Solidity में, msg.sender एक ग्लोबल वेरिएबल है जो उस एड्रेस को दर्शाता है जिसने स्मार्ट कॉन्ट्रैक्ट पर किसी फ़ंक्शन कॉल को कॉल किया या शुरू किया। ग्लोबल वेरिएबल tx.origin वह वॉलेट है जिसने ट्रांजेक्शन को साइन (sign) किया है।
Solana में, msg.sender के समकक्ष (equivalent) कुछ भी नहीं है।
tx.origin के समकक्ष एक चीज़ मौजूद है, लेकिन आपको यह पता होना चाहिए कि Solana ट्रांजेक्शन्स में एक से अधिक साइनर्स (signers) हो सकते हैं, इसलिए हम इसे “कई tx.origins” होने के रूप में सोच सकते हैं।
Solana में “tx.origin” एड्रेस प्राप्त करने के लिए, आपको फ़ंक्शन कॉन्टेक्स्ट में Signer अकाउंट को जोड़कर इसे सेट करना होगा और फ़ंक्शन को कॉल करते समय कॉलर (caller) के अकाउंट को इसमें पास करना होगा।
आइए एक उदाहरण देखें कि हम Solana में ट्रांजेक्शन साइनर के एड्रेस को कैसे एक्सेस कर सकते हैं:
use anchor_lang::prelude::*;
declare_id!("Hf96fZsgq9R6Y1AHfyGbhi9EAmaQw2oks8NqakS6XVt1");
#[program]
pub mod day14 {
use super::*;
pub fn initialize(ctx: Context<Initialize>) -> Result<()> {
let the_signer1: &mut Signer = &mut ctx.accounts.signer1;
// Function logic....
msg!("The signer1: {:?}", *the_signer1.key);
Ok(())
}
}
#[derive(Accounts)]
pub struct Initialize<'info> {
#[account(mut)]
pub signer1: Signer<'info>,
}
ऊपर दिए गए कोड स्निपेट से, Signer<'info> का उपयोग यह वेरिफाई (verify) करने के लिए किया जाता है कि Initialize<'info> अकाउंट स्ट्रक्ट (struct) में signer1 अकाउंट ने ट्रांजेक्शन को साइन किया है।
initialize फ़ंक्शन में, signer1 अकाउंट को कॉन्टेक्स्ट से म्यूटैबली (mutably) रेफरेंस किया जाता है और the_signer1 वेरिएबल को असाइन किया जाता है।
फिर अंत में, हमने msg! मैक्रो का उपयोग करके और *the_signer1.key को पास करके signer1 की pubkey (एड्रेस) को लॉग किया, जो the_signer1 द्वारा पॉइंट की जा रही वास्तविक वैल्यू पर key फ़ील्ड या मेथड को डीरेफरेंस (dereferences) और एक्सेस करता है।
इसके बाद ऊपर दिए गए प्रोग्राम के लिए एक टेस्ट लिखना है:
describe("Day14", () => {
// Configure the client to use the local cluster.
anchor.setProvider(anchor.AnchorProvider.env());
const program = anchor.workspace.Day14 as Program<Day14>;
it("Is signed by a single signer", async () => {
// Add your test here.
const tx = await program.methods.initialize().accounts({
signer1: program.provider.publicKey
}).rpc();
console.log("The signer1: ", program.provider.publicKey.toBase58());
});
});
टेस्ट में, हमने अपने वॉलेट अकाउंट को signer1 अकाउंट में साइनर के रूप में पास किया, फिर initialize फ़ंक्शन को कॉल किया। इसके बाद, हमने अपने प्रोग्राम में मौजूद अकाउंट के साथ इसकी कंसिस्टेंसी (consistency) वेरिफाई करने के लिए कंसोल पर वॉलेट अकाउंट को लॉग किया।
Exercise: टेस्ट चलाने के बाद आपने shell_1 (कमांड टर्मिनल) और shell_3 (लॉग टर्मिनल) के आउटपुट में क्या नोटिस किया?
Multiple signers
Solana में, हमारे पास एक ट्रांजेक्शन को साइन करने के लिए एक से अधिक साइनर (signer) भी हो सकते हैं, आप इसे कई सिग्नचेर्स (signatures) का बैच बनाकर एक ही ट्रांजेक्शन में भेजने के रूप में सोच सकते हैं। इसका एक यूज़-केस एक ही ट्रांजेक्शन में multisig ट्रांजेक्शन करना है।
ऐसा करने के लिए, हम बस अपने प्रोग्राम में अकाउंट स्ट्रक्ट में और अधिक Signer स्ट्रक्ट्स जोड़ते हैं, फिर यह सुनिश्चित करते हैं कि फ़ंक्शन को कॉल करते समय आवश्यक अकाउंट्स पास किए जाएं:
use anchor_lang::prelude::*;
declare_id!("Hf96fZsgq9R6Y1AHfyGbhi9EAmaQw2oks8NqakS6XVt1");
#[program]
pub mod day14 {
use super::*;
pub fn initialize(ctx: Context<Initialize>) -> Result<()> {
let the_signer1: &mut Signer = &mut ctx.accounts.signer1;
let the_signer2: &mut Signer = &mut ctx.accounts.signer2;
msg!("The signer1: {:?}", *the_signer1.key);
msg!("The signer2: {:?}", *the_signer2.key);
Ok(())
}
}
#[derive(Accounts)]
pub struct Initialize<'info> {
pub signer1: Signer<'info>,
pub signer2: Signer<'info>,
}
ऊपर दिया गया उदाहरण कुछ हद तक सिंगल साइनर उदाहरण के समान ही है, जिसमें एक ध्यान देने योग्य अंतर है। इस मामले में, हमने Initialize स्ट्रक्ट में एक और Signer अकाउंट (signer2) जोड़ा है और initialize फ़ंक्शन में दोनों साइनर्स की pubkey को लॉग भी किया है।
सिंगल साइनर की तुलना में, एक से अधिक साइनर्स के साथ initialize फ़ंक्शन को कॉल करना अलग होता है। नीचे दिया गया टेस्ट दिखाता है कि एक से अधिक साइनर्स के साथ किसी फ़ंक्शन को कैसे इनवोक (invoke) किया जाता है:
describe("Day14", () => {
// Configure the client to use the local cluster.
anchor.setProvider(anchor.AnchorProvider.env());
const program = anchor.workspace.Day14 as Program<Day14>;
// generate a signer to call our function
let myKeypair = anchor.web3.Keypair.generate();
it("Is signed by multiple signers", async () => {
// Add your test here.
const tx = await program.methods
.initialize()
.accounts({
signer1: program.provider.publicKey,
signer2: myKeypair.publicKey,
})
.signers([myKeypair])
.rpc();
console.log("The signer1: ", program.provider.publicKey.toBase58());
console.log("The signer2: ", myKeypair.publicKey.toBase58());
});
});
तो ऊपर दिए गए टेस्ट में क्या अलग है? पहला signers() मेथड है, जो ट्रांजेक्शन को साइन करने वाले साइनर्स के एक एरे (array) को आर्ग्यूमेंट के रूप में लेता है। लेकिन हमारे पास एरे में दो के बजाय केवल एक ही साइनर है। Anchor स्वचालित रूप से प्रोवाइडर (provider) में मौजूद वॉलेट अकाउंट को साइनर के रूप में पास कर देता है, इसलिए हमें इसे फिर से साइनर्स एरे में जोड़ने की आवश्यकता नहीं होती है।
Generating random addresses to test with
दूसरा बदलाव myKeypair वेरिएबल है, जो anchor.web3 मॉड्यूल द्वारा रैंडमली जनरेट किए गए Keypair (किसी अकाउंट को एक्सेस करने के लिए एक publickey और संबंधित private key) को स्टोर करता है। टेस्ट में, हमने Keypair की (जो myKeypair वेरिएबल में स्टोर है) publickey को signer2 अकाउंट को असाइन किया, इसीलिए इसे .signers([myKeypair]) मेथड में आर्ग्यूमेंट के रूप में पास किया गया है।
टेस्ट को कई बार चलाएँ, आप देखेंगे कि signer1 की pubkey नहीं बदलती है लेकिन signer2 की pubkey बदलती रहती है। ऐसा इसलिए है क्योंकि (टेस्ट में) signer1 अकाउंट को असाइन किया गया वॉलेट अकाउंट प्रोवाइडर से है, जो आपकी लोकल मशीन में मौजूद Solana वॉलेट अकाउंट भी है और signer2 को असाइन किया गया अकाउंट हर बार anchor test —skip-local-validator चलाने पर रैंडमली जनरेट होता है।
Exercise: एक और फ़ंक्शन बनाएँ (आप इसे कुछ भी नाम दे सकते हैं) जिसके लिए तीन साइनर्स (प्रोवाइडर का वॉलेट अकाउंट और दो रैंडमली जनरेट किए गए अकाउंट्स) की आवश्यकता हो और इसके लिए एक टेस्ट लिखें।
onlyOwner
यह Solidity में उपयोग किया जाने वाला एक सामान्य पैटर्न है जो किसी फ़ंक्शन के एक्सेस को केवल कॉन्ट्रैक्ट के मालिक (owner) तक ही सीमित करता है। Anchor के #[access_control] एट्रिब्यूट (attribute) का उपयोग करके, हम ओनली ओनर (only owner) पैटर्न को लागू कर सकते हैं, यानी अपने Solana प्रोग्राम में किसी फ़ंक्शन के एक्सेस को एक PubKey (मालिक के एड्रेस) तक सीमित कर सकते हैं।
यहाँ एक उदाहरण दिया गया है कि Solana में “onlyOwner” फ़ंक्शनैलिटी को कैसे लागू किया जाए:
use anchor_lang::prelude::*;
declare_id!("Hf96fZsgq9R6Y1AHfyGbhi9EAmaQw2oks8NqakS6XVt1");
// NOTE: Replace with your wallet's public key
const OWNER: &str = "8os8PKYmeVjU1mmwHZZNTEv5hpBXi5VvEKGzykduZAik";
#[program]
pub mod day14 {
use super::*;
#[access_control(check(&ctx))]
pub fn initialize(ctx: Context<OnlyOwner>) -> Result<()> {
// Function logic...
msg!("Holla, I'm the owner.");
Ok(())
}
}
fn check(ctx: &Context<OnlyOwner>) -> Result<()> {
// Check if signer === owner
require_keys_eq!(
ctx.accounts.signer_account.key(),
OWNER.parse::<Pubkey>().unwrap(),
OnlyOwnerError::NotOwner
);
Ok(())
}
#[derive(Accounts)]
pub struct OnlyOwner<'info> {
signer_account: Signer<'info>,
}
// An enum for custom error codes
#[error_code]
pub enum OnlyOwnerError {
#[msg("Only owner can call this function!")]
NotOwner,
}
ऊपर दिए गए कोड के संदर्भ में, OWNER वेरिएबल मेरे लोकल Solana वॉलेट से जुड़ी pubkey (एड्रेस) को स्टोर करता है। टेस्टिंग से पहले OWNER वेरिएबल को अपने वॉलेट की pubkey से बदलना सुनिश्चित करें। आप solana address कमांड चलाकर आसानी से अपनी pubkey प्राप्त कर सकते हैं।
#[access_control] एट्रिब्यूट मुख्य इंस्ट्रक्शन (instruction) को चलाने से पहले दिए गए एक्सेस कंट्रोल मेथड को एक्ज़ीक्यूट (execute) करता है। जब initialize फ़ंक्शन को कॉल किया जाता है, तो initialize फ़ंक्शन से पहले एक्सेस कंट्रोल मेथड (check) एक्ज़ीक्यूट होता है। check मेथड एक रेफरेंस्ड कॉन्टेक्स्ट को आर्ग्यूमेंट के रूप में स्वीकार करता है, फिर यह चेक करता है कि ट्रांजेक्शन का साइनर OWNER वेरिएबल की वैल्यू के बराबर है या नहीं। require_keys_eq! मैक्रो यह सुनिश्चित करता है कि दो pubkeys की वैल्यूज़ बराबर हैं, यदि यह सही (true) है, तो यह initialize फ़ंक्शन को एक्ज़ीक्यूट करता है, अन्यथा, यह NotOwner कस्टम एरर के साथ रिवर्ट (revert) कर देता है।
Testing the onlyOwner functionality — happy case
नीचे दिए गए टेस्ट में, हम initialize फ़ंक्शन को कॉल कर रहे हैं और मालिक (owner) के keypair का उपयोग करके ट्रांजेक्शन को साइन कर रहे हैं:
import * as anchor from "@coral-xyz/anchor";
import { Program } from "@coral-xyz/anchor";
import { Day14 } from "../target/types/day14";
describe("day14", () => {
// Configure the client to use the local cluster.
anchor.setProvider(anchor.AnchorProvider.env());
const program = anchor.workspace.Day14 as Program<Day14>;
it("Is called by the owner", async () => {
// Add your test here.
const tx = await program.methods
.initialize()
.accounts({
signerAccount: program.provider.publicKey,
})
.rpc();
console.log("Transaction hash:", tx);
});
});
हमने initialize फ़ंक्शन को कॉल किया और प्रोवाइडर में मौजूद वॉलेट अकाउंट (लोकल Solana वॉलेट अकाउंट) को signerAccount में पास किया, जिसमें Signer<'info> स्ट्रक्ट है, ताकि यह वैलिडेट (validate) किया जा सके कि वास्तव में वॉलेट अकाउंट ने ट्रांजेक्शन को साइन किया है। यह भी याद रखें कि Anchor गुप्त रूप से प्रोवाइडर में मौजूद वॉलेट अकाउंट का उपयोग करके किसी भी ट्रांजेक्शन को साइन करता है।
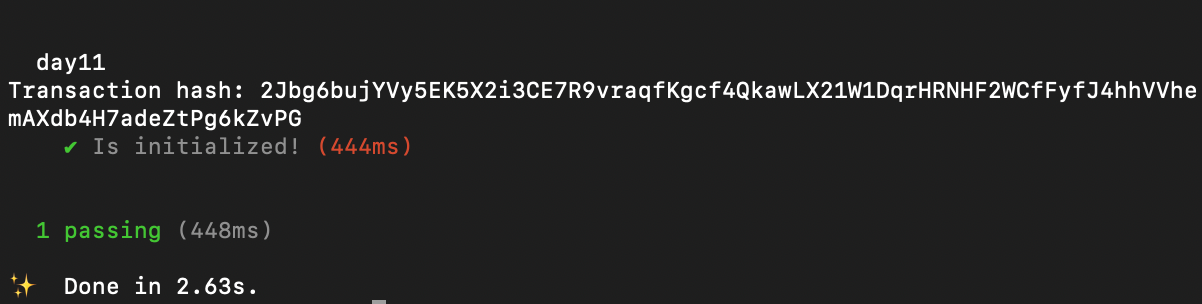
टेस्ट anchor test --skip-local-validator चलाएँ, अगर सब कुछ सही ढंग से किया गया था, तो टेस्ट पास हो जाना चाहिए:
Testing if the signer is not the owner — attack case
किसी अलग keypair का उपयोग करना जो कि मालिक (owner) नहीं है, initialize फ़ंक्शन को कॉल करने और ट्रांजेक्शन को साइन करने पर एक एरर (error) थ्रो (throw) करेगा क्योंकि फ़ंक्शन कॉल केवल मालिक तक ही सीमित है:
describe("day14", () => {
// Configure the client to use the local cluster.
anchor.setProvider(anchor.AnchorProvider.env());
const program = anchor.workspace.Day14 as Program<Day14>;
let Keypair = anchor.web3.Keypair.generate();
it("Is NOT called by the owner", async () => {
// Add your test here.
const tx = await program.methods
.initialize()
.accounts({
signerAccount: Keypair.publicKey,
})
.signers([Keypair])
.rpc();
console.log("Transaction hash:", tx);
});
});
यहाँ हमने एक रैंडम keypair जनरेट किया और इसका उपयोग ट्रांजेक्शन को साइन करने के लिए किया। आइए फिर से टेस्ट चलाएँ:

जैसी कि उम्मीद थी, हमें एक एरर मिला, क्योंकि साइनर की pubkey मालिक की pubkey के बराबर नहीं है।
Modify the owner
किसी प्रोग्राम में मालिक को बदलने के लिए, मालिक को असाइन की गई pubkey को ऑन-चेन (on-chain) स्टोर करने की आवश्यकता होती है। हालाँकि, Solana में “स्टोरेज” के बारे में चर्चाएँ भविष्य के एक ट्यूटोरियल में कवर की जाएंगी।
मालिक केवल बाइटकोड (bytecode) को फिर से डिप्लॉय (redeploy) कर सकता है।
Exercise: ऊपर दिए गए प्रोग्राम की तरह किसी प्रोग्राम को अपग्रेड करें ताकि उसका एक नया मालिक (owner) बन सके।
Learn more with RareSkills
यह ट्यूटोरियल हमारे Solana course का चैप्टर 14 है।
मूल रूप से 21 फरवरी, 2024 को प्रकाशित