In the previous chapter, we learned the theoretical side of formal verification, including what it is and how it works. In this module, we’ll move beyond theory and learn the following:
- How to set up a project to work with Certora Prover.
- How to obtain and use a Certora access key.
- How to perform formal verification using the Certora Prover.
Let’s start by setting up the project environment for Certora Prover.
Installing the Essential Prerequisites Tools
Before setting up the project directory, make sure that your local machine has the following prerequisites installed:
You can check whether your machine has both of these installed by simply running python3 --version and java --version command in your terminal.
💡 For Windows users, we highly recommend using Windows Subsystem for Linux (WSL) for a better experience.
Setting Up Our Project Directory
Once prerequisites are installed, create an empty directory named certora-counter, navigate into it, and follow the instructions below to set up your project directory correctly.
- In your local machine, install virtualenv by running the command below. This tool will allow us to create a Python virtual environment, which is essential for managing dependencies within your project directory.
pip3 install virtualenv
- Once we have virtualenv installed, create a Python virtual environment for our project by running the command below in your terminal.
virtualenv certora-env
- Next, activate the Python virtual environment you created by running the command below in your terminal.
source certora-env/bin/activate
- Next, run the command below in your terminal to install the Prover.
pip3 install certora-cli
- Next, Install solc-select in your virtual environment using the command below. This will allow us to conveniently change the version of the Solidity compiler we are using.
pip3 install solc-select
Adding Certora Personal Access Key
To run the Prover, you need to set up an access key as a system variable. To obtain your personal access, register on the Certora website. Once you register, you will receive an email from Certora containing the access key and an initial password for your Certora account.
To add the access key as a system variable, follow the following instructions:
For Linux Users
- Open a terminal and make sure you’re in the project directory.
- Create and open the .profile file using the
nano .profilecommand. - To add the access key as an environment variable, add the following text in it.
#certora access key
export CERTORAKEY=<your-certora-access-key>
- To save the changes, press
CTRL + Oand then pressEnter. - To exit , press
CTRL + X. - To load the recent changes we made in .profile file , run the command below in your terminal.
source .profile
For Mac Users Using zsh
- Open a terminal and make sure you’re in the
certora-counterdirectory. - Create a file with the name .zshenv by running
nano .zshenvcommand in your terminal. - Open the
.zshenvfile in your favourite text editor. - To add the access key as an environment variable, add the following text in it.
#certora access key
export CERTORAKEY=<your-certora-access-key>
- To save the changes, press
CTRL + Oand then pressEnter. - To exit, press
CTRL + X. - To apply the environment variable we just created, run the command below in your terminal.
source .zshenv
Please note that whenever you open the new terminal, make sure to run source .zshenv or source .profile command to load environment variables; Otherwise, you will get the error message The environment variable CERTORAKEY does not contain a Certora key error from the Prover
Adding a Contract In the Project Directory
In the certora-counter directory, add a subfolder called contracts . Once done, create a file called Counter.sol in it, and add the contract below.
//SPDX-License-Identifier: MIT
pragma solidity 0.8.25;
contract Counter {
uint256 public count;
function increment() external {
count++;
}
}
The above contract is a simple smart contract that has only one public state variable called count, whose value can be incremented by the external function increment().
Setting Up Certora Verification Language LSP
If you use Microsoft’s VS Code editor or a fork of it, we recommend installing the Certora Verification Language LSP to enhance your development experience with syntax checking, syntax highlighting, and code completion by following the instructions below:
- Open VS Code on your machine.
- Open the Extensions Marketplace by clicking the Extensions icon in the sidebar.
- Search for “Certora Verification Language LSP” in the Extensions search bar.
- Click “Install” on the extension published by Certora.
- Restart VS Code to fully activate the extension and apply all changes.
Writing Your First Specification
In the certora-counter directory, add a subfolder named specs. Once done, create a file named counter.spec in it and add the code below.
methods {
function count() external returns(uint256) envfree;
function increment() external envfree;
}
rule checkCounter() {
// Pre-Call State
uint256 precallCount = count();
// Method Call
increment();
// Post-call state
uint256 postcallCount = count();
// Assert that the post-call count is exactly one more than the pre-call count
assert postcallCount == precallCount + 1;
}
For now, do not worry about the code. We will break it down and explain each part in detail in the next chapter.
Adding the Solidity Compiler
Before we run the Prover, we need to add the correct Solidity compiler. To add and use the correct Solidity compiler version for our project, run the below two commands in your terminal.
solc-select install 0.8.25
solc-select use 0.8.25
Running the Verification
Once we have a contract and a specification, we can submit them to the Certora prover for the verification process by running the certoraRun command. This command requires the path to the Solidity contract and the associated .spec file, as shown below, to execute successfully.
certoraRun contractFilePath:contractName --verify contractName:specFilePath
To verify our specification, make sure you are in the certora-counter directory, and then run the command below in your terminal.
certoraRun contracts/Counter.sol:Counter --verify Counter:specs/counter.spec
Once you run the above command, you should see an output like the one below.

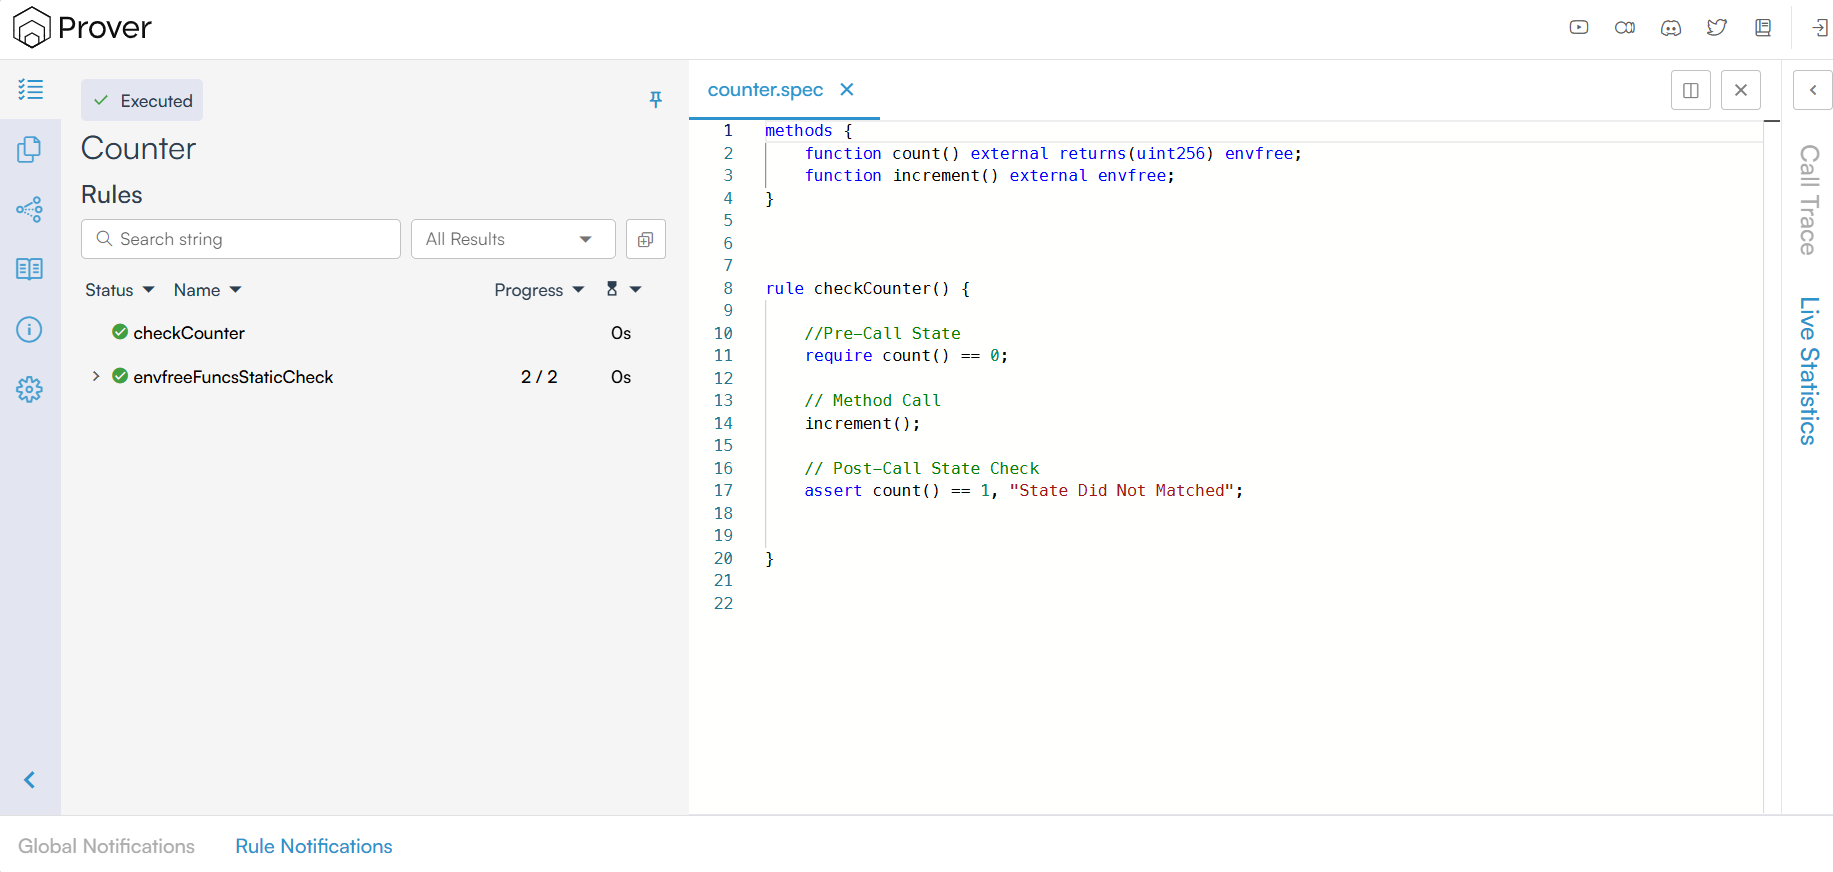
To view the verification result, open the verification link printed in your terminal. The result should look similar to the image below.
However, for large a project, using the certoraRuncommand with many arguments directly in the terminal can become cumbersome. Therefore, it is recommended to use a configuration file.
Using a Config File to Streamline the certoraRun Command
In Certora, a config file is a simple JSON5 file written with a .conf extension that requires at least two key parameters along with other configuration options:
- files: A path to our contract, along with the contract name.
- verify: A path to the specification file.
To use the config file, create a subfolder named confs in your project directory. Then, create a file named counter.conf inside the confs folder and add the content below.
{
"files": [
"contracts/Counter.sol:Counter"
],
"verify": "Counter:specs/counter.spec",
}
Once we have the configuration file placed correctly, we can perform the verification process by simply running the certoraRun command and referencing the path to the configuration file, as shown below:
certoraRun confs/counter.conf
If the command executes successfully, you should see an output like the following, which contains a link to the verification result.

Open the verification link printed in your terminal to view the result of the verification. The result should look similar to the image below.
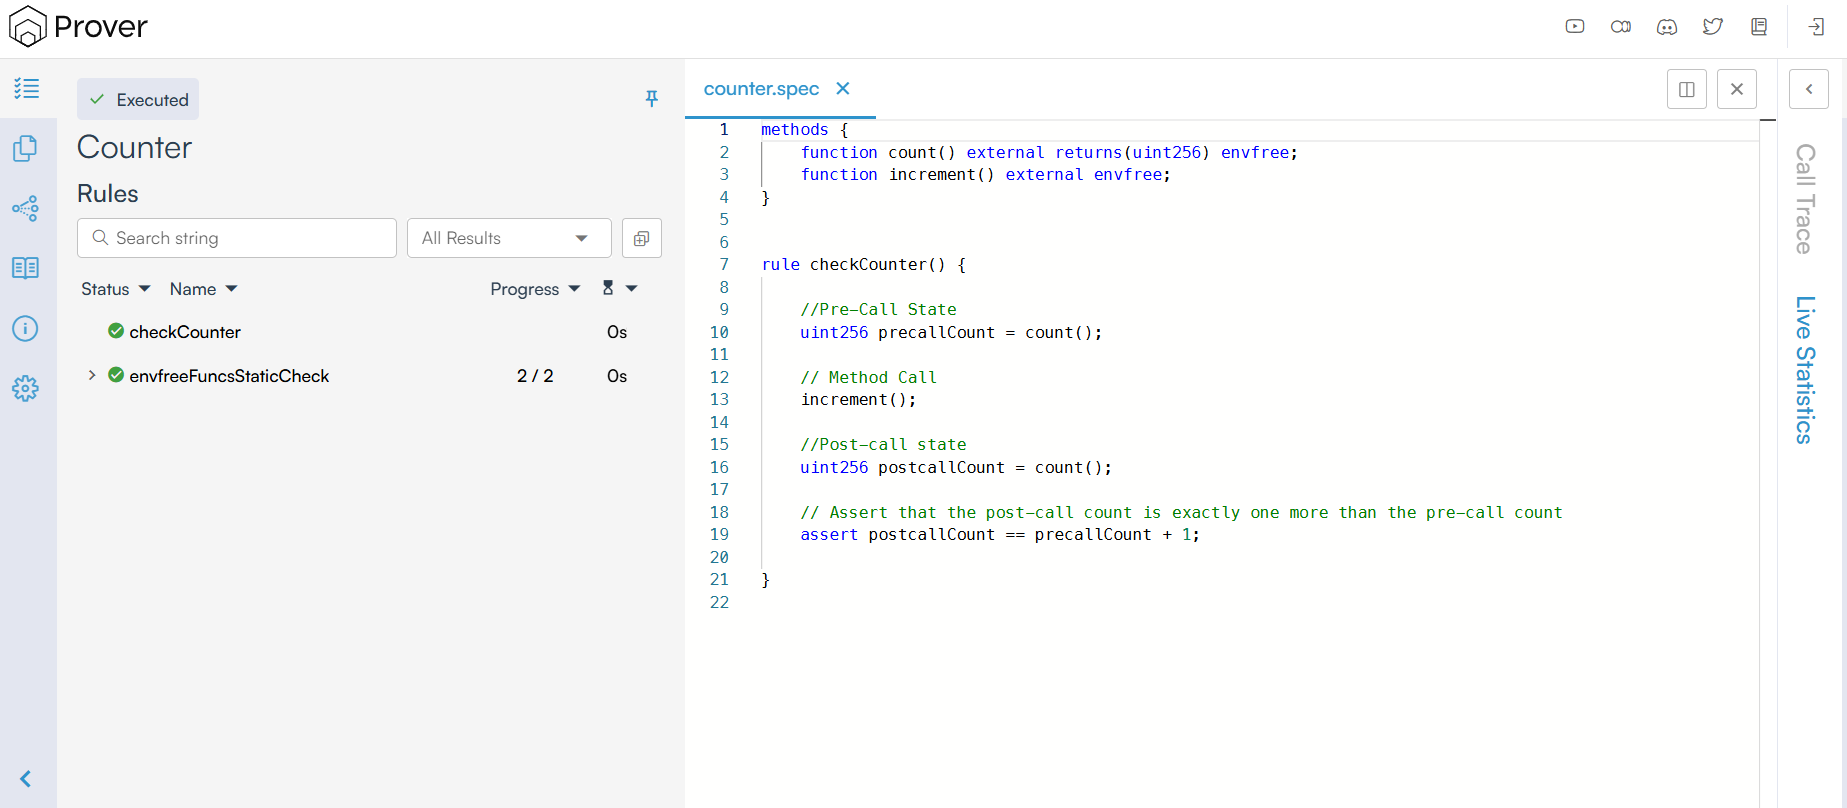
For now, just understand that the green check (✅) indicates that the Prover has successfully verified the conditions specified in the spec file (counter.spec). This means that the contract has behaved as expected based on the assertions and logic outlined in the spec.
Conclusion
Congratulations! You have successfully set up your development environment and executed your first formal verification run. However, up until now, we have treated the specification file (.spec) as a ‘black box’. We ran it, but didn’t look inside. In the next chapter, we will open that box and dissect the anatomy of a Certora specification. We will break down its two essential components, Rule Blocks and Methods Blocks, and learn how to define the pre-conditions, actions, and post-conditions necessary to verify your first smart contract.
This article is part of a series on formal verification using the Certora Prover