The goal of this tutorial is to set up your development environment and learn how to deploy your first ICP smart contract on your local network.
Canister Smart Contracts
ICP refers to their smart contracts as canisters. Canisters store both logic and data, on-chain.

The Internet Computer Protocol is WASM based — It utilizes a customized WebAssembly Virtual Machine (WASM VM) to run their canister smart contracts.
Canisters can be written in any language that compiles to WASM or has an interpreter that targets WASM bytecode. However, official SDKs are currently available only for Rust, C++, Python, TypeScript, and Motoko (ICP’s native language). For this course, we will use Rust exclusively.
To begin, we’ll first install Rust and the developer environment, dfx, next.
Rust Installation
Follow the official Rust installation guide. After you’ve installed Rust, verify the installation by running:
rustc --version
cargo --version

Install the WASM Build Target
After you have installed Rust in your local machine, install the WebAssembly compilation target by running the following command:
rustup target add wasm32-unknown-unknown
Canisters written in Rust needs to be compiled into WebAssembly bytecode. The command above installs the wasm32-unknown-unknown target so Rust can compile your Rust canister code into a .wasm binary/bytecode.
Setup The Developer Environment (dfx)
dfx is a command-line tool (CLI) that helps you build, deploy, and test canisters.
Windows
dfx is not natively supported on Windows. You will have to install Linux on Windows ****and install dfx inside the Linux environment.
Mac or Linux
Install dfxvm, the version manager for dfx, with following command:
sh -ci "$(curl -fsSL https://internetcomputer.org/install.sh)"
Note: If you’re on Apple Silicon, install Rosetta beforehand with the command softwareupdate --install-rosetta. Rosetta allows Apple Silicon Macs to run software built for intel-based Macs.
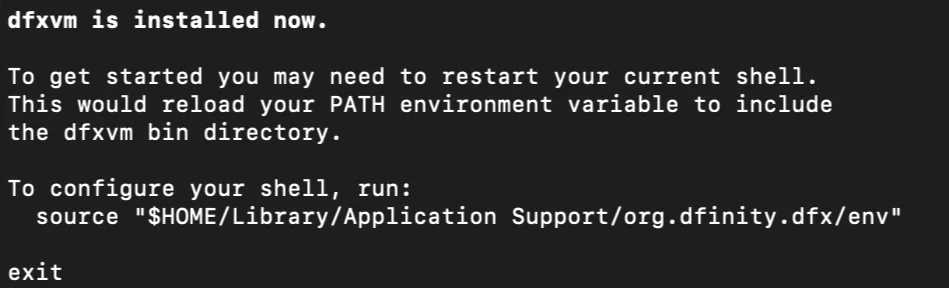
Choose the default configuration for dfx.
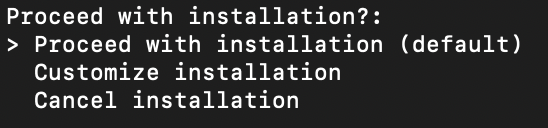
Upon success, you should be presented with a output similar to the image below.
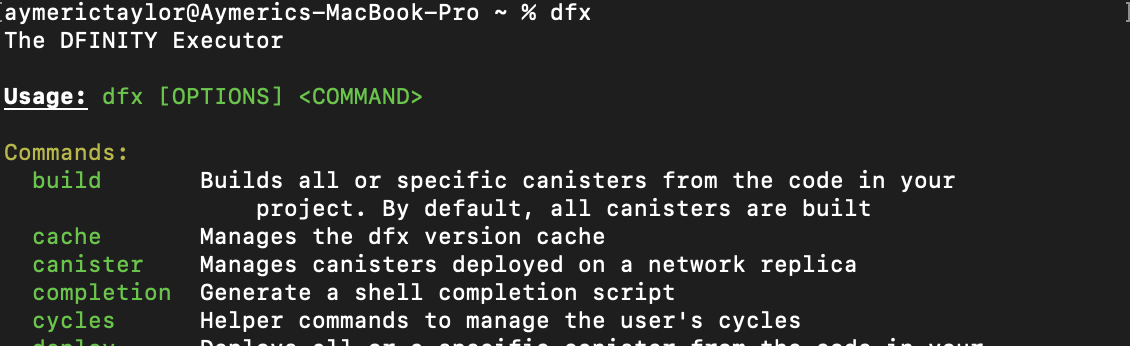
Restart your terminal and enter dfx:
dfx
The following output confirms that dfx is installed on your machine.
With dfx installed, we’ll begin with creating a hello_world canister and deploy it on the local testnet.
Hello World
Run the command below to create a new hello_world Rust canister.
dfx new hello_world --type rust --no-frontend
- This command creates a directory called
hello_world, which contains the default starter files you need to begin developing your canister. - The
--typeflag specifies the programming language for your canister. In our case we are using Rust. - The
—no-frontendflag skips bootstrapping a default frontend website.
Navigate to the hello_world project directory and open it in your code editor of choice.
cd hello_world
When you create a new Rust canister project with dfx, the main file where we write our canister code is at lib.rs. Navigate to the lib.rs file.
hello_world/
├──── src/
│ └──── hello_world_backend/
│ └──── src/
│ └── **lib.rs**
lib.rs will contain the following boilerplate code:
#[ic_cdk::query]
fn greet(name: String) -> String {
format!("Hello, {}!", name)
}
The Rust code above is a public function greet(), which takes a string as its argument (name) and returns “Hello” concatenated with name.
A detailed explanation of the code above and its underlying concepts is provided in the next article. For now, we’ll learn how to deploy a canister to the local testnet and call the its function.
Deploy a Canister To The Local IC instance
To deploy the hello_world canister locally, we’ll need to start a local IC instance (localnet).
Run an IC instance on your local machine
In a new terminal, input the command below.
dfx start
This will start your local IC instance and produce output similar to the image below:

By default, the local IC instance runs on port 4943: http://127.0.0.1:4943.
Once we have a local IC instance running, we can deploy our hello_world canister.
Note: To stop your local IC instance, use the command Ctrl-C, dfx killall or dfx stop.
Deploy The hello_world Canister
To deploy the hello_world canister on the local IC instance, run the command below from the hello_world project directory:
dfx deploy
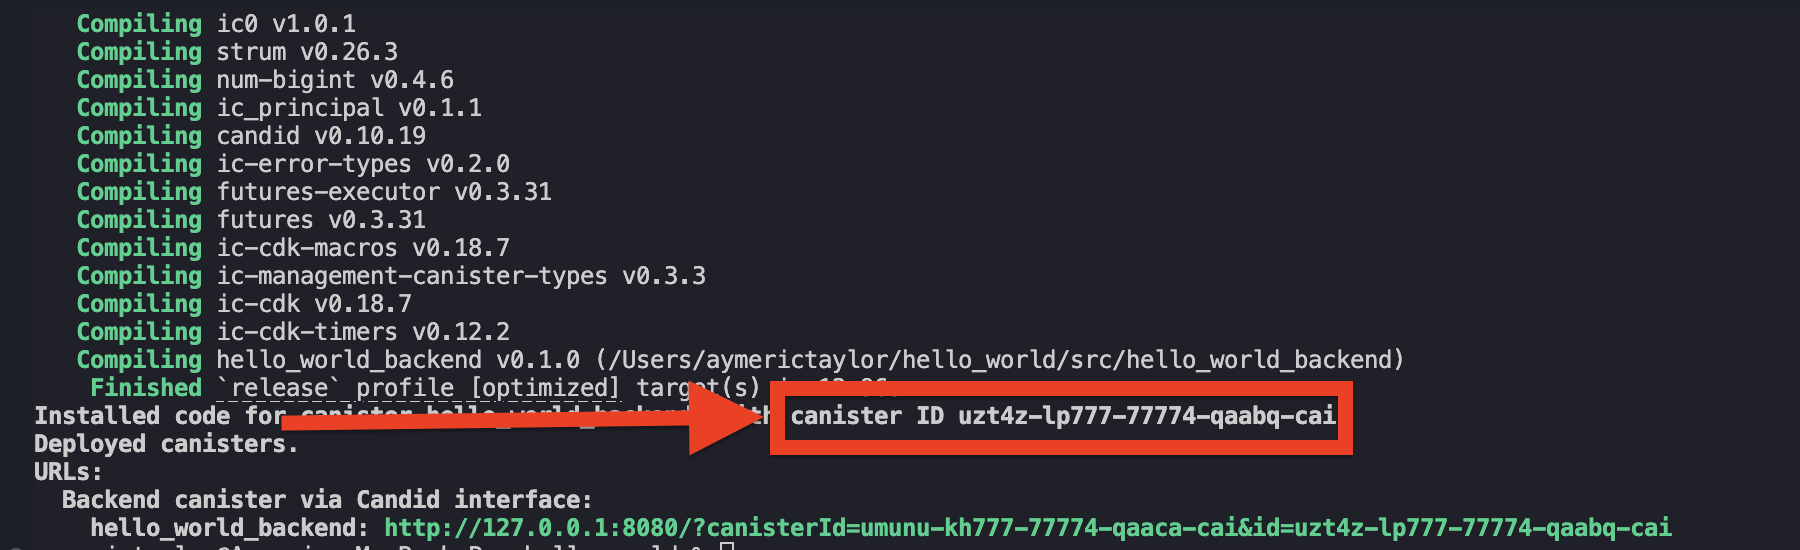
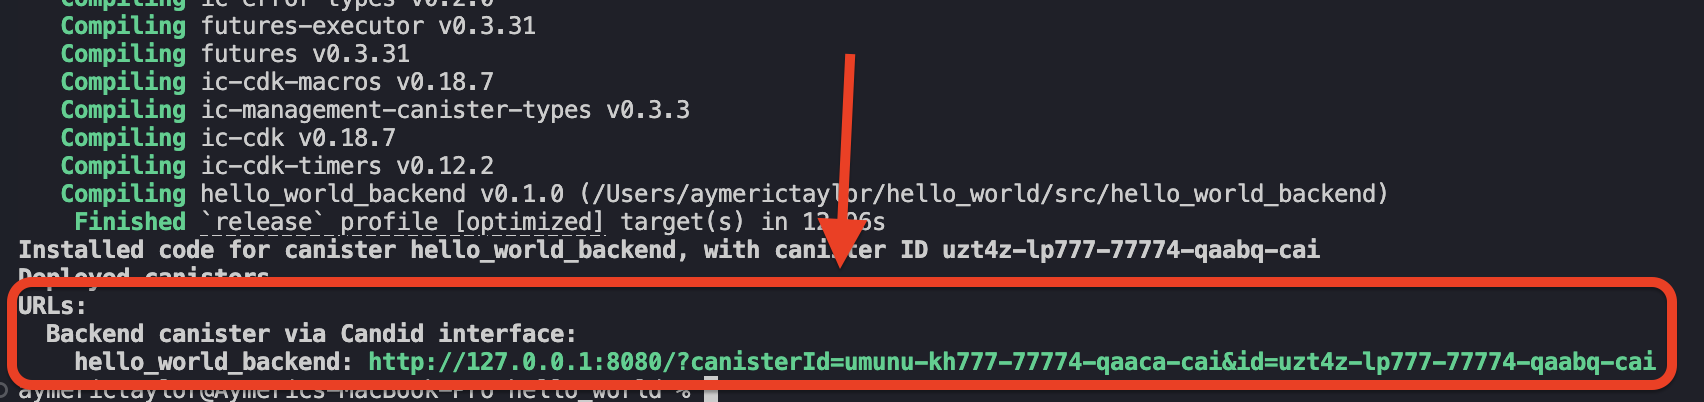
A similar output to the one below indicates a successful deployment.
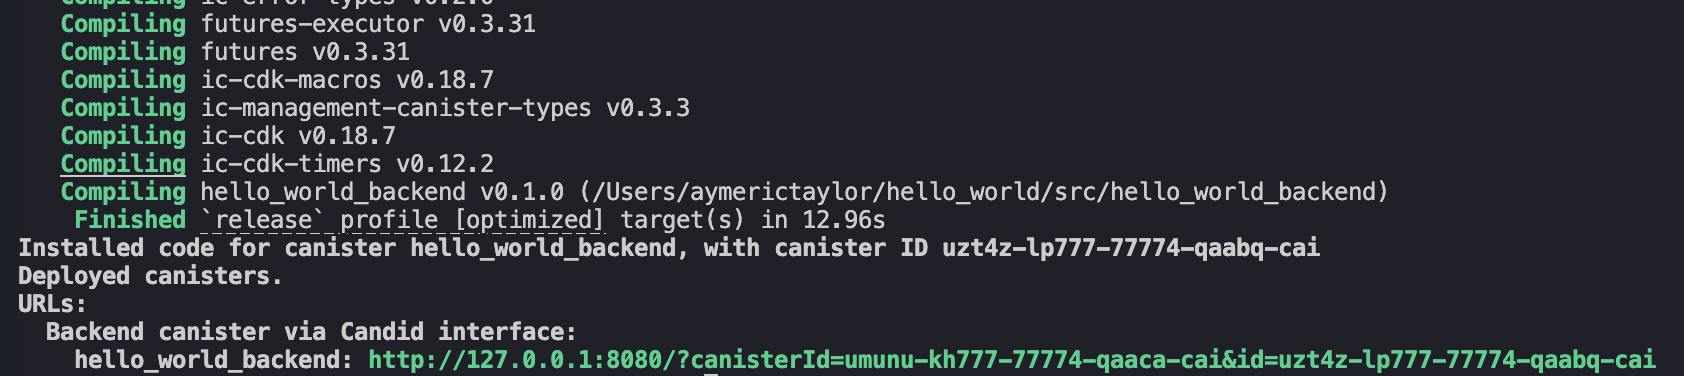
The successful output of dfx deploy contains the address of your canister, and a link to a canister interface frontend where we can interact with its functions:
The Canister ID (smart contract address)
hello_world’s smart contract address or Canister ID, can be found at the successful terminal output, highlighted by the red box:
The next section looks at how we can interact with the deployed hello_world canister.
Methods To Interact With Your Canister
We’ll explore two ways in which we can call hello_world’s greet() function, and pass the name string parameter, which are through the:
- Candid UI, and
dfxCLI
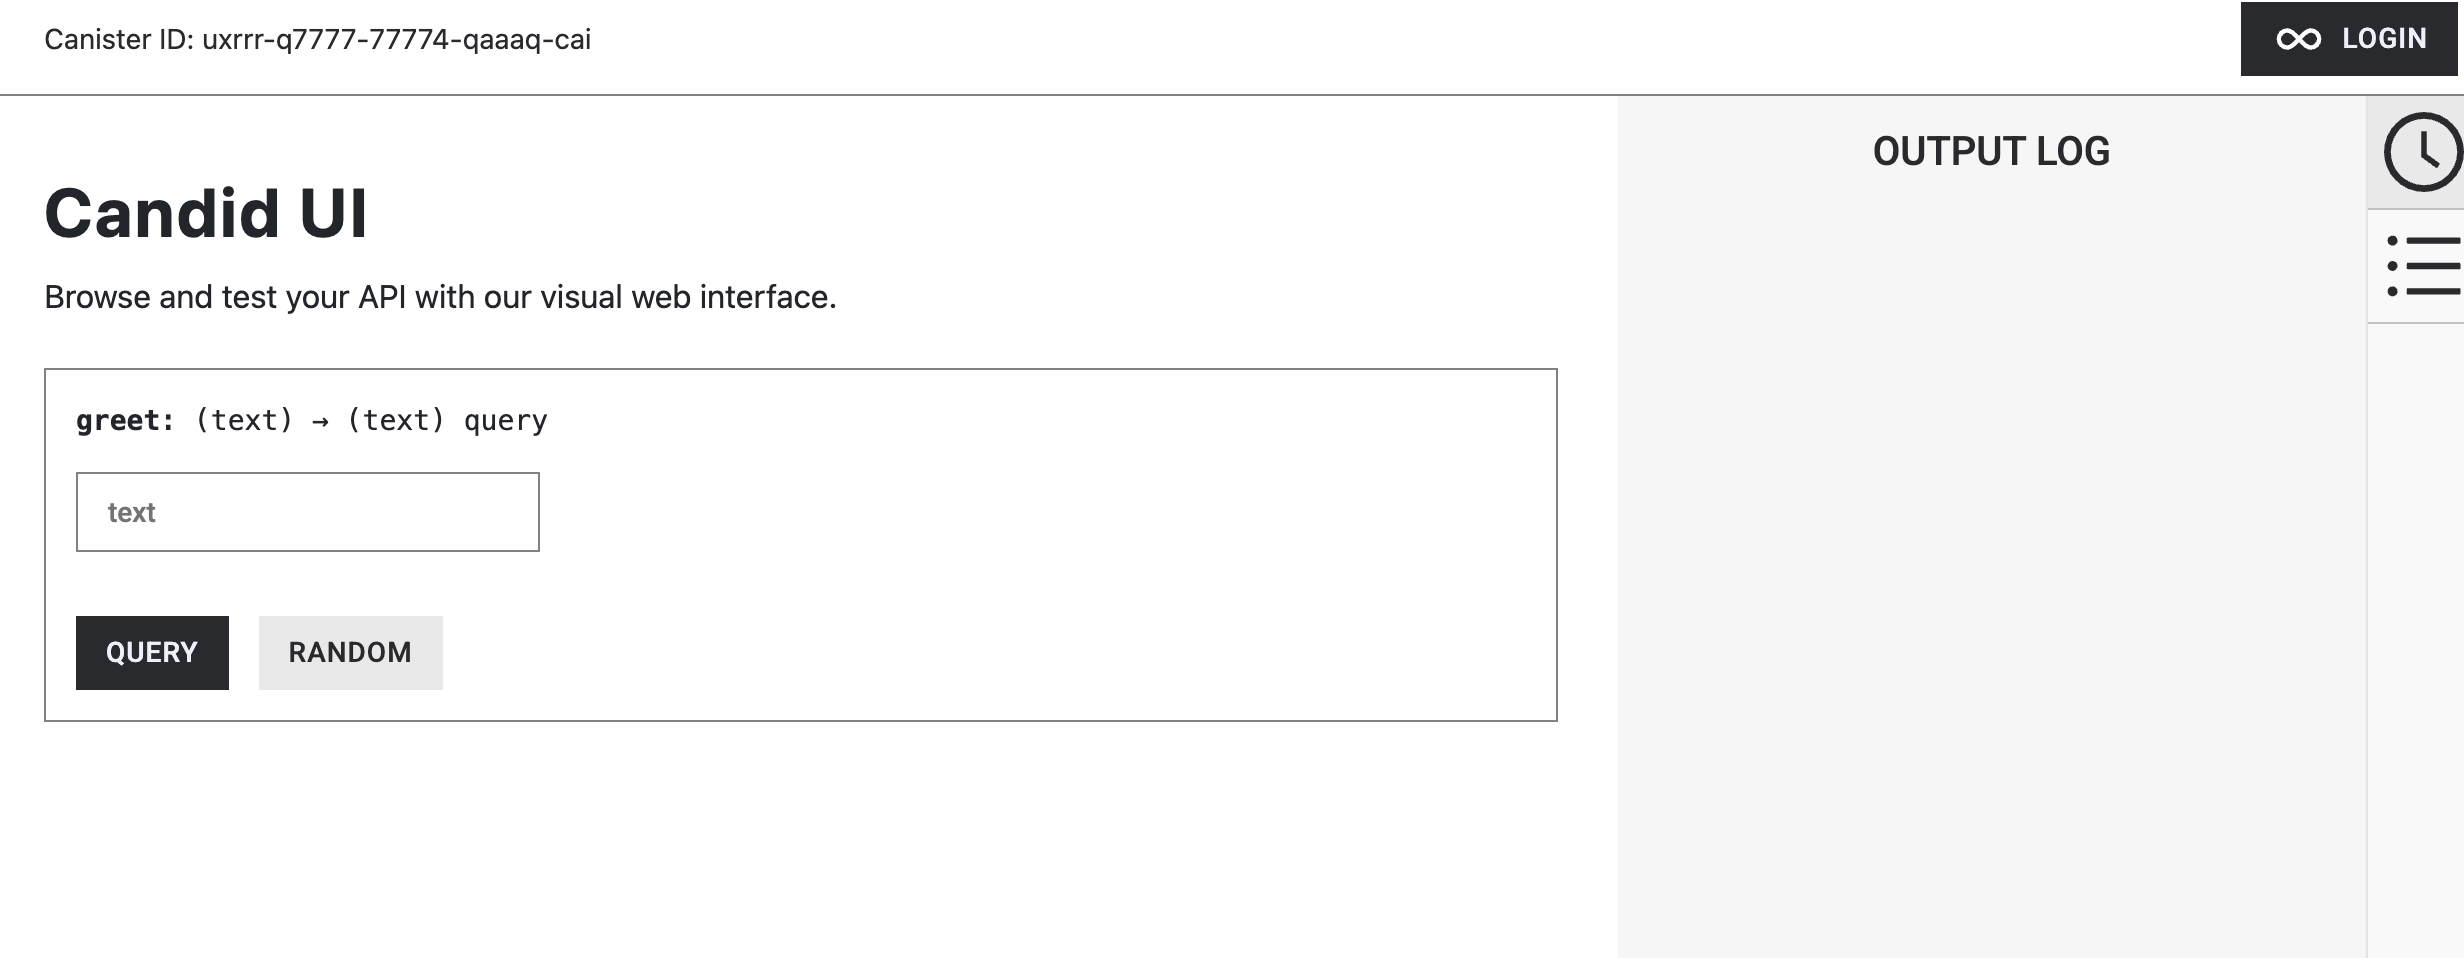
The Candid UI
The Candid UI is an automatically generated and deployed frontend web interface to interact with your canister functions. It looks like this:
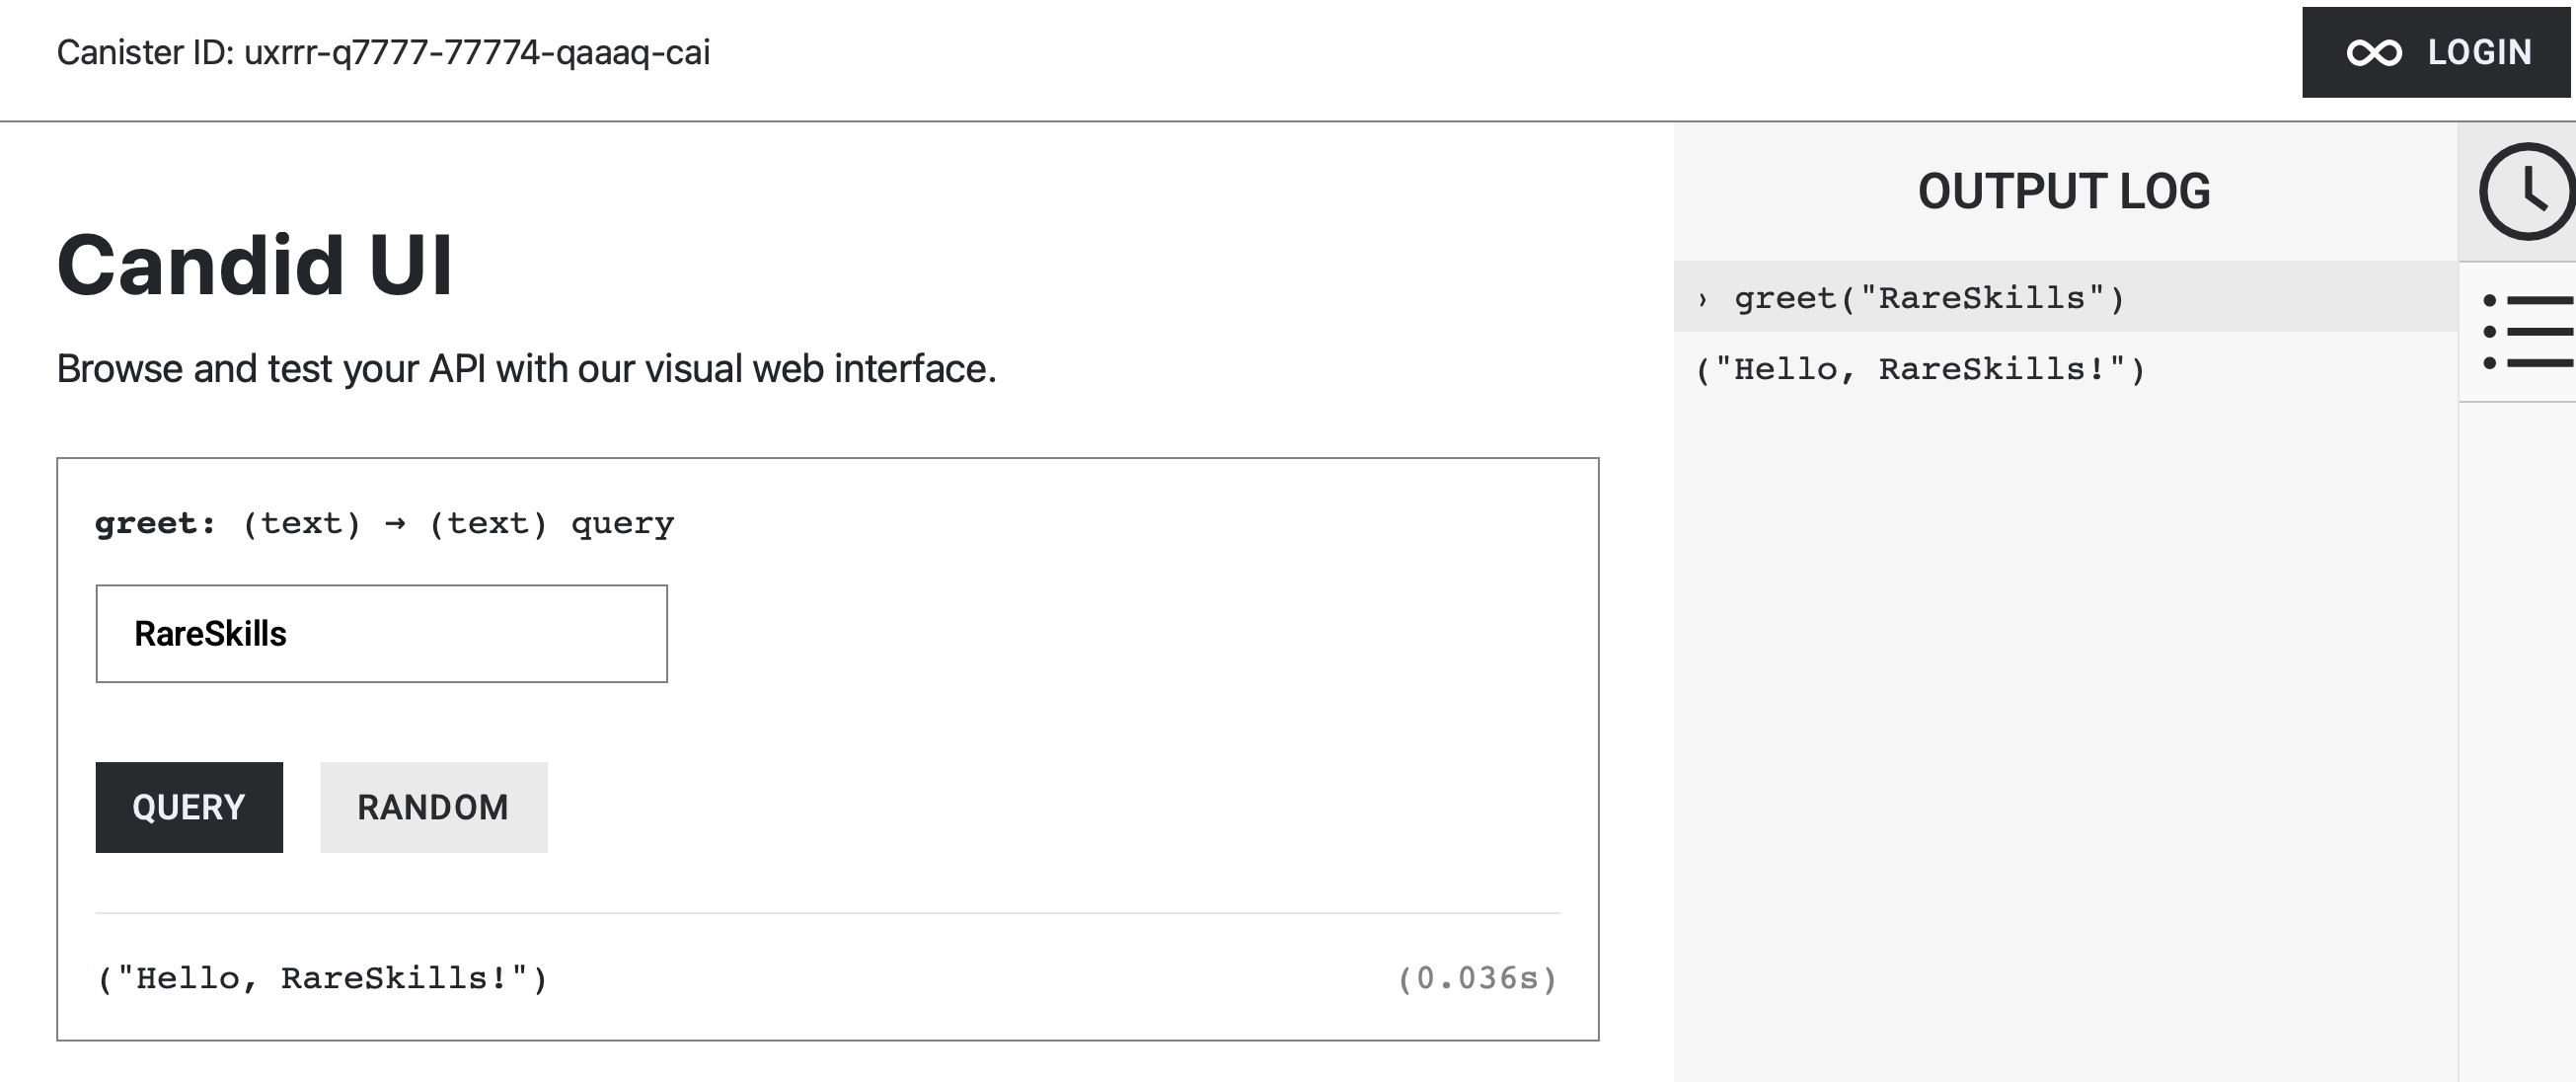
The link to Candid UI can be found at the successful output of the dfx deploy command, titled "Backend canister via Candid Interface." Open the link and it should take you to the Candid UI.
Try calling the greet() function and pass “RareSkills” as the string argument.
Note: In local deployments with dfx, Canister IDs are generated deterministically, so the first, second, third, and subsequent canisters consistently receive the same Canister IDs across runs.
The dfx CLI
dfx provides a direct way to interact with your canister through the command line interface (CLI). The following is a command format for calling a canister’s function:
dfx canister call <Canister-ID> <Function Name>
<Canister-ID>can be either the actual Canister ID or the canister’s name.<Function Name>is the function signature.
We’ll demonstrate calling greet() using both the Canister ID and the canister’s name.
-
dfx canister call with the Canister ID
Replace the terms:
<Canister-ID>with the Canister ID found in thedfx deploysuccess terminal output. In the example’s case it’suxrrr-q777-77774-qaaaq-cai.<Function Name>withgreet
dfx canister call uxrrr-q7777-77774-qaaaq-cai greetYou will automatically be prompted for the function’s parameter in a step-by-step manner as shown in the image below.

-
dfx canister call with the canister’s name
Optionally, you could use the canister’s name in place of
<Canister-ID>. The format for a canister’s name is the project directory’s name (hello_world) +_backend:hello_world_backend:dfx canister call hello_world_backend greetThe canister’s name can be found in the
dfx.jsonfile, highlighted by the red box.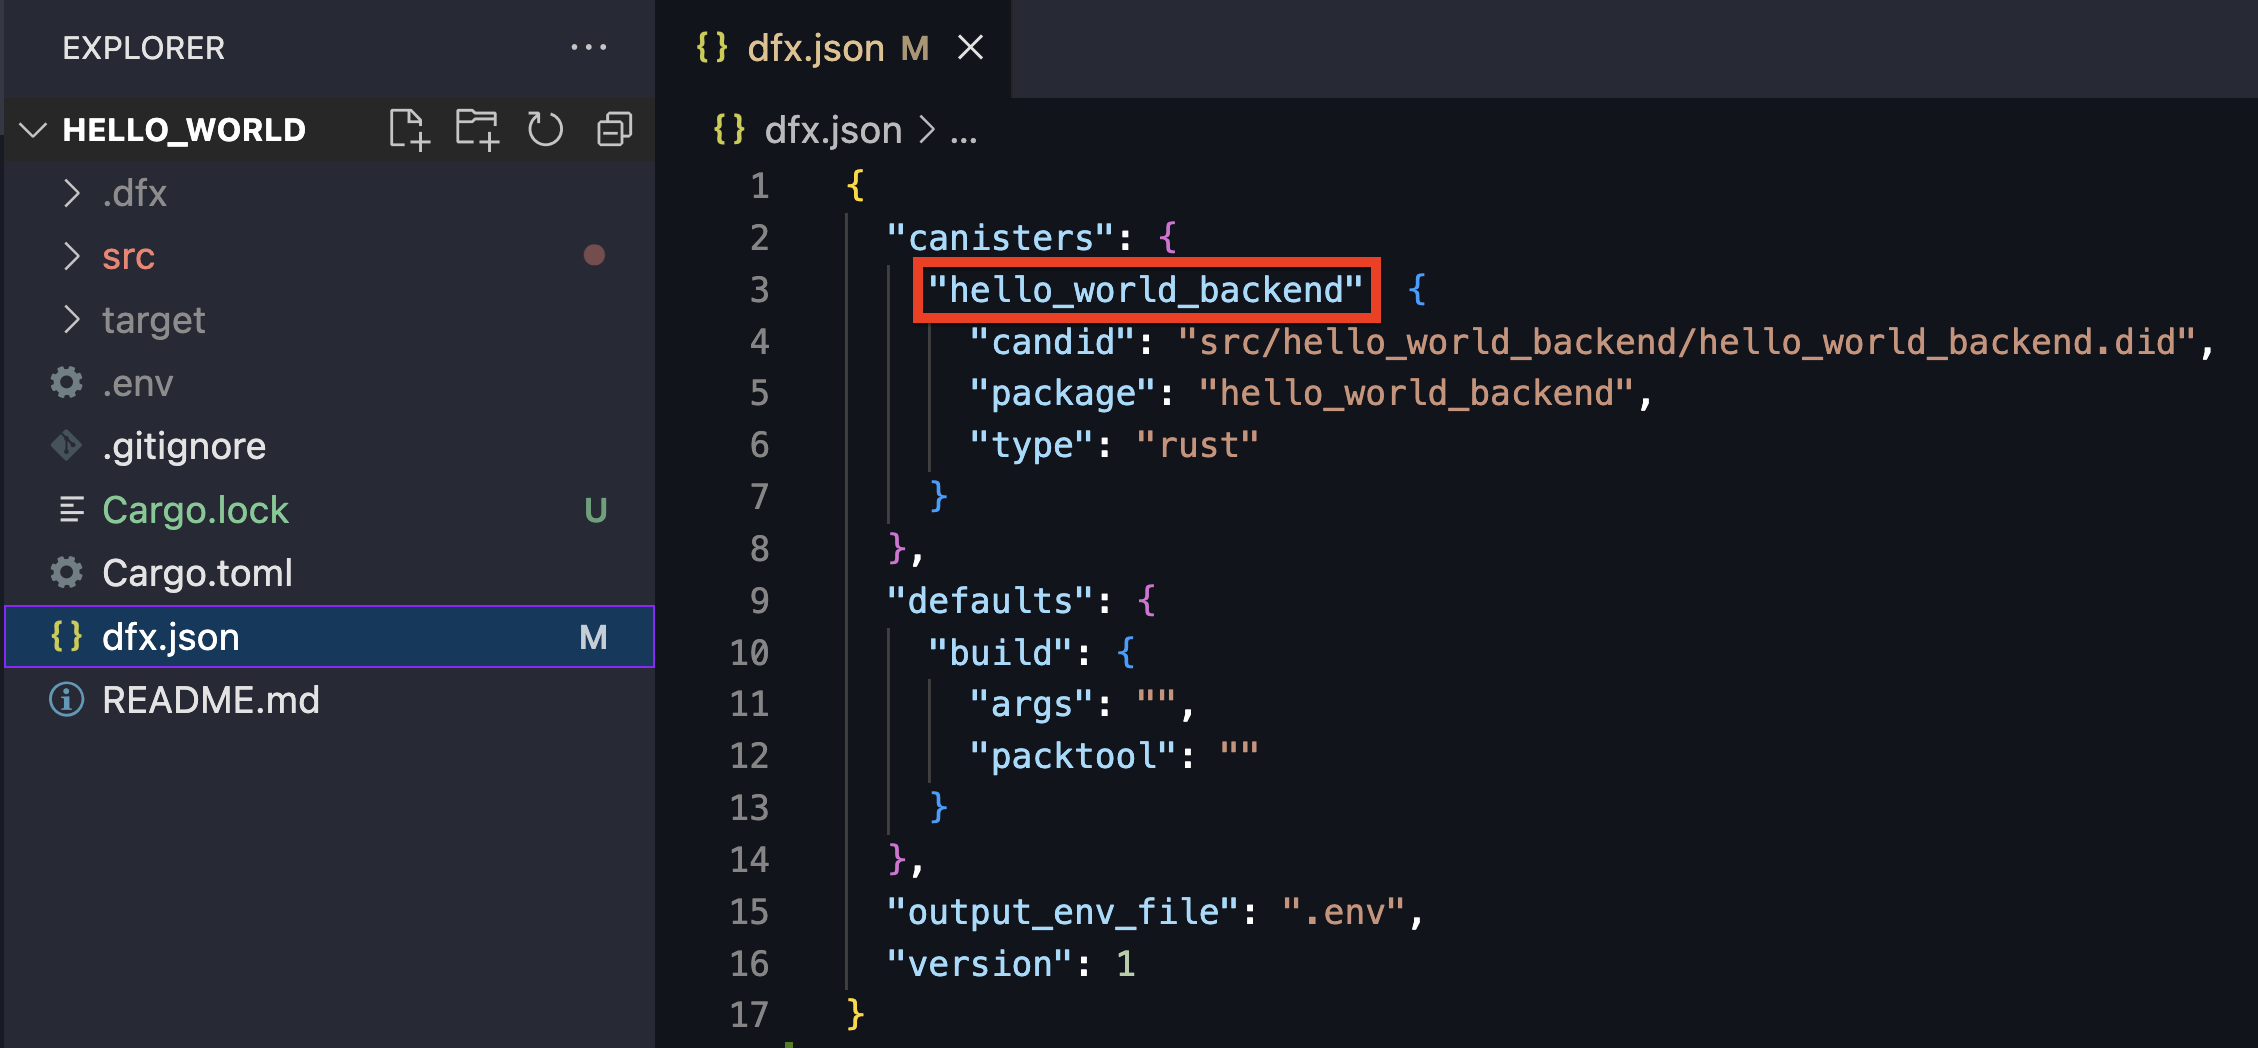
The
dfx.jsonfile is a configuration file thatdfxuses to manage your canister project.
Now that we can deploy and test our canisters through dfx, the next article introduces how to write canister functions, including the code explanations for the default greet() function.