The ICP JavaScript Agent is a JavaScript library that provides high-level abstractions for interacting with the Internet Computer Protocol (ICP). Using it, you can call canister functions, submit state-changing transactions, and query on-chain data—similar to how libraries like ethers.js are used to interact with Ethereum smart contracts. While ICP also offers agent libraries in other languages such as Rust, Go, and Dart, this guide focuses specifically on the JavaScript agent.
This tutorial builds on the previous Simple Token Canister guide. We assume that your token_canister is already deployed locally. In this guide, you’ll learn how to interact with that canister from a JavaScript environment using the ICP JavaScript Agent.
By the end of this tutorial, you will be able to:
- Connect a JavaScript application to a local ICP replica
- Generate and use a canister’s Candid interface in JavaScript
- Perform both query and update calls
- Sign transactions using a specific identity
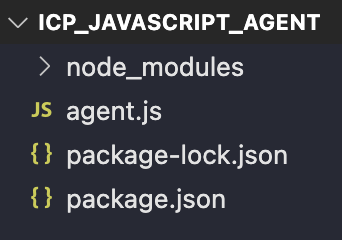
To follow along with this tutorial, create a new folder called icp_javascript_agent in your home directory and initialize a new npm project by running the following commands:
mkdir icp_javascript_agent
cd icp_javascript_agent
npm init -y
Installing the ICP Javascript Agent
To install the ICP JavaScript Agent package, run the following command:
npm i --save @dfinity/agent
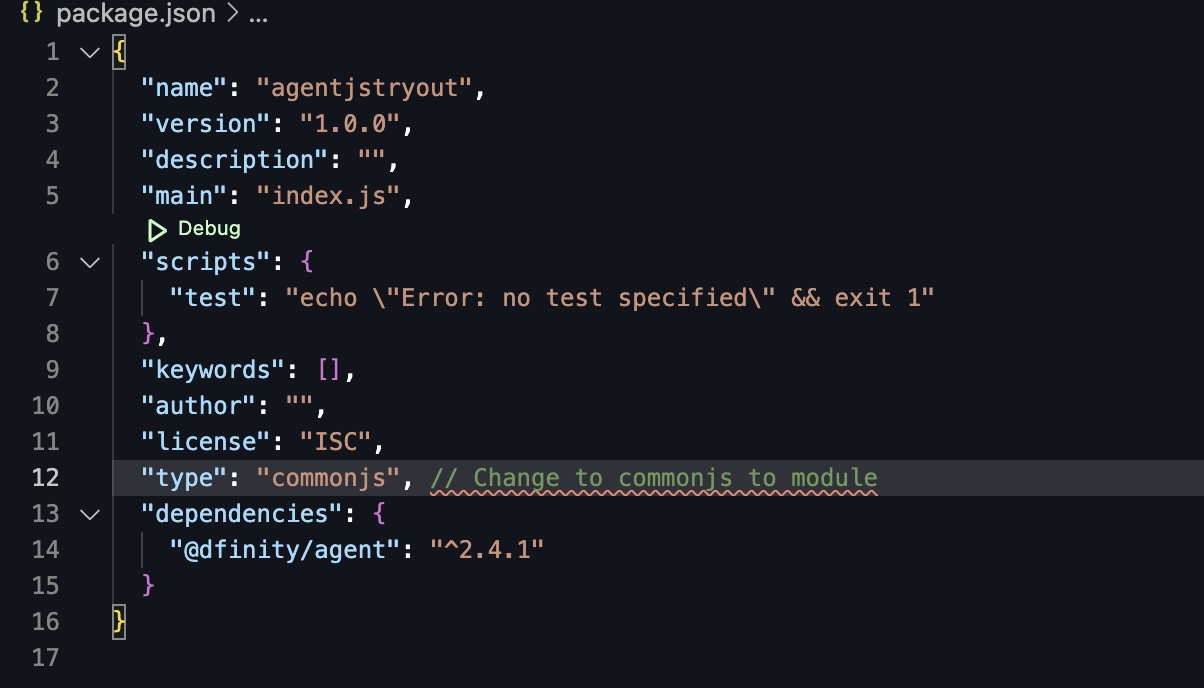
Open package.json and change the “type":“commonjs" to “type":“module". Node will treat your .js files as ES modules and allow you to use the import/export syntax required by @dfinity/agent.
Next, create a new JavaScript file called agent.js.
This file will contain the script we’ll use to connect to the local ICP replica and interact with the token_canister.
Connect To The Local IC Instance
Now that our JavaScript project is set up, the next step is to establish a connection to the local Internet Computer replica. All communication between your JavaScript code and a canister—whether it’s a query or a state-changing update—goes through an HTTP agent.
An HTTP agent is responsible for:
- sending requests to the replica,
- attaching identity information to those requests, and
- receiving and decoding responses from canisters.
Without an agent, your JavaScript code has no way to talk to the Internet Computer.
Create an HTTP agent and Verify the connection
To create an agent, import the HttpAgent class from @dfinity/agent and initialize it with the URL of the local replica. When running dfx start, the local replica listens on http://127.0.0.1:4943.
import { HttpAgent } from '@dfinity/agent';
const agent = await HttpAgent.create({
host: 'http://127.0.0.1:4943',
});
At this point, the agent is configured but we haven’t yet confirmed that it can successfully reach the replica. To do that, we can call agent.status(), which queries the replica’s status endpoint.
import { HttpAgent } from '@dfinity/agent';
const agent = await HttpAgent.create({
host: 'http://127.0.0.1:4943',
});
//new code
const status = await agent.status();
console.log(status);
Run the script with:
node agent.js
If the connection succeeds, the output will include replica_health_status: "healthy".
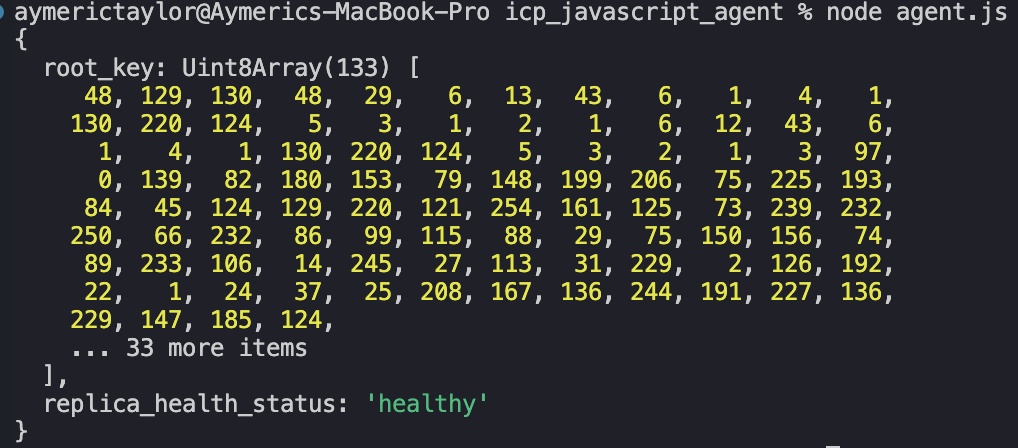
This confirms that your JavaScript code can communicate with the local ICP replica.
With a working agent in place, we can now interact with our deployed token_canister. To do that, we still need two pieces of information:
- the canister ID, which identifies the specific canister on the network, and
- the Candid interface, which describes the canister’s methods and their types.
In the next section, we’ll generate the Candid interface for token_canister in JavaScript format and prepare it for use with the agent.
Import Token_Canister’s Candid Interface
With a working HTTP agent, our JavaScript code can now communicate with the local ICP replica. However, the agent alone is not enough. In order to call methods on a specific canister, the agent also needs to know what functions the canister exposes and how to encode their arguments.
This information is described by the canister’s Candid interface. When working in JavaScript, this interface must be available in a JavaScript-compatible form.
dfx generate token_canister_backend
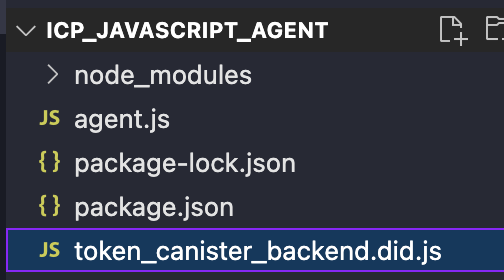
Head over to *token_canister* directory and run the command below. This will translate the canister’s Candid Interface into javascript, under the file: token_canister_backend.did.js
token_canister
/src
/declarations
/token_canister_backend
/**token_canister_backend.did.js**
Copy token_canister_backend.did.js over to icp_javascript_agent folder.
Next, open the agent.js file and import idlFactory from the generated Candid file:
import { HttpAgent } from '@dfinity/agent';
import { idlFactory } from './token_canister_backend.did.js';
const agent = await HttpAgent.create({
host: 'http://127.0.0.1:4943',
});
The idlFactory is a function generated from the Candid interface. It describes the canister’s methods and their types in a form that the ICP JavaScript Agent can use to encode requests and decode responses.
Now that we’ve established a connection to the localnet and obtained the Candid interface for token_canister, we can start interacting with the canister.
Create a Canister Instance
At this point, we have two essential pieces in place:
- an HTTP agent connected to the local ICP replica, and
- the JavaScript representation of the token_canister Candid interface.
What we’re still missing is a convenient way to call canister methods from JavaScript. This is where the Actor abstraction comes in.
An Actor represents a specific canister on the network and exposes its Candid-defined methods as callable JavaScript functions. Once an actor is created, interacting with a canister feels very similar to calling methods on a local object.
To create an actor, import Actor from the @dfinity/agent package:
import { Actor } from '@dfinity/agent';
An actor is created using three inputs:
- The candid interface, which we have imported as
idlFactory - The agent, which was created using
HttpAgent. - The canister ID of
token_canister, which we can get e.g.vu5yx-eh777-77774-qaaga-cai
Putting everything together, the following code creates an actor for token_canister:
import { HttpAgent } from '@dfinity/agent';
import { idlFactory } from './token_canister_backend.did.js'; //imports candid interface
import { Actor } from '@dfinity/agent';
const agent = await HttpAgent.create({
host: 'http://127.0.0.1:4943',
});
const TOKEN_CANISTER_ID = 'ufxgi-4p777-77774-qaadq-cai';
// Create the actor with the agent and the canister ID, and candid interface
const token_actor = Actor.createActor(
idlFactory,
{
agent,
canisterId: TOKEN_CANISTER_ID,
}
);
await agent.fetchRootKey();
Once created, token_actor exposes all public methods defined in the canister’s Candid interface. We can now use it to perform both query and update calls.
Query Calls
Query calls allow us to read canister state without modifying it. These calls are fast and free, similar to view functions in Solidity.
Let’s start by retrieving some metadata from the token_canister.
Retrieving token name
The following call invokes the name() query method:
// copy paste code found in ##Create Canister Instance
const name = await token_actor.name();
console.log(name);

Retrieving the token symbol
token_actor.symbol() returns a string representing the symbol of the token canister.
const symbol = await token_actor.symbol();
console.log(symbol);

Retrieving the token_supply
const total_supply = await token_actor.token_supply();
console.log(total_supply);
Update Calls
So far, we’ve only made query calls, which read canister state without modifying it. Now we’ll move on to update calls, which change the canister’s state and therefore require authorization.
Let’s start by invoking the mint() function, which creates new tokens and assigns them to a recipient.
The code below calls mint() with two arguments:
- the recipient’s principal, and
- the number of tokens to mint.
import { Principal } from '@dfinity/principal';
async function mint_tokens(to_id: string, amount: bigint | number) {
const to = Principal.fromText(to_id);
const ok = await token_actor.mint(to, BigInt(amount));
return ok; // true if mint succeeded
}
// Example
const recipient = 'aaaaa-aa'; // replace with a real principal
const mint_result = await mint_tokens(recipient, 5000);
console.log('Mint result:', mint_result);
Run the code with:
node agent.js
You should see a failure message indicating that only the owner can call this function. This failure is expected.

By default, if no identity is attached to the HTTP agent, all update calls are treated as coming from the anonymous principal. Since mint() is restricted to the canister owner, calls made by an anonymous identity are rejected.
We can confirm which identity the agent is currently using:
const principal = await agent.getPrincipal();
const currentIdentity = principal.toText();
console.log('Current identity principal (agent):', currentIdentity);
The output is as follows:

If you haven’t configured an identity yet, this will return the anonymous principal.
To successfully call mint(), we must configure the agent to use the same identity that deployed the canister.
Signed Transactions from ICP Javascript Agent
To attach the owner’s identity, we’ll export it from dfx and load it into our JavaScript code. This allows the agent to sign update calls, proving to the canister that the request comes from an authorized principal.
Export dfx identity
In your terminal, run:
dfx identity export
This command outputs the private key of the currently active dfx identity in PEM format.

Import the private key
Inside the icp_javascript_agent directory, create a new file named owner.pem and paste the exported private key into it. The .pem format is commonly used for storing cryptographic private keys.
-----BEGIN EC PRIVATE KEY-----
MHQCAQEEICJxApEbuZznKFpV+VKACRK30i6+7u5Z13/DOl18cIC+oAcGBSuBBAAK
oUQDQgAEPas6Iag4TUx+Uop+3NhE6s3FlayFtbwdhRVjvOar0kPTfE/N8N6btRnd
74ly5xXEBNSXiENyxhEuzOZrIWMCNQ==
-----END EC PRIVATE KEY-----
We’ll need to install the cryptographic library for generating identities:
npm i @dfinity/identity-secp256k1
Import the library:
import { Secp256k1KeyIdentity } from '@dfinity/identity-secp256k1';
Get the current Identity
// Get the current principal from the agent
const principal = await agent.getPrincipal();
const currentIdentity = principal.toText();
console.log('Current identity principal (agent):', currentIdentity);
The code above should return the same principal as the owner as long as you have exported the same identity that you used to deploy token_canister.
Now that we have set our identity to be the owner’s identity we can mint tokens to any Principal.
Call mint() with the owner’s identity
The code below sets up the identity from the pem key file, it connects to the local net, creates an Actor canister instance and calls the mint function to mint itself 1000 tokens.
import { HttpAgent } from '@dfinity/agent';
import { Actor } from '@dfinity/agent';
import { idlFactory } from './token_canister_backend.did.js';
import { Secp256k1KeyIdentity } from '@dfinity/identity-secp256k1';
import { Principal } from "@dfinity/principal";
import fs from 'fs';
// Load identity
const pemKey = fs.readFileSync("owner.pem", "utf8");
// create identity from pem key file
const identity = Secp256k1KeyIdentity.fromPem(pemKey);
const agent = await HttpAgent.create({
host: 'http://127.0.0.1:8080',
identity,
});
const TOKEN_CANISTER_ID = 'vu5yx-eh777-77774-qaaga-cai';
const token_actor = Actor.createActor(idlFactory, { agent, canisterId: TOKEN_CANISTER_ID, });
async function mint_tokens(to_id, amount) {
const to = Principal.fromText(to_id);
const ok = await token_actor.mint(to, BigInt(amount));
return ok; // true if mint succeeded
}
const recipient = 'hpikg-6exdt-jn33w-ndty3-fc7jc-tl2lr-buih3-cs3y7-tftkp-sfp62-gqe';
// replace with a real principal
const mint_result = await mint_tokens(recipient, 5000);
console.log('Mint result:', mint_result);
Expected output:
Mint result: true
Check balance of a Principal
The get_balance() function below can be added to the code above to query the balance of the principal we have minted. We set the arguments to the canister principal in string form.
import { Principal } from '@dfinity/principal';
async function get_balance(account_id: string) {
const p = Principal.fromText(account_id);
const bal = await token_actor.balance_of(p);
console.log(bal.toString()); // Nat -> BigInt
}
// Example
await get_balance('aaaaa-aa');
Transfer() function call
Since we’ve minted it to ourselves, we can create a function that calls the transfer function and send RareSkills token to any other principal.
import { Principal } from '@dfinity/principal';
async function transfer_tokens(to_id, amount) {
const to = Principal.fromText(to_id);
const ok = await token_actor.transfer(to, BigInt(amount));
return ok; // true if transfer succeeded
}
// Example
const transfer_result = await transfer_tokens('aaaaa-aa', 1000);
console.log('Transfer result:', transfer_result);
If you want to test it, set the parameters of transfer_tokens to transfer_tokens(your principal of choice, amount of choice).
We believe to have given enough examples to use ICP Javascript Agent. An exercise we have for you is to call the approve and transfer-from function yourself.
Approve(spender, amount). The caller of the function agrees that the spender can manageamountamount of tokens in behalf of the caller.ALLOWANCE()is where the token delegation information is storedTransfer_from(owner, to , amount)allows the spender to transfer the owner’s tokens.
Exercise: Thief Thiel
Default has entrusted Thiel to spend his token wisely, however, Thiel has ulterior motives and wants to take all of his tokens for himself. Default mints 1000 tokens and approves thiel to spend all of it.
Create another dfx idenitty and name it Thiel. Then, re-enact the case scenario above as Thiel and steal Default’s tokens.
Token balances before:
Default: 1000 RareSkills TokensThiel: 0 RareSkills Tokens
Token balances after:
Default: 0 RareSkills TokensThiel: 1000 RareSkills Tokens