在 Solidity 中,msg.sender 是一个全局变量,表示调用或发起智能合约函数调用的地址。全局变量 tx.origin 则是签署该交易的钱包。
在 Solana 中,没有与 msg.sender 等效的概念。
存在与 tx.origin 等效的概念,但你需要注意,Solana 交易可以有多个签名者(signers),因此我们可以认为它具有“多个 tx.origin”。
要在 Solana 中获取“tx.origin”地址,你需要通过将 Signer 账户添加到函数上下文中来进行设置,并在调用该函数时将调用者的账户传递给它。
让我们看一个如何在 Solana 中访问交易签名者地址的示例:
use anchor_lang::prelude::*;
declare_id!("Hf96fZsgq9R6Y1AHfyGbhi9EAmaQw2oks8NqakS6XVt1");
#[program]
pub mod day14 {
use super::*;
pub fn initialize(ctx: Context<Initialize>) -> Result<()> {
let the_signer1: &mut Signer = &mut ctx.accounts.signer1;
// Function logic....
msg!("The signer1: {:?}", *the_signer1.key);
Ok(())
}
}
#[derive(Accounts)]
pub struct Initialize<'info> {
#[account(mut)]
pub signer1: Signer<'info>,
}
在上述代码片段中,Signer<'info> 用于验证 Initialize<'info> 账户结构体中的 signer1 账户是否已签署了该交易。
在 initialize 函数中,从上下文中对 signer1 账户进行了可变引用,并将其赋值给 the_signer1 变量。
最后,我们使用 msg! 宏记录了 signer1 的公钥(地址),并传入了 *the_signer1.key,这会解引用并访问 the_signer1 所指向的实际值的 key 字段或方法。
接下来是为上述程序编写测试:
describe("Day14", () => {
// Configure the client to use the local cluster.
anchor.setProvider(anchor.AnchorProvider.env());
const program = anchor.workspace.Day14 as Program<Day14>;
it("Is signed by a single signer", async () => {
// Add your test here.
const tx = await program.methods.initialize().accounts({
signer1: program.provider.publicKey
}).rpc();
console.log("The signer1: ", program.provider.publicKey.toBase58());
});
});
在测试中,我们将我们的钱包账户作为签名者传递给 signer1 账户,然后调用了 initialize 函数。随后,我们在控制台上记录了该钱包账户,以验证其与我们程序中的账户保持一致。
练习: 运行测试后,你从 shell_1(命令终端)和 shell_3(日志终端)的输出中注意到了什么?
多个签名者
在 Solana 中,我们也可以让多个签名者签署一笔交易,你可以将此视为将一堆签名批量处理并在一次交易中发送。一个用例是在单次交易中执行多签(multisig)操作。
为此,我们只需在程序中的账户结构体中添加更多 Signer 结构体,然后确保在调用函数时传递了必要的账户:
use anchor_lang::prelude::*;
declare_id!("Hf96fZsgq9R6Y1AHfyGbhi9EAmaQw2oks8NqakS6XVt1");
#[program]
pub mod day14 {
use super::*;
pub fn initialize(ctx: Context<Initialize>) -> Result<()> {
let the_signer1: &mut Signer = &mut ctx.accounts.signer1;
let the_signer2: &mut Signer = &mut ctx.accounts.signer2;
msg!("The signer1: {:?}", *the_signer1.key);
msg!("The signer2: {:?}", *the_signer2.key);
Ok(())
}
}
#[derive(Accounts)]
pub struct Initialize<'info> {
pub signer1: Signer<'info>,
pub signer2: Signer<'info>,
}
上面的示例与单个签名者的示例大致相同,但有一个显著区别。在这种情况下,我们在 Initialize 结构体中添加了另一个 Signer 账户(signer2),并且在 initialize 函数中记录了两个签名者的公钥。
与单个签名者相比,使用多个签名者调用 initialize 函数是不同的。下面的测试展示了如何使用多个签名者调用该函数:
describe("Day14", () => {
// Configure the client to use the local cluster.
anchor.setProvider(anchor.AnchorProvider.env());
const program = anchor.workspace.Day14 as Program<Day14>;
// generate a signer to call our function
let myKeypair = anchor.web3.Keypair.generate();
it("Is signed by multiple signers", async () => {
// Add your test here.
const tx = await program.methods
.initialize()
.accounts({
signer1: program.provider.publicKey,
signer2: myKeypair.publicKey,
})
.signers([myKeypair])
.rpc();
console.log("The signer1: ", program.provider.publicKey.toBase58());
console.log("The signer2: ", myKeypair.publicKey.toBase58());
});
});
那么,上面的测试有什么不同呢?首先是 signers() 方法,它接收一个用于签署交易的签名者数组作为参数。但我们在数组中只有一个签名者,而不是两个。Anchor 会自动将 provider 中的钱包账户作为签名者传递,因此我们不需要再将其添加到 signers 数组中。
生成用于测试的随机地址
第二个变化是 myKeypair 变量,它存储了由 anchor.web3 模块随机生成的 Keypair(访问账户所需的公钥和对应私钥)。在测试中,我们将 Keypair(存储在 myKeypair 变量中)的 publickey 赋值给 signer2 账户,这就是为什么它在 .signers([myKeypair]) 方法中作为参数被传递。
多次运行测试,你会注意到 signer1 的公钥不会改变,但 signer2 的公钥会改变。这是因为(在测试中)分配给 signer1 账户的钱包账户来自 provider,这也是你本地机器上的 Solana 钱包账户,而分配给 signer2 的账户是你每次运行 anchor test —skip-local-validator 时随机生成的。
练习: 创建另一个函数(你可以随意命名),该函数需要三个签名者(provider 钱包账户和两个随机生成的账户),并为其编写一个测试。
onlyOwner
这是 Solidity 中常用的一种模式,用于将函数的访问权限限制为仅限合约的所有者。使用 Anchor 中的 #[access_control] 属性,我们同样可以实现 only owner 模式,即在我们的 Solana 程序中将函数的访问权限限制为特定的 PubKey(所有者地址)。
以下是在 Solana 中如何实现“onlyOwner”功能的示例:
use anchor_lang::prelude::*;
declare_id!("Hf96fZsgq9R6Y1AHfyGbhi9EAmaQw2oks8NqakS6XVt1");
// NOTE: Replace with your wallet's public key
const OWNER: &str = "8os8PKYmeVjU1mmwHZZNTEv5hpBXi5VvEKGzykduZAik";
#[program]
pub mod day14 {
use super::*;
#[access_control(check(&ctx))]
pub fn initialize(ctx: Context<OnlyOwner>) -> Result<()> {
// Function logic...
msg!("Holla, I'm the owner.");
Ok(())
}
}
fn check(ctx: &Context<OnlyOwner>) -> Result<()> {
// Check if signer === owner
require_keys_eq!(
ctx.accounts.signer_account.key(),
OWNER.parse::<Pubkey>().unwrap(),
OnlyOwnerError::NotOwner
);
Ok(())
}
#[derive(Accounts)]
pub struct OnlyOwner<'info> {
signer_account: Signer<'info>,
}
// An enum for custom error codes
#[error_code]
pub enum OnlyOwnerError {
#[msg("Only owner can call this function!")]
NotOwner,
}
在上述代码的上下文中,OWNER 变量存储了与我本地 Solana 钱包关联的公钥(地址)。在测试之前,请务必将 OWNER 变量替换为你钱包的公钥。你可以通过运行 solana address 命令轻松检索你的公钥。
#[access_control] 属性会在运行主指令之前执行指定的访问控制方法。当调用 initialize 函数时,访问控制方法(check)会在 initialize 函数之前执行。check 方法接收一个引用的上下文作为参数,然后检查交易的签名者是否等于 OWNER 变量的值。require_keys_eq! 宏确保两个公钥的值相等,如果为真,则执行 initialize 函数,否则会抛出 NotOwner 自定义错误并回滚。
测试 onlyOwner 功能 —— 正常情况(happy case)
在下面的测试中,我们将调用 initialize 函数并使用所有者的密钥对签署交易:
import * as anchor from "@coral-xyz/anchor";
import { Program } from "@coral-xyz/anchor";
import { Day14 } from "../target/types/day14";
describe("day14", () => {
// Configure the client to use the local cluster.
anchor.setProvider(anchor.AnchorProvider.env());
const program = anchor.workspace.Day14 as Program<Day14>;
it("Is called by the owner", async () => {
// Add your test here.
const tx = await program.methods
.initialize()
.accounts({
signerAccount: program.provider.publicKey,
})
.rpc();
console.log("Transaction hash:", tx);
});
});
我们调用了 initialize 函数,并将 provider 中的钱包账户(本地 Solana 钱包账户)传递给具有 Signer<'info> 结构体的 signerAccount,以验证该钱包账户实际上签署了交易。还要记住,Anchor 会暗中使用 provider 中的钱包账户对任何交易进行签名。
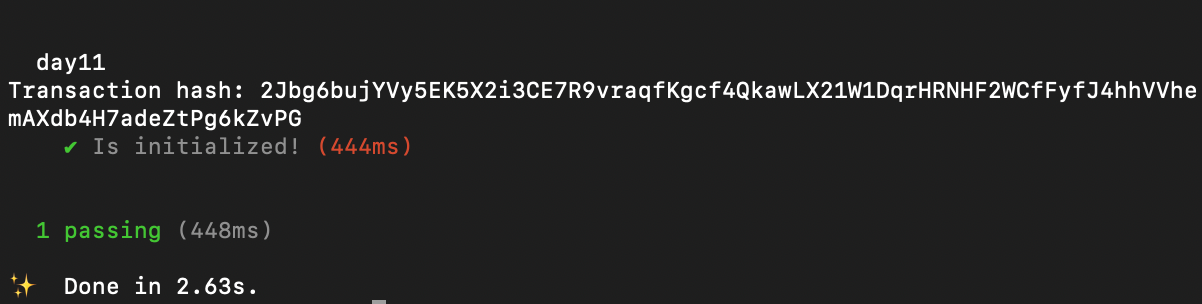
运行测试 anchor test --skip-local-validator,如果一切操作正确,测试应该会通过:
测试如果签名者不是所有者 —— 攻击情况(attack case)
使用一个非所有者的不同密钥对来调用 initialize 函数并签署交易将会抛出错误,因为该函数的调用仅限所有者:
describe("day14", () => {
// Configure the client to use the local cluster.
anchor.setProvider(anchor.AnchorProvider.env());
const program = anchor.workspace.Day14 as Program<Day14>;
let Keypair = anchor.web3.Keypair.generate();
it("Is NOT called by the owner", async () => {
// Add your test here.
const tx = await program.methods
.initialize()
.accounts({
signerAccount: Keypair.publicKey,
})
.signers([Keypair])
.rpc();
console.log("Transaction hash:", tx);
});
});
在这里,我们生成了一个随机的密钥对,并使用它来签署交易。让我们再次运行测试:

不出所料,我们得到了一个错误,因为签名者的公钥不等于所有者的公钥。
修改所有者
要更改程序中的所有者,分配给所有者的公钥需要存储在链上。不过,关于 Solana 中“存储”的讨论将在未来的教程中涉及。
所有者也可以直接重新部署字节码。
练习:将类似上述的程序进行升级,以拥有一个新的所有者。
通过 RareSkills 了解更多
本教程是我们的 Solana 课程 中的第 14 章。
最初发布于 2024 年 2 月 21 日