在这个分为两部分的教程中,我们将学习如何使用两种方法在原生 Solana 程序中创建用于存储数据的账户:keypairs(本部分)和 Program Derived Addresses 或 PDAs(第 2 部分)。我们的目标是在底层理解账户分配、初始化和数据序列化——即 Anchor 的 #[account(init)] 宏为你抽象掉的逻辑。
对于这两种方法,我们将构建一个创建账户并向其写入数据的程序,然后使用 TypeScript 客户端进行测试,以验证数据是否被正确写入。
设置 keypair 存储程序
运行以下命令创建一个目录并使用 Cargo 初始化 Rust 项目:
mkdir solana-storage-write
cd solana-storage-write
cargo init --lib
将你的 Cargo.toml 更新为以下配置,该配置设置了 crate 类型并添加了 Solana 程序依赖项:
[package]
name = "solana-storage-write"
version = "0.1.0"
edition = "2021"
[lib]
crate-type = ["cdylib", "lib"]
[dependencies]
solana-program = "1.18"
borsh = "0.10"
请注意,我们添加了 borsh = "0.10" 用于序列化,这在创建账户时会用到。我们在之前的教程中详细介绍了 Borsh 序列化。
现在让我们创建我们的程序。
在原生 Solana 程序中使用 keypairs 创建账户
数据存储的账户结构
在深入研究代码之前,让我们先了解一下存储数据的 Solana 账户是什么样的:
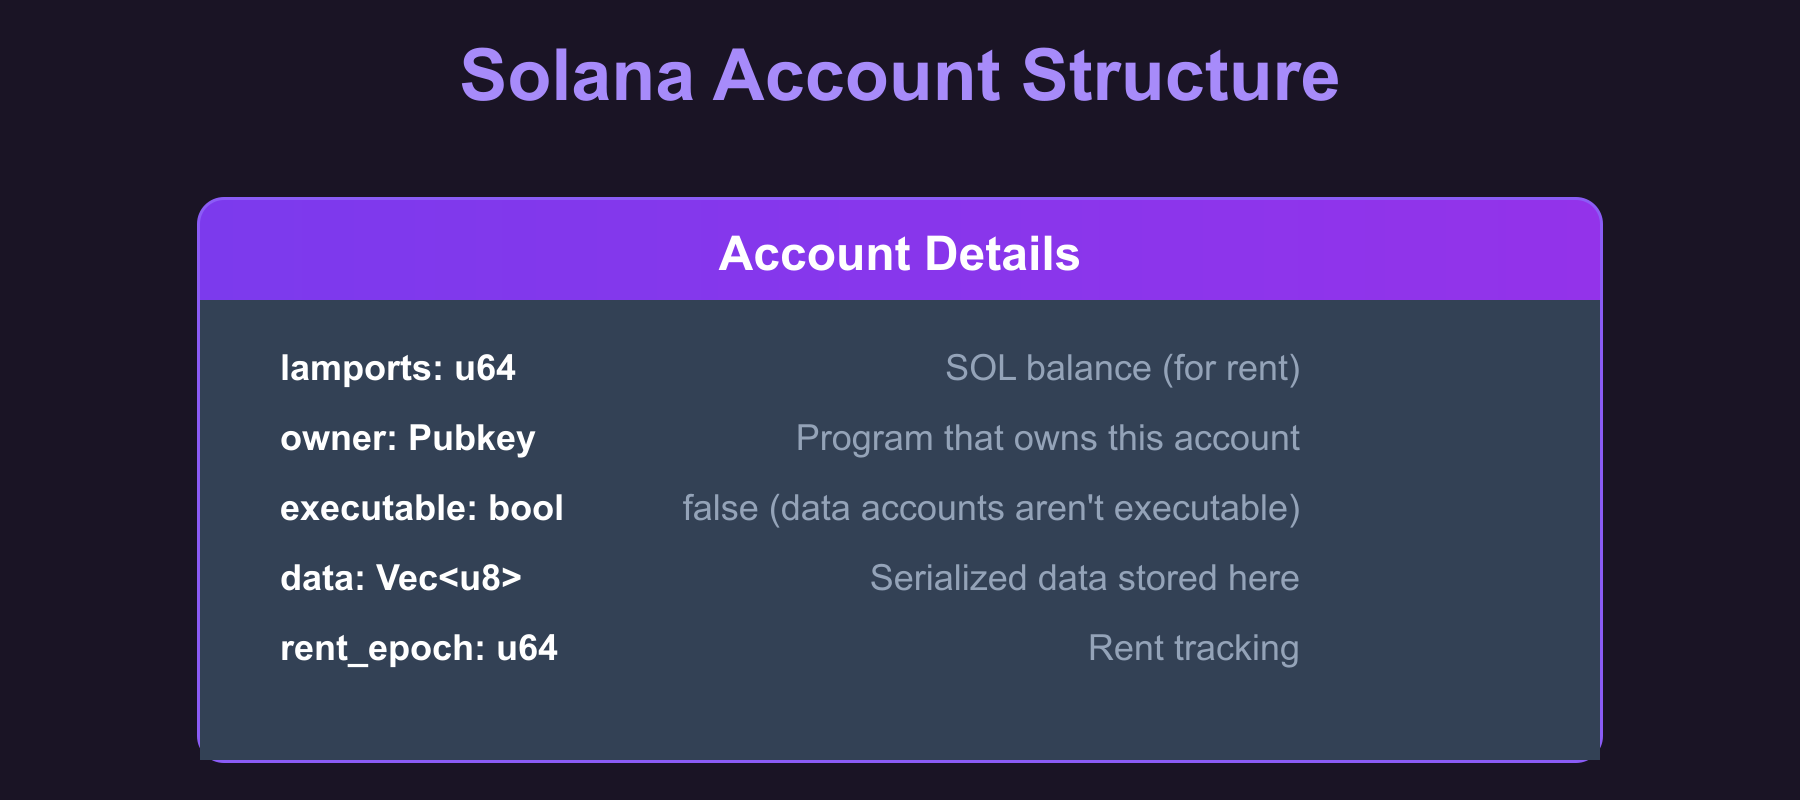
data 字段是我们存储序列化 struct 的地方(我们稍后会讲到)。当我们创建账户时,我们会指定该字段应容纳多少字节,然后 System Program 会分配该空间。
创建基于 keypair 的存储账户的步骤
以下步骤展示了如何创建用于数据存储的基于 keypair 的账户:
- 从客户端接收存储账户的公钥(客户端生成了 keypair 并将签署交易)
- 创建我们要存储的数据结构(一个带有
u64类型的 count 字段的CounterDatastruct)并使用 Borsh 对其进行序列化 - 确定所需的空间(设定账户 data 字段大小的序列化数据的字节长度)。
- 计算该空间所需的免租金 lamports(保持账户存活而不被垃圾回收所需的最小 SOL 余额)。
- 使用 System Program 根据计算出的空间和 lamports 创建账户。
- 将序列化后的数据直接写入账户的 data 字段中。
现在让我们在代码中看看这一点。将 src/lib.rs 文件中的代码替换为以下内容。我们添加了代码注释,以显示我们在何处实现了上面列出的每个步骤:
use borsh::{BorshDeserialize, BorshSerialize};
use solana_program::{
account_info::{next_account_info, AccountInfo},
entrypoint,
entrypoint::ProgramResult,
msg,
program::invoke,
program_error::ProgramError,
pubkey::Pubkey,
rent::Rent,
system_instruction, system_program,
};
entrypoint!(process_instruction);
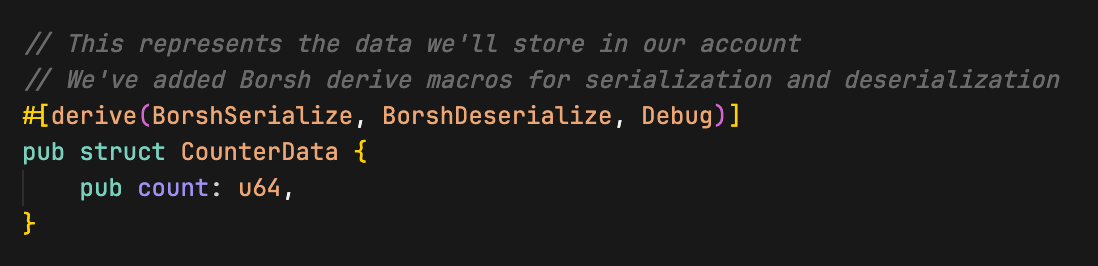
// This represents the data we'll store in our account
// We've added Borsh derive macros for serialization and deserialization
#[derive(BorshSerialize, BorshDeserialize, Debug)]
pub struct CounterData {
pub count: u64,
}
pub fn process_instruction(
program_id: &Pubkey,
accounts: &[AccountInfo],
_instruction_data: &[u8],
) -> ProgramResult {
msg!("Storage Write Program: Creating storage account and writing data");
let accounts_iter = &mut accounts.iter();
// STEP 1: Get the accounts we need
// next_account_info() extracts the next AccountInfo from the iterator
let storage_account = next_account_info(accounts_iter)?;
let signer = next_account_info(accounts_iter)?;
let system_program = next_account_info(accounts_iter)?;
// Verify the system program
if system_program.key != &system_program::ID {
msg!("Invalid system program");
return Err(ProgramError::IncorrectProgramId);
}
// Verify the signer account is actually a signer
if !signer.is_signer {
msg!("Signer must be a signer");
return Err(ProgramError::MissingRequiredSignature);
}
// STEP 2: Create our counter data
let counter_data = CounterData { count: 42 };
// STEP 2: Serialize the data with Borsh (u64 becomes 8 bytes in little-endian format)
let serialized_data = counter_data.try_to_vec()?; // [42, 0, 0, 0, 0, 0, 0, 0]
// STEP 3: Determine the space needed for our data
let space = serialized_data.len();
msg!("Creating storage account with {} bytes", space);
msg!("Serialized data: {:?}", serialized_data);
// STEP 4: Calculate lamports needed for rent exemption
let lamports = Rent::default().minimum_balance(space);
// STEP 5: Create the account using system program
let create_account_ix = system_instruction::create_account(
signer.key,
storage_account.key,
lamports,
space as u64,
program_id,
);
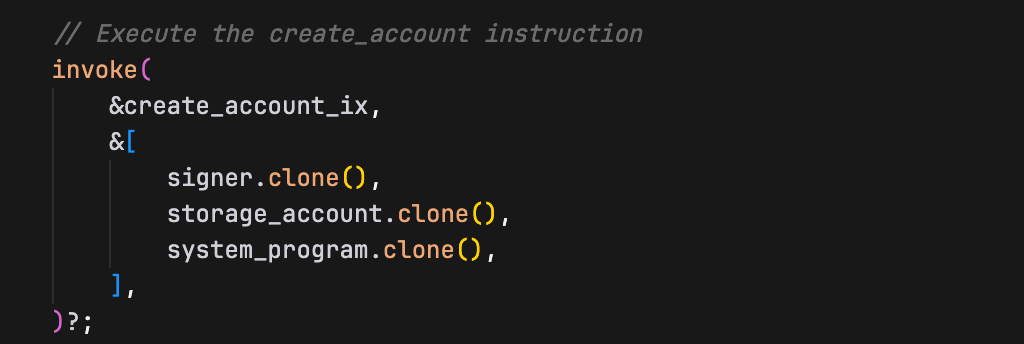
// STEP 5 (continued): Execute the create_account instruction
invoke(
&create_account_ix,
&[
signer.clone(),
storage_account.clone(),
system_program.clone(),
],
)?;
msg!("Storage account created successfully");
// STEP 6: Write our serialized data to the account
let mut account_data = storage_account.try_borrow_mut_data()?;
account_data.copy_from_slice(&serialized_data);
msg!("Data written to storage account");
Ok(())
}
我们现在将了解账户创建背后的步骤。
我们的 Rust 程序中 keypair 账户创建的工作原理
我们程序中的账户创建分两步进行。首先,我们使用 system_instruction::create_account() 构建指令——这是一个辅助函数,用于构建包含正确账户和数据以创建账户的 Instruction struct(在 CPI 教程中,我们是手动构建这个 struct 的)。
其次,我们使用 invoke() 执行此指令,该操作向 System Program 执行跨程序调用 (Cross-Program Invocation, CPI)。然后,System Program 实际上会使用我们指定的参数在链上创建账户。
create_account 指令
System Program 的 create_account 指令通过转移 lamports、分配数据空间和分配 owner 来创建一个新的链上账户。它接受五个参数:
- Payer:为新账户的租金提供资金的账户
- New account address:创建账户的地址(正在初始化的账户)
- Lamports:要转移到新账户的 SOL 数量(必须覆盖免租金要求)
- Space:要为账户数据分配的字节数
- Owner:将拥有新账户的程序 ID(公钥)
因为 System Program 要求新账户地址必须是 create_account 指令中的 signer,所以 keypair 账户可以按预期工作:交易包含来自 keypair 私钥的签名。PDA 没有私钥,因此创建它的程序必须通过 invoke_signed() 提供 seeds,runtime 使用这些 seeds 重新派生并验证 PDA,从而赋予其签名权限(我们将在第 2 部分中看到这一点)。
Solana 如何知道 keypair 地址可用于创建账户?
客户端生成一个新的 keypair 并在交易中传递其公钥。我们的程序通过 let storage_account = next_account_info(accounts_iter)?; 接收此地址。当 System Program 处理 create_account 指令时,它会检查该地址是否已存在账户。如果该地址不存在账户,System Program 会创建它。如果账户已经存在,指令将因错误而失败。
数据如何存储在 Solana 账户中
现在我们已经看到了代码,让我们仔细看看当我们把数据存储在 Solana 账户中时究竟会发生什么。
首先,从我们的 struct 开始:

这只是一个存在于内存中的常规 Rust struct。但 Solana 账户不能直接存储 Rust struct,它们只能理解原始字节。因此,我们需要使用 Borsh 将我们的 struct 转换为字节:

这个 try_to_vec() 方法之所以可用,是因为我们之前在 CounterData struct 中添加了 #[derive(BorshSerialize, BorshDeserialize)] 属性。
这些 derive 宏生成了将我们的 struct 转换为字节(以及从字节转换回 struct)的代码。Borsh 接受我们的 count: 42(一个 u64)并将其转换为小端格式的 8 个字节。值 42 变成 [42, 0, 0, 0, 0, 0, 0, 0],第一个字节是 42,其余部分都是零,因为 u64 总是恰好占用 8 个字节(正如我们在 Borsh 序列化教程中讨论的那样)。这是必要的,因为 Solana 账户只能存储原始字节,而不能直接存储 Rust struct。
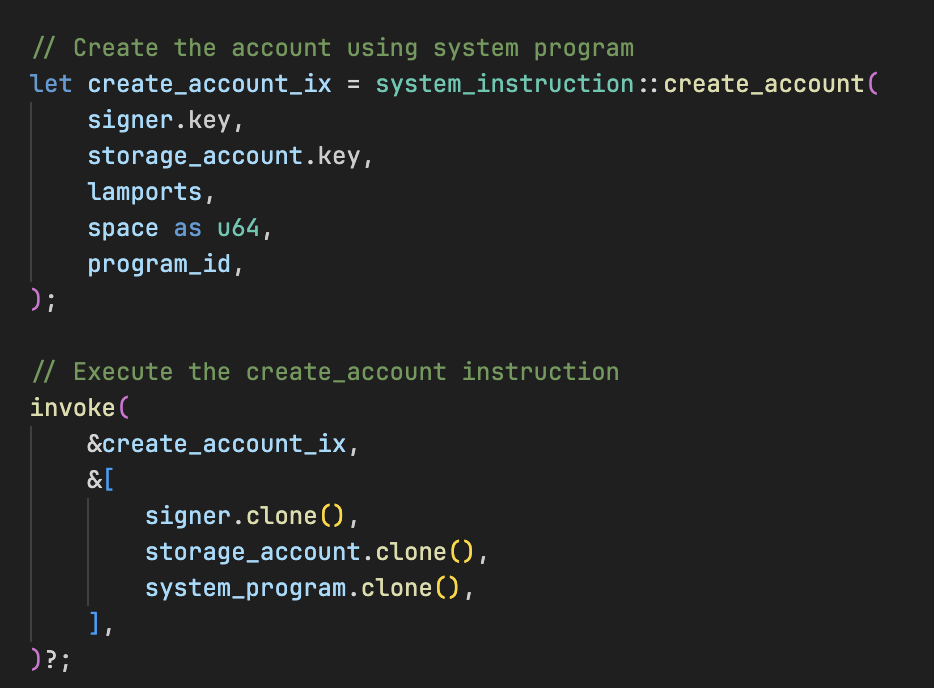
接下来,我们使用 system program 的 create_account 指令创建账户。
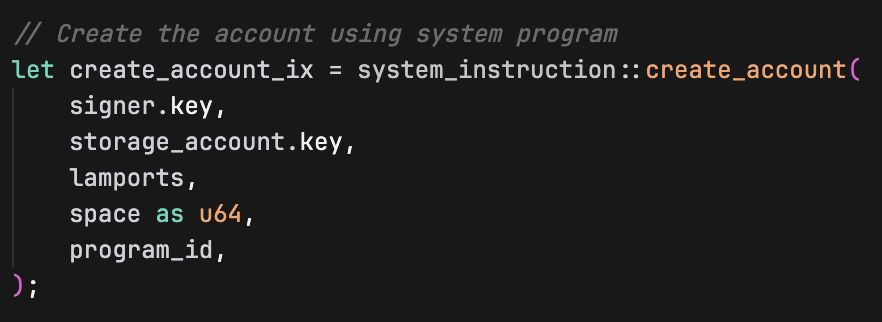
create_account 指令接受以下参数:
signer.key:为创建新账户付款的账户地址storage_account.key:将要创建新账户的地址lamports:为新账户提供资金的 SOL 数量(用于免租金)space as u64:新账户的 data 字段大小(以字节为单位)program_id:哪个程序将拥有新创建的账户(在我们的例子中是我们的程序)
然后我们使用 invoke(从 solana_program crate 导入)创建账户:
创建此账户后,我们将 Borsh 序列化后的字节直接写入其 data 字段:

这如何持久化到存储中?
storage_account.try_borrow_mut_data()? 不仅仅给了我们一个副本。它给了我们一个指向存在于 Solana 区块链上的实际账户的 data 字段的可变引用。因此,当我们写入 account_data 时,我们直接写入的是该账户的持久化存储。
可以这样理解:
storage_account是一个句柄,指向存在于 Solana 上的实际账户try_borrow_mut_data()让你能够直接访问该账户的数据字节- 当你修改
account_data时,你正在使用copy_from_slice修改实际的链上账户数据(将字节从serialized_data复制到account_data中) - 当你的程序成功完成时,Solana runtime 会自动持久化这些更改
此时,我们账户的 data 字段恰好包含 Borsh 序列化后的 8 个字节:[42, 0, 0, 0, 0, 0, 0, 0]。就是这样,我们的 struct 现在被“存储”在了账户中,并且在我们的程序执行完毕后,它也将继续持久化在区块链上。
现在构建并部署该程序:
cargo build-sbf
solana-test-validator # in another terminal
solana program deploy target/deploy/solana_storage_write.so
从部署输出中复制 program ID,我们在测试程序时会用到它。
使用客户端测试程序
现在让我们创建一个 TypeScript 客户端来测试我们的存储程序。
就像在之前的教程中一样,我们从项目根目录设置客户端环境:
mkdir client && cd client
npm init -y
npm install @solana/web3.js typescript ts-node @types/node
更新 client/package.json 添加测试脚本:
{
"scripts": {
"test": "ts-node client.ts"
}
}
创建 client/tsconfig.json 以配置 TypeScript 编译设置:
{
"compilerOptions": {
"target": "ES2020",
"module": "commonjs",
"moduleResolution": "node",
"strict": true,
"esModuleInterop": true,
"skipLibCheck": true,
"types": ["node"]
},
"include": ["*.ts"]
}
现在创建 client/client.ts 并添加以下代码。在这个客户端中,我们:
- 创建一个 signer keypair 和一个用于我们的
CounterDatastruct 的 storage keypair 账户 - 使用 SOL 为 signer 账户提供资金
- 将所需账户传递给我们的程序以进行存储创建(storage account、signer account、system program)
- 执行交易以创建账户并写入数据
- 重新读出账户数据并验证其是否被正确写入(count 值刚好是 42)
import {
Connection,
Keypair,
LAMPORTS_PER_SOL,
PublicKey,
SystemProgram,
Transaction,
TransactionInstruction,
sendAndConfirmTransaction,
} from '@solana/web3.js';
const PROGRAM_ID = new PublicKey('YOUR_PROGRAM_ID_HERE'); // Replace with your actual program ID
const connection = new Connection('http://localhost:8899', 'confirmed');
async function testStorageWrite() {
console.log('Testing Storage Creation and Writing\n');
// Create a signer keypair and a storage keypair account
const signer = Keypair.generate();
const storageAccount = Keypair.generate();
// Fund the signer keypair account
console.log('Funding signer account...');
await connection.requestAirdrop(signer.publicKey, LAMPORTS_PER_SOL);
await new Promise(resolve => setTimeout(resolve, 2000));
console.log(`Signer: ${signer.publicKey.toString()}`);
console.log(`Storage Account: ${storageAccount.publicKey.toString()}\n`);
// Create instruction with required accounts (storage, signer & system program account)
const instruction = new TransactionInstruction({
keys: [
{ pubkey: storageAccount.publicKey, isSigner: true, isWritable: true },
{ pubkey: signer.publicKey, isSigner: true, isWritable: true },
{ pubkey: SystemProgram.programId, isSigner: false, isWritable: false },
],
programId: PROGRAM_ID,
data: Buffer.alloc(0), // No instruction data needed
});
const transaction = new Transaction().add(instruction);
console.log('Creating storage account and writing data...');
const signature = await sendAndConfirmTransaction(connection, transaction, [signer, storageAccount]);
console.log(`Transaction confirmed: ${signature}`);
// Verify the data was written correctly by reading it back
console.log('\nVerifying data was written correctly...');
const accountInfo = await connection.getAccountInfo(storageAccount.publicKey);
if (accountInfo && accountInfo.data.length > 0) {
console.log('Account data length:', accountInfo.data.length, 'bytes');
console.log('Raw account data:', Array.from(accountInfo.data));
// Deserialize the data back to verify
const deserializedData = new Uint8Array(accountInfo.data);
// DataView lets us read binary data as specific types (u64 in this case)
// getBigUint64(0, true) reads 8 bytes starting at offset 0, little-endian
const count = new DataView(deserializedData.buffer).getBigUint64(0, true);
console.log('Deserialized count value:', count.toString());
// the `n` makes 42 a BigInt literal. This is required because getBigUint64 returns a BigInt
if (count === 42n) {
console.log('Data was written correctly to the storage account.');
} else {
console.log('Error: Expected count 42, got', count.toString());
}
} else {
console.log('Error: Could not read account data');
}
}
testStorageWrite().catch(console.error);
确保将 PROGRAM_ID 变量设置为你的 program ID。
了解我们的客户端中的 keypair 账户创建
首先我们生成一个将成为我们新账户的 keypair:

下一个重要步骤是在构建指令时将账户设置为 signer:
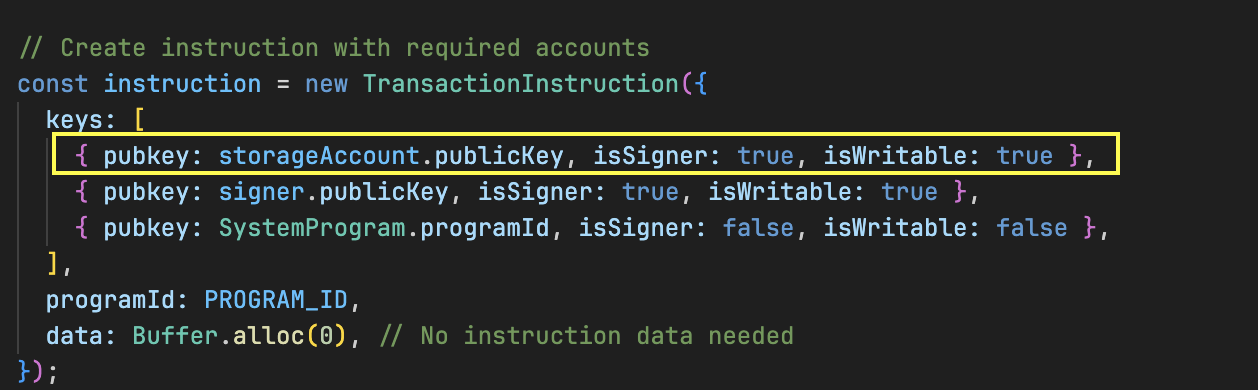
isSigner: true 至关重要,因为 System Program 需要来自将要创建账户的精确地址的签名。
然后我们在发送交易时提供 keypairs:
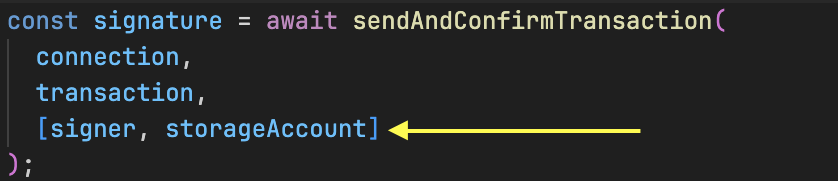
keypair 对象包含生成所需签名所需的私钥,从而授权在该特定地址创建账户。
在运行测试之前,确保你本地的 Solana 验证节点仍在运行,并且程序已部署到该节点上。
现在运行测试:
cd client
npm run test
你应该会看到交易成功执行。

我们的程序成功执行并创建了一个 counter 值为 42 的账户。我们还看到了序列化后的 CounterData 为 [42, 0, 0, 0, 0, 0, 0, 0](8 个字节)。
在本教程的下一部分中,我们将使用 PDA 而不是 keypair 创建一个存储账户。基本原理保持不变——只有签名机制不同。
本文是 Solana 开发教程系列的一部分。