跨程序调用 (CPI) 是程序在 Solana 区块链上调用其他程序的方式。在本教程中,我们将学习如何使用原生 Rust 进行 CPI 调用。
在之前的 Anchor 教程中,我们在通过 SPL Token 程序转移 SOL 或铸造代币时,已经使用过 CPI。在 Anchor 中,CPI 调用如下所示:
let cpi_ctx = CpiContext::new(
ctx.accounts.system_program.to_account_info(),
system_program::Transfer {
from: ctx.accounts.from.to_account_info(),
to: ctx.accounts.to.to_account_info(),
}
);
system_program::transfer(cpi_ctx, amount)?;
上述代码使用 System Program 以及转账所需的账户创建了一个 CPI 上下文,然后调用 system_program::transfer 来执行 CPI。
本教程将解释在 Anchor 中进行 CPI 调用时幕后发生的事情,然后展示如何直接使用 Solana 的原生 CPI 函数。
我们将涵盖以下内容:
- Solana 中的两个核心 CPI 函数:
invoke和invoke_signed - Anchor 如何对这些核心函数进行抽象
- 如何通过原生 Rust 手动构建 CPI 指令,在此我们将展示一个实际示例,构建两个程序:一个返回 42 的目标程序,以及一个通过 CPI 调用它的调用者程序
让我们首先了解 invoke 和 invoke_signed CPI 函数。
了解 Solana 的核心 CPI 函数
Solana 有两个用于进行跨程序调用的核心函数:
invoke:用于不需要 PDA 签名 的 CPI 调用(使用原始的交易签名者)invoke_signed:用于需要 PDA 签名的 CPI 调用(当程序需要代表其控制的 PDA 进行签名时)
让我们详细了解一下这些函数:
1. invoke 函数
invoke 函数使用账户和指令数据调用另一个程序。当你的程序需要使用原始交易签名者进行授权来调用另一个程序时,你会使用它。
pub fn invoke(
instruction: &Instruction,
account_infos: &[AccountInfo<'_>],
) -> ProgramResult
参数如下:
instruction:一个包含以下内容的Instruction结构体:program_id:目标程序的公钥accounts:一个AccountMeta结构体的向量。每个结构体包含三个字段:pubkey(账户的公钥)、is_signer(该账户是否必须对交易进行签名)和is_writable(程序是否可以修改此账户)data:包含指令数据的字节数组。通常包括一个鉴别器(用于标识要执行哪个指令),后跟指令期望的任何参数。具体布局由目标程序定义
account_infos:AccountInfo结构体的切片。这必须包括指令的accounts字段中引用的所有账户,外加目标程序的账户。运行时在执行期间使用这些来访问实际的账户数据
指令中的 AccountMeta 告诉 Solana 你需要哪些账户以及将如何使用它们。 AccountInfo 提供你的程序所读取或写入的实际账户数据和状态。
2. invoke_signed 函数
invoke_signed 函数与 invoke 一样,使用账户和指令数据调用另一个程序,但用于你的程序必须代表 PDA 进行签名的情况。它的工作原理如下:
- 当使用
invoke_signed时,你必须提供用于派生 PDA 的种子(seeds) - 运行时使用这些种子来验证你的程序是否派生了该 PDA(即该 PDA 是否属于你的程序)
- 这允许你的程序代表 PDA 进行签名,因为 PDA 没有私钥并且不能直接签名
pub fn invoke_signed(
instruction: &Instruction,
account_infos: &[AccountInfo<'_>],
signers_seeds: &[&[&[u8]]],
) -> ProgramResult
此函数具有与 invoke 相同的参数,外加一个附加参数:
signers_seeds:需要对 CPI 指令进行签名的 PDA 的派生种子。运行时使用这些种子重新派生 PDA 并验证它是否属于你的程序。
现在我们了解了 Solana 提供的原生 CPI 函数,接下来让我们看看 Anchor 是如何使用它们的。
Anchor 如何抽象 Solana 的 CPI 函数
Anchor 通过提供包装了 invoke 和 invoke_signed 函数的两种方法,降低了构建 CPI 调用的复杂性:
1. 常规 CPI 调用(使用原始交易签名者):
当被调用程序所需的账户已经是原始交易中的签名者时,Anchor 使用 CpiContext::new() 来包装原生的 invoke 函数。以下是一个通过 System Program 转移 SOL 的示例:
let cpi_ctx = CpiContext::new(
ctx.accounts.system_program.to_account_info(),
system_program::Transfer {
from: ctx.accounts.from.to_account_info(),
to: ctx.accounts.to.to_account_info(),
}
);
system_program::transfer(cpi_ctx, amount)?;
2. PDA 签名的 CPI 调用(当你的程序需要代表 PDA 签名时):
当由你的程序控制的 PDA 必须对被调用的指令进行签名时,Anchor 使用 CpiContext::new_with_signer() 来包装原生的 invoke_signed 函数。第三个参数(&[&seeds])提供了派生 PDA 并使用其签名的种子:
let seeds = &[
b"seed-prefix",
payer.key.as_ref(),
&[bump],
];
let cpi_ctx = CpiContext::new_with_signer(
ctx.accounts.token_program.to_account_info(),
token::Transfer {
from: ctx.accounts.from.to_account_info(),
to: ctx.accounts.to.to_account_info(),
authority: ctx.accounts.authority.to_account_info(),
},
&[&seeds],
);
token::transfer(cpi_ctx, amount)?;
使用这两种方法之一构建指令上下文后,你可以将该上下文传递给相应的 Anchor CPI 辅助函数(如 system_program::transfer 或 token::transfer)进行调用。
在幕后,Anchor 对所有 CPI 调用都使用了 invoke_signed。这是因为:
- 如果没有提供签名者种子,它的工作方式与
invoke完全相同 - 如果提供了签名者种子,它就可以实现 PDA 签名
这种统一的方法意味着 Anchor 对所有的 CPI 操作只需要一条代码路径。
invoke 函数之所以以这种方式工作,是因为它的实现内部使用了 invoke_signed 函数,但为 PDA 签名者种子传递了一个空的字节切片。
pub fn invoke(instruction: &Instruction, account_infos: &[AccountInfo]) -> ProgramResult {
invoke_signed(instruction, account_infos, &[])
}
在 Solana 的 BPF 运行时中,invoke 和 invoke_signed 都调用了 sol_invoke_signed_rust 系统调用 (syscall)。此系统调用通过挂起调用者的执行、调用目标程序、管理调用栈以及在提供签名者种子时验证 PDA 派生的签名,来执行实际的跨程序调用。此外还有一个 C 语言的 ABI 变体 sol_invoke_signed_c,它为用 C 编程语言编写的程序公开了相同的行为。
为了了解 Anchor 是如何使用 invoke_signed 的,让我们检查一下 Anchor 源代码 中的 system_program::transfer 函数。请注意,它使用 system_instruction::transfer 构建了一条指令,然后使用 ctx.signer_seeds 调用了 invoke_signed:
pub fn transfer<'info>(
ctx: CpiContext<'_, '_, '_, 'info, Transfer<'info>>,
lamports: u64,
) -> Result<()> {
let ix = crate::solana_program::system_instruction::transfer(
ctx.accounts.from.key,
ctx.accounts.to.key,
lamports,
);
crate::solana_program::program::invoke_signed(
&ix,
&[ctx.accounts.from, ctx.accounts.to],
ctx.signer_seeds,
)
.map_err(Into::into)
}
在 Anchor SPL token crate 的 SPL Token transfer 函数中也可以看到相同的模式:
pub fn transfer<'info>(
ctx: CpiContext<'_, '_, '_, 'info, Transfer<'info>>,
amount: u64,
) -> Result<()> {
let ix = spl_token::instruction::transfer(
&spl_token::ID,
ctx.accounts.from.key,
ctx.accounts.to.key,
ctx.accounts.authority.key,
&[],
amount,
)?;
anchor_lang::solana_program::program::invoke_signed(
&ix,
&[ctx.accounts.from, ctx.accounts.to, ctx.accounts.authority],
ctx.signer_seeds,
)
.map_err(Into::into)
}
请注意在这两个例子中,代码一致地使用了 invoke_signed 并传递了 ctx.signer_seeds。如前所述,当没有提供种子时(常规 CPI),空的 signer_seeds 会使得 invoke_signed 的行为与 invoke 完全相同。当提供种子时(PDA 签名),它允许程序代表其 PDA 进行签名。
现在我们已经了解了 Anchor 是如何抽象跨程序调用的。接下来,我们将学习如何手动构建 CPI 指令。
在原生 Rust 中手动构建 CPI 指令
为了在原生的 Rust Solana 程序中构造和进行 CPI 调用,我们需要构建一条指令,然后调用适当的 CPI 函数。
为此,我们需要:
- 使用我们要调用的程序的
program_id、该程序在 CPI 期间需要读写的一个账户列表以及要发送的指令数据来创建一条指令。 - 然后我们使用该指令和账户来调用适当的 CPI 函数(
invoke或invoke_signed)
正如本教程开头提到的,我们将创建两个协同工作的独立 Solana 程序:
- 一个目标程序:被调用时返回数字 42(我们稍后会看到如何实现)
- 一个调用者程序:使用
invoke函数对目标程序进行 CPI 调用。
通过实现这两个程序,我们可以从两个角度观察完整的 CPI 过程,并了解数据如何在程序之间流动。
在创建我们的程序之前,让我们先设置项目结构:
mkdir solana-cpi-example
cd solana-cpi-example
创建目标程序
我们将保持目标程序简单,它只会为调用者程序返回一个值。
首先,我们创建目标程序目录并对其进行初始化(在 solana-cpi-example 内):
mkdir target-program
cd target-program
cargo init --lib
更新 target-program/Cargo.toml:
[package]
name = "target-program"
version = "0.1.0"
edition = "2021"
[lib]
crate-type = ["cdylib", "lib"]
[dependencies]
solana-program = "1.18"
将 target-program/src/lib.rs 中的代码替换为以下代码。在此程序中,我们:
- 导入必要的 Solana 依赖项,包括
solana_programcrate 中的set_return_data(我们将在下方的代码之后解释这个) - 定义一个
process_instruction函数,它将:- 创建一个值为 42 的变量,并且
- 使用
set_return_data将该值返回给调用者
// target-program/src/lib.rs
use solana_program::{
account_info::AccountInfo,
entrypoint,
entrypoint::ProgramResult,
program::set_return_data,
pubkey::Pubkey,
};
entrypoint!(process_instruction);
pub fn process_instruction(
_program_id: &Pubkey,
_accounts: &[AccountInfo],
_instruction_data: &[u8],
) -> ProgramResult {
// Create the data we want to return
let return_value: u64 = 42;
let return_bytes = return_value.to_le_bytes();
// Set the return data that the calling program can access
set_return_data(&return_bytes);
Ok(())
}
set_return_data 函数
set_return_data 函数(来自 solana_program crate)将数据存储在缓冲区中,调用程序可以在 CPI 返回后读取该缓冲区。最大返回数据大小为 1024 字节。
我们将 u64 值转换为字节并将其设置为返回数据。我们需要这样做是因为 ProgramResult 返回类型仅向运行时指示成功或失败,并不包含实际数据。Solana 引入了 set_return_data 以实现程序之间的直接数据传递,而无需使用额外的账户。在 Anchor 中,这是通过指令函数中的返回类型自动处理的。
在接下来构建调用者程序时,我们将看到如何检索此数据。
现在构建目标程序:
cargo build-sbf
创建调用者程序
接下来,我们将实现对目标程序进行 CPI 调用的程序。这将演示一个程序如何调用另一个程序。
调用者程序将处理 CPI 调用以及从目标程序检索数据。
让我们回到项目根目录并创建我们的调用者程序:
cd ..
mkdir caller-program
cd caller-program
cargo init --lib
更新 caller-program/Cargo.toml:
[package]
name = "caller-program"
version = "0.1.0"
edition = "2021"
[lib]
crate-type = ["cdylib", "lib"]
[dependencies]
solana-program = "1.18"
将 caller-program/src/lib.rs 中的代码替换为以下代码。在此程序中,我们:
- 导入必要的 Solana 依赖项,包括
solana_programcrate 中的get_return_data - 为我们的程序定义一个
process_instruction函数,它将:- 从账户数组中的第一个账户提取目标程序 ID
- 构建一个不含指令数据的 CPI 指令
- 使用
invoke()进行 CPI 调用 - 使用
get_return_data()检索返回的数据 - 记录从目标程序接收到的实际值
在代码块之后,我们将详细探讨 CPI 的构造。
// caller-program/src/lib.rs
use solana_program::{
account_info::AccountInfo,
entrypoint,
entrypoint::ProgramResult,
instruction::{AccountMeta, Instruction},
msg,
program::{invoke, get_return_data},
pubkey::Pubkey,
};
entrypoint!(process_instruction);
pub fn process_instruction(
_program_id: &Pubkey,
accounts: &[AccountInfo],
_instruction_data: &[u8],
) -> ProgramResult {
msg!("Caller program: Making CPI call to target program");
// Extract the target program's program_id from the accounts array
let target_program_account = &accounts[0];
let target_program_id = *target_program_account.key;
// In production, verify the program ID matches expected value and is executable:
// assert!(target_program_id == EXPECTED_PROGRAM_ID);
// assert!(target_program_account.executable);
// Build CPI instruction with empty data
let instruction = Instruction {
program_id: target_program_id,
accounts: vec![], // No additional accounts needed for our simple target program
data: vec![], // No instruction data needed
};
// Make the CPI call using invoke
// We pass target_program_account (an AccountInfo from our accounts parameter)
// because invoke needs the AccountInfo of the program we're calling
invoke(&instruction, &[target_program_account.clone()])?;
// Get the return data from the called program
let (_, return_data) = get_return_data().unwrap();
let value = u64::from_le_bytes(return_data[0..8].try_into().unwrap());
msg!("Caller program: Target program returned {}", value);
Ok(())
}// caller-program/src/lib.rs
use solana_program::{
account_info::AccountInfo,
entrypoint,
entrypoint::ProgramResult,
instruction::{AccountMeta, Instruction},
msg,
program::{invoke, get_return_data},
pubkey::Pubkey,
};
entrypoint!(process_instruction);
pub fn process_instruction(
_program_id: &Pubkey,
accounts: &[AccountInfo],
_instruction_data: &[u8],
) -> ProgramResult {
msg!("Caller program: Making CPI call to target program");
// Extract the target program's program_id from the accounts array
let target_program_account = &accounts[0];
let target_program_id = *target_program_account.key;
// In production, verify the program ID matches expected value and is executable:
// assert!(target_program_id == EXPECTED_PROGRAM_ID);
// assert!(target_program_account.executable);
// Build CPI instruction with empty data
let instruction = Instruction {
program_id: target_program_id,
accounts: vec![], // No additional accounts needed for our simple target program
data: vec![], // No instruction data needed
};
// Make the CPI call using invoke
// We pass target_program_account (an AccountInfo from our accounts parameter)
// because invoke needs the AccountInfo of the program we're calling
invoke(&instruction, &[target_program_account.clone()])?;
// Get the return data from the called program
let (_, return_data) = get_return_data().unwrap();
let value = u64::from_le_bytes(return_data[0..8].try_into().unwrap());
msg!("Caller program: Target program returned {}", value);
Ok(())
}
get_return_data 函数
get_return_data 函数允许我们的调用者程序从我们刚刚调用的程序中检索数据。
此函数返回 Option<(Pubkey, Vec<u8>)>——一个包含设置数据的程序 ID 和数据本身的元组。我们只关心返回数据(第二项),因此我们将其解构为 let (_, return_data) = get_return_data().unwrap()。然后我们将这些字节转换回我们期望的数据类型(在本例中为 u64)。
cargo build-sbf
拆解调用者程序中的 CPI 构造
首先,我们从账户数组中提取目标程序 ID:

然后,我们构建了定义我们的 CPI 调用的指令:
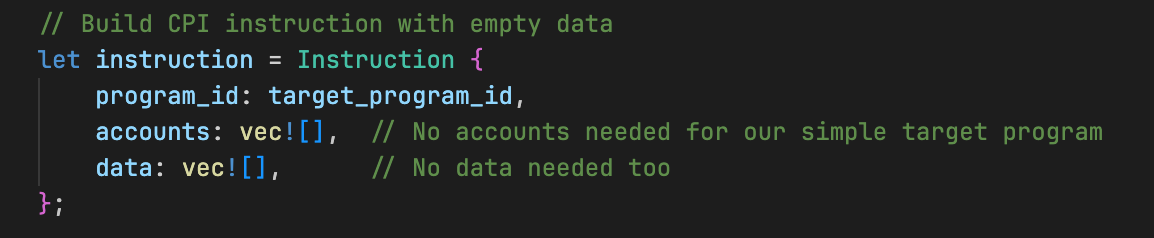
此 Instruction 结构体包含三个组件:
program_id:我们要调用的程序的地址(在本例中为目标程序的 ID)accounts:我们的指令所需的账户列表(在本例中为空)data:要传递的任何指令数据(也为空)
最后,我们使用 invoke 函数执行了 CPI:

invoke 函数接收:
- 我们构建的指令
- 该指令所需的所有 account infos(账户信息)列表
如果被调用的程序返回 ProgramError,错误将传播到运行时,执行将立即停止,整个交易失败。控制权不会返回给调用者程序。
但当 invoke 函数成功执行时,会发生以下情况:
- 调用者程序使用指令和 account infos 调用
invoke() - Solana 运行时挂起调用者程序并将执行权转移给目标程序
- 目标程序执行,调用
set_return_data(&return_bytes)以存储值 42,并返回Ok(()) - 运行时从调用者程序中断的地方(即
invoke()调用之后)恢复它的执行 - 调用者程序调用
get_return_data()从缓冲区检索字节 - 它将这些字节转换回 u64 值(42)并将其记录下来
部署和测试这两个程序
部署这两个程序
现在我们已经编写了这两个程序——目标程序和执行 CPI 的调用者程序——我们可以部署它们来测试我们的实现是否有效。
在单独的终端选项卡中运行以下命令,以启动本地测试验证器并查看日志:
solana-test-validator # in a separate terminal
solana logs # in another terminal
首先部署目标程序:
cd target-program
solana program deploy target/deploy/target_program.so
你将看到显示程序 ID 的输出。复制这个程序 ID——在设置客户端测试时你需要用到它。

部署调用者程序:
cd ../caller-program
solana program deploy target/deploy/caller_program.so
同样也复制这个程序 ID。
测试这两个程序
随着两个程序的部署完成,我们需要触发我们的调用者程序并观察结果。我们将使用 TypeScript 客户端来完成这一操作。
我们将创建一个 TypeScript 客户端,向我们的调用者程序发送一笔交易。该客户端启动了整个过程:客户端调用调用者程序,随后调用者程序对目标程序进行 CPI 调用。
现在,让我们回到项目根目录并设置我们的 TypeScript 客户端:
cd ..
mkdir client && cd client
npm init -y
npm install @solana/web3.js typescript ts-node @types/node
更新 client/package.json:
{
"scripts": {
"test": "ts-node client.ts"
}
}
创建 client/tsconfig.json:
{
"compilerOptions": {
"target": "ES2020",
"module": "commonjs",
"moduleResolution": "node",
"strict": true,
"esModuleInterop": true,
"skipLibCheck": true,
"types": ["node"]
},
"include": ["*.ts"]
}
接下来,创建 client/client.ts 并添加下方的代码。在此客户端代码中,我们:
- 设置与本地 Solana 集群的连接
- 为目标程序和调用者程序的 ID(
TARGET_PROGRAM_ID和CALLER_PROGRAM_ID)定义常量 - 创建一个签名者账户并为其提供用于测试的 SOL 资金
- 创建一条调用我们调用者程序的指令
- 将目标程序 ID 作为账户传入,以便调用者程序知道要通过 CPI 调用哪个程序
- 执行交易并显示交易签名
import {
Connection,
Keypair,
LAMPORTS_PER_SOL,
PublicKey,
Transaction,
TransactionInstruction,
sendAndConfirmTransaction,
} from "@solana/web3.js";
// Replace these with your actual program IDs
const TARGET_PROGRAM_ID = new PublicKey("YOUR_TARGET_PROGRAM_ID_HERE");
const CALLER_PROGRAM_ID = new PublicKey("YOUR_CALLER_PROGRAM_ID_HERE");
const connection = new Connection("http://localhost:8899", "confirmed");
async function testCPI() {
console.log("Testing Cross-Program Invocation\n");
// Create and fund a signer account
const signer = Keypair.generate();
console.log("Funding signer account...");
await connection.requestAirdrop(signer.publicKey, LAMPORTS_PER_SOL);
await new Promise((resolve) => setTimeout(resolve, 2000));
console.log(`Signer: ${signer.publicKey.toString()}`);
console.log(`Target Program: ${TARGET_PROGRAM_ID.toString()}`);
console.log(`Caller Program: ${CALLER_PROGRAM_ID.toString()}\n`);
// Create instruction to call our caller program
// The caller program expects the target program ID as the first account
const instruction = new TransactionInstruction({
keys: [{ pubkey: TARGET_PROGRAM_ID, isSigner: false, isWritable: false }],
programId: CALLER_PROGRAM_ID,
data: Buffer.alloc(0), // No instruction data needed
});
const transaction = new Transaction().add(instruction);
console.log("Executing CPI test...");
const signature = await sendAndConfirmTransaction(
connection,
transaction,
[signer],
{
commitment: "confirmed",
preflightCommitment: "confirmed",
},
);
}
testCPI().catch(console.error);
确保将 TARGET_PROGRAM_ID 和 CALLER_PROGRAM_ID 替换为你实际部署的程序 ID。
现在运行测试:
npm run test # inside the client/ directory
如果我们查看日志,可以看到调用者程序对目标程序的 CPI 调用已成功,并且调用者程序从目标程序接收到了值 42,并将其记录了下来。

程序执行概述
当我们运行程序测试时,会发生一系列事件。以下是发生过程的概述:
- TypeScript 客户端调用调用者程序
- 调用者程序准备 CPI 指令并调用
invoke() - Solana 运行时将执行权切换到目标程序
- 目标程序执行,存储返回值 42,并返回
Ok(()) - 最后,运行时将执行权切换回调用者程序,调用者程序检索并记录下值 42
后续步骤
在本教程中我们没有使用 invoke_signed,因为它要求在原生 Rust 中创建账户和 PDA,而我们尚未涵盖这些内容。当我们学习在原生 Rust 程序中创建 PDA 的教程时,我们将看到 invoke_signed 的示例。
现在,构建调用者程序:
此函数返回 Option<(Pubkey, Vec<u8>)>——一个包含设置数据的程序 ID 和数据本身的元组。我们只关心返回数据(第二个元素),因此我们将其解构为 let (_, return_data) = get_return_data().unwrap()。然后我们将这些字节转换回我们期望的数据类型(在本例中为 u64)。
get_return_data 函数允许我们的调用者程序从我们刚刚调用的程序中检索数据。
这种机制允许程序不仅可以相互调用,还可以将数据传递回调用者。
- 它将这些字节转换回 u64 值(42)并将其记录下来
- 调用者程序调用
get_return_data()从缓冲区检索字节 - 运行时从调用者程序中断的地方(即
invoke()调用之后)恢复它的执行 - 目标程序执行,调用
set_return_data(&return_bytes)以存储值 42,并返回Ok(()) - Solana 运行时挂起调用者程序并将执行权转移给目标程序
本文是 Solana 开发教程系列的一部分。