ZK-addition-dapp with Noir and Nextjs
We will demonstrate a step-by-step exploration of a basic zk-dapp designed for verifying additions. This application enables users to prove that the sum of two numbers, X and Y, equals Z without disclosing the actual numbers on the blockchain. Although solving this problem does not necessarily demand zero-knowledge proofs, we will utilize them in this example to maintain simplicity and enhance comprehension.
Let’s dive into the code, or skip to running the dapp.
We will start by cloning noir-zk-fullstack-example repo locally;
git clone https://github.com/RareSkills/noir-zk-fullstack-example.gitNOTE: To effectively understand the code, it is necessary to have a working knowledge of noir and typescript.
Installing dependencies
We already have specific versions stated in package.json file. To install, run:
npm installDo not use yarn as it is incapable of retrieving the specific versions of NPM that is required.
Deploy (Backend)
In order to build the project and deploy contracts locally, it is necessary to initiate a local development EVM at http://localhost:8545. To accomplish this, we first change the name of the file .env.example to .env then open a new terminal to execute the following command:
npx hardhat nodeYou have the flexibility to choose different networks to run on. To do so, you need to make the following adjustments: firstly, modify the contents of the .env file by adding the deployer’s private key and Alchemy’s API key. Afterward, navigate to the hardhat.config.ts file and include a new network configuration.
Once done, you can deploy using the NETWORK environment variable to specify the desired network. For example NETWORK=mumbai npm run build or NETWORK=sepoia npm run build. For the purpose of this dapp, we will be deploying locally using this command:
NETWORK=localhost npm run buildExecuting the aforementioned command triggers the execution of four additional commands in the order mentioned:
- hardhat run scripts/genContract.ts
- hardhat compile
- hardhat run –network ${NETWORK} scripts/deploy.ts
- next build
What happens when these are executed?
-
hardhat run scripts/genContract.ts
import { NoirServer } from '../utils/noir/noirServer';

async function main() {
const noir = new NoirServer();await noir.compile();
noir.getSmartContract()
process.exit();
}

// We recommend this pattern to be able to use async/await everywhere
// and properly handle errors.
main().catch(error => {
console.error(error);
process.exitCode = 1;
});
Executing
genContract.tsscript calls compile() method from NoirServer class which compiles the noir circuit written in./circuits/srcdirectory and also generates ACIR (Abstract Circuit Intermediate Representation). Also initializes this.prover and this.verifier by calling barretenberg’s setup_generic_prover_and_verifier with the ACIR generated.async compile() { // I'm running on the server so I can use the file system initialiseResolver((id: any) => { try { const code = fs.readFileSync(`circuits/src/${id}`, { encoding: 'utf8' }) as string; return code } catch (err) { console.error(err); throw err; } }); const compiled_noir = compile({ entry_point: 'main.nr', }); this.compiled = compiled_noir; this.acir = acir_read_bytes(this.compiled.circuit); [this.prover, this.verifier] = await setup_generic_prover_and_verifier(this.acir); };Additionally, the getSmartContract method is called, which generates a solidity contract at
./contract/plonk_vk.sol. This contract is created as part of the execution process.getSmartContract() { const sc = this.verifier.SmartContract(); // The user must have a folder called 'contract' in the root directory. If not, we create it. if (!fs.existsSync(path.join(__dirname, '../../contract'))) { console.log('Contract folder does not exist. Creating...'); fs.mkdirSync(path.join(__dirname, '../../contract')); } // If the user already has a file called 'plonk_vk.sol' in the 'contract' folder, we delete it. if (fs.existsSync(path.join(__dirname, '../../contract/plonk_vk.sol'))) { fs.unlinkSync(path.join(__dirname, '../../contract/plonk_vk.sol')); } // We write the contract to a file called 'plonk_vk.sol' in the 'contract' folder. fs.writeFileSync(path.join(__dirname, '../../contract/plonk_vk.sol'), sc, { flag: 'w', }); return sc; } -
hardhat compile
This command compiles the contract(s) located in the
./contractdirectory. In this specific case, it compiles the plonk_vk.sol contract. -
hardhat run –network ${NETWORK} scripts/deploy.ts
import { writeFileSync } from 'fs';
import { ethers } from 'hardhat';
async function main() {
    // Deploy the verifier contractconst Verifier = await ethers.getContractFactory('TurboVerifier');
    const verifier = await Verifier.deploy();

    // Get the address of the deployed verifier contract
    const verifierAddr = await verifier.deployed();

    // Create a config object
    const config = {
        chainId: ethers.provider.network.chainId,
        verifier: verifierAddr.address,
    };

    // Print the config
    console.log('Deployed at', config);
    writeFileSync('utils/addresses.json', JSON.stringify(config), { flag: 'w' });
    process.exit();
}

// We recommend this pattern to be able to use async/await everywhere
// and properly handle errors.
main().catch(error => {
console.error(error);
process.exitCode = 1;
});
This script deploys plonk_vk.sol to the network assigned to NETWORK environment variable and write the deployed address to
./utils/addresses.json. -
next build
Generates an optimized version of our application for production.
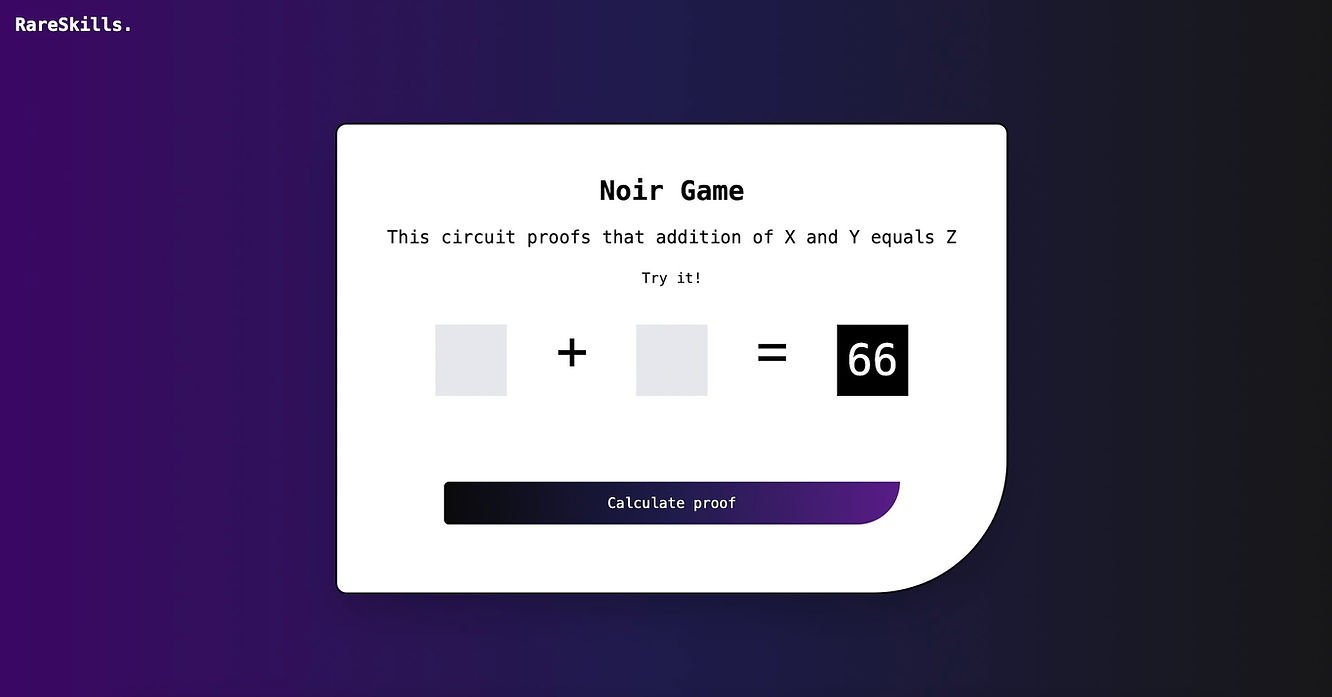
Calculate Proof (Frontend)
To start a development server, execute the following command:
npm run devNavigate to http://localhost:3000 on your web browser. Connect your MetaMask wallet to the dapp and switch your Metamask network to Localhost network. Then, provide two input values and click on the Calculate proof button. This will initiate the proof calculation and also verify onchain.
Within the ./components directory, the components.tsx file contains two noteworthy functions that handles those actions:
- calculateProof
- verifyProof The code is commented on for understanding.
1. calculateProof
// Calculates proof
const calculateProof = async () => {
   // only launch if we do have an acir to calculate the proof from
   // set a pending state to show a spinner
   setPending(true);

   if (input.x == "" || input.y == "") {
      toast.error('Fields can not be empty!');
      setPending(false);
   } else {

      // launching a new worker for the proof calculation
      const worker = new Worker(new URL('../utils/prover.ts', import.meta.url));

      // handling the response from the worker
      worker.onmessage = e => {
         if (e.data instanceof Error) {
            toast.error('Error while calculating proof');
            setPending(false);
         } else {
            toast.success('Proof calculated');
            setProof(e.data);
            setPending(false);
         }
      };

      // sending the acir and input to the worker
      worker.postMessage({ input });
   }
};
It first checks if the input fields are not empty. If the input fields contain values, it proceeds to sending those inputs to the newly created worker and also calling onmessage function in ./utils/prover.ts file.
// @ts-ignore
import { NoirBrowser } from '../utils/noir/noirBrowser';

// // Add an event listener for the message event
onmessage = async event => {
   try {
      const { input } = event.data;
      const hexInputObj = Object.entries(input).reduce((newObj, [key, value]) => {
         newObj[key] = (value as number).toString(16).padStart(2, '0');
         return newObj;
      }, {});

      const noir = new NoirBrowser();
      await noir.compile();
      const proof = await noir.createProof({ input: hexInputObj })
      console.log(hexInputObj)
      postMessage(proof);
   } catch (er) {
      console.log(er);
      postMessage(er);
   } finally {
      close();
   }
};
To create the proof, the create_proof function from the barretenberg library is invoked. It accepts three arguments: this.prover object, acir, and input.
async createProof({input} : {input: any}) {
    const proof = await create_proof(this.prover, this.acir, input);
    return proof;
}
1. verifyProof
const verifyProof = async () => {
   // only launch if we do have an acir and a proof to verify
   if (proof) {
      // launching a new worker for the verification
      const worker = new Worker(new URL('../utils/verifier.ts', import.meta.url));
      console.log('worker launched');

      // handling the response from the worker
      worker.onmessage = async e => {
         if (e.data instanceof Error) {
            toast.error('Error while verifying proof');
         } else {
            toast.success('Proof verified');

         // Verifies proof on-chain
         const ethers = new Ethers();
         const ver = await ethers.contract.verify(proof);
         if (ver) {
            toast.success('Proof verified on-chain!');
            setVerification(true);
         } else {
            toast.error('Proof failed on-chain verification');
            setVerification(false);
         }
      }
   };

   // sending the acir and proof to the worker
   worker.postMessage({ proof });
   }
};
It first checks if there is a proof available for verification. If a proof exists, it launches a new worker. The proof is then sent to the worker, and the onmessage function in the ./utils/verifier.ts file is called to handle the incoming proof by calling barretenberg’s verify_proof function.
async verifyProof({proof} : {proof: any}) {
    const verification = await verify_proof(this.verifier, proof);
    return verification;
}
If the entire process is working as intended, the function should return true.
Run dApp
1. Clone repo locally
git clone https://github.com/RareSkills/noir-zk-fullstack-example.git 2. Install dependencies
npm install 3. Startup a local development EVM at http://localhost:8545
change the name of the file .env.example to .env then open a new terminal to execute the following command:
npx hardhat node 4. Build the project
NETWORK=localhost npm run build 5. Start development server
npm run dev Open http://localhost:3000 on your web browser. Connect your MetaMask wallet to the dapp and switch your Metamask network to Localhost network. If you can not find it, open Metamask network settings, add a new network and configure it with the following details:
- Network name
- Localhost 8545
- New RPC URL
- http://localhost:8545
- Chain ID - 1337 - Currency Symbol - ETH
Save the network configuration, switch your MetaMask wallet to the Localhost network and test the dApp 🙂
Conclusion
Due to the active development of Noir, the project frequently experiences updates and improvements. Consequently, it is not uncommon for the latest versions of various packages to exhibit incompatibilities with one another.
Staying updated with the latest release notes and community discussions is crucial to avoid potential issues caused by version incompatibilities and ensure a seamless development experience.
Learn More
For more on zero knowledge programming, see our zero knowledge course. For advanced smart contract development, see our Solidity Bootcamp.
Originally Published May 28, 2023