इस ट्यूटोरियल के पहले भाग में, हमने keypairs का उपयोग करके native Rust में स्टोरेज अकाउंट बनाए थे, जहां अकाउंट को अपने इनिशियलाइज़ेशन (initialization) के लिए साइन (sign) करने के लिए एक प्राइवेट की (private key) की आवश्यकता थी। अब हम Program Derived Addresses (PDAs) का उपयोग करके एक अलग दृष्टिकोण का पता लगाएंगे, जिनमें प्राइवेट की (private keys) नहीं होती हैं, फिर भी एक विशेष साइनिंग मैकेनिज़्म (signing mechanism) के माध्यम से उन्हें स्टोरेज अकाउंट के रूप में उपयोग किया जा सकता है।
PDAs के साथ स्टोरेज अकाउंट बनाना
कोड में जाने से पहले, आइए समझें कि PDA अकाउंट निर्माण, keypair-आधारित अकाउंट्स से कैसे अलग है:
Keypair Accounts:
- इनमें एक प्राइवेट की होती है जो ट्रांज़ैक्शन को साइन कर सकती है।
- keypair को अपने स्वयं के इनिशियलाइज़ेशन के लिए साइन करना आवश्यक है।
- अकाउंट बनाते समय
isSigner: trueकी आवश्यकता होती है।
PDA Accounts:
- seeds और program ID से डिटरमिनिस्टिक (deterministically) रूप से डिराइव (derive) किए जाते हैं।
- इनमें कोई प्राइवेट की नहीं होती है, इसलिए ये सीधे ट्रांज़ैक्शन या इंस्ट्रक्शन को साइन नहीं कर सकते।
- हमारा प्रोग्राम
invoke_signed()का उपयोग करके PDA की ओर से एक साइनर (signer) के रूप में कार्य करता है। - ओनरशिप के प्रमाण (proof of ownership) के रूप में एड्रेस को डिराइव करने के लिए उपयोग किए गए seeds की आवश्यकता होती है।
इस मूलभूत अंतर का मतलब है कि हम PDA अकाउंट बनाते समय invoke() के बजाय invoke_signed() का उपयोग करेंगे, क्योंकि System Program को किसी भी अकाउंट को इनिशियलाइज़ करने के लिए एक सिग्नेचर (signature) की आवश्यकता होती है।
PDA स्टोरेज प्रोग्राम बनाना
src/lib.rs (भाग 1 से) के कोड को इस वर्ज़न से बदलें। नीचे दिए गए कोड में, हम:
- PDA निर्माण के लिए अतिरिक्त डिपेंडेंसीज़ (
invoke_signed,Rent,Sysvar) इम्पोर्ट करते हैं। - आवश्यक अकाउंट्स (storage account, signer, system program, rent) प्राप्त करते हैं।
- वेरीफाई करते हैं कि हमें सही system program प्राप्त हुआ है और signer अकाउंट वैलिड है।
- 100 की वैल्यू के साथ
CounterDataबनाते हैं और इसे Borsh के साथ सीरियलाइज़ (serialize) करते हैं। - PDA एड्रेस को डिराइव करने के लिए seed और bump के साथ
invoke_signedका उपयोग करके एक PDA स्टोरेज अकाउंट बनाते हैं। - सीरियलाइज़्ड डेटा को सीधे अकाउंट में लिखते हैं।
use borsh::{BorshDeserialize, BorshSerialize};
use solana_program::{
account_info::{next_account_info, AccountInfo},
entrypoint,
entrypoint::ProgramResult,
msg,
program::invoke_signed,
program_error::ProgramError,
pubkey::Pubkey,
system_instruction, system_program,
sysvar::{rent::Rent, Sysvar},
};
entrypoint!(process_instruction);
// This represents the data we'll store in our account
// We've added Borsh derive macros for serialization and deserialization
#[derive(BorshSerialize, BorshDeserialize, Debug)]
pub struct CounterData {
pub count: u64,
}
pub fn process_instruction(
program_id: &Pubkey,
accounts: &[AccountInfo],
_instruction_data: &[u8],
) -> ProgramResult {
msg!("Storage Write Program: Creating PDA storage account and writing data");
let accounts_iter = &mut accounts.iter();
// Get the accounts we need
// next_account_info() extracts the next AccountInfo from the iterator
let storage_account = next_account_info(accounts_iter)?;
let signer = next_account_info(accounts_iter)?;
let system_program = next_account_info(accounts_iter)?;
let rent = next_account_info(accounts_iter)?;
// Verify the system program
if system_program.key != &system_program::ID {
msg!("Invalid system program");
return Err(ProgramError::IncorrectProgramId);
}
// Verify the signer is a signer
if !signer.is_signer {
msg!("Signer must be a signer");
return Err(ProgramError::MissingRequiredSignature);
}
// Create our counter data
let counter_data = CounterData { count: 100 };
let serialized_data = counter_data.try_to_vec()?;
let space = serialized_data.len();
msg!("Creating PDA storage account with {} bytes", space);
msg!("Serialized data: {:?}", serialized_data);
// Get rent info
let rent_sysvar = Rent::from_account_info(rent)?;
let lamports = rent_sysvar.minimum_balance(space);
// Define the seed for our PDA
let seed = b"storage";
let (expected_pda, bump_seed) = Pubkey::find_program_address(&[seed], program_id);
// Verify the provided account is the expected PDA
if storage_account.key != &expected_pda {
msg!("Invalid PDA provided");
return Err(ProgramError::InvalidAccountData);
}
// Create the account using system program with PDA signing
let create_account_ix = system_instruction::create_account(
signer.key,
storage_account.key,
lamports,
space as u64,
program_id,
);
// Accounts needed for the create_account instruction
let accounts = &[
signer.clone(),
storage_account.clone(),
system_program.clone(),
];
// Seeds for PDA signing (seed + bump)
let signer_seeds = &[&seed[..], &[bump_seed]];
invoke_signed(&create_account_ix, accounts, &[&signer_seeds[..]])?;
// Write data to the account
let mut account_data = storage_account.try_borrow_mut_data()?;
account_data.copy_from_slice(&serialized_data);
msg!("Data written to PDA storage account");
Ok(())
}
अब जब हमने पूरा इम्प्लीमेंटेशन देख लिया है, तो आइए उस मैकेनिज़्म की जांच करें जो PDA अकाउंट निर्माण को संभव बनाता है।
PDA निर्माण के लिए invoke_signed() का उपयोग करना
invoke_signed() हमारे प्रोग्राम को उस एड्रेस को डिराइव करने के लिए उपयोग किए गए seeds प्रदान करके PDA के लिए एक साइनर के रूप में कार्य करने की अनुमति देता है। Solana रनटाइम यह वेरीफाई करता है कि seeds वास्तव में PDA को डिराइव करते हैं, और यदि वे ऐसा करते हैं, तो यह मानता है कि PDA ने ट्रांज़ैक्शन को साइन किया है।
इस मैकेनिज़्म के बिना, System Program create_account इंस्ट्रक्शन को रिजेक्ट कर देगा क्योंकि PDA एड्रेस में एक वैलिड सिग्नेचर नहीं होगा।
signers_seeds पैरामीटर को समझना
invoke_signed() एक ही CPI कॉल में साइन करने वाले कई PDAs को हैंडल कर सकता है। यही कारण है कि signers_seeds का स्ट्रक्चर नेस्टेड (nested) है — यह PDA seed एरे (arrays) का एक एरे है।
यहाँ एक PDA के लिए हमारा seeds स्ट्रक्चर है:
let seed = b"storage";
let bump_seed = bump_seed;
// Seeds that derive our PDA: ["storage" + bump]
let signer_seeds: &[&[&[u8]]] = &[
&[seed, &[bump_seed]] // ← seeds for our one PDA
];
invoke_signed(&create_account_ix, accounts, signer_seeds)?;
नेस्टिंग के तीन स्तरों (बाहर से अंदर की ओर) का विश्लेषण:
&[ // Outer: array of PDA seed sets (we have 1 PDA signing)
&[ // Middle: this PDA's seed components (we have 2)
seed, // Component 1: "storage"
&[bump_seed] // Component 2: bump byte
]
]
- Outer
&[...]: प्रति PDA साइनर के लिए एक seed सेट (हमारे मामले में, केवल 1) - Middle
&[...]: प्रत्येक PDA के लिए कई seed कॉम्पोनेन्ट (हम 2 का उपयोग करते हैं: string और bump) - Inner
&[u8]: प्रत्येक seed कॉम्पोनेन्ट के व्यक्तिगत बाइट्स (bytes)
यदि हमारे पास साइन करने वाले दो PDAs होते, तो यह कुछ ऐसा दिखता:
let signer_seeds: &[&[&[u8]]] = &[
&[seed1, &[bump1]], // First PDA's seeds
&[seed2, &[bump2]], // Second PDA's seeds
];
PDA स्टोरेज अकाउंट निर्माण प्रक्रिया को समझना
अब जब हम समझ गए हैं कि invoke_signed() कैसे काम करता है, तो आइए देखते हैं कि हमने अपना PDA स्टोरेज अकाउंट बनाने के लिए इसका उपयोग कैसे किया।
ऊपर दिए गए कोड में, आप देख सकते हैं कि हम PDA एड्रेस को डिराइव करने से शुरुआत करते हैं:

यह हमारे program ID और “storage” seed के आधार पर एक डिटरमिनिस्टिक एड्रेस डिराइव करता है। bump_seed एक सिंगल बाइट है जो यह सुनिश्चित करता है कि एड्रेस वैलिड है।
इसके बाद, हम वेरीफाई करते हैं कि क्लाइंट से पास किया गया अकाउंट हमारे अपेक्षित (expected) PDA से मेल खाता है:
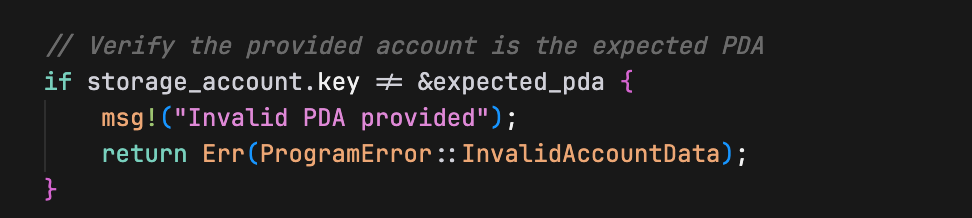
यह सुनिश्चित करता है कि क्लाइंट सही PDA एड्रेस पास कर रहा है जिसे हमने डिराइव किया है।
अंत में, हम स्टोरेज अकाउंट बनाते हैं और invoke_signed का उपयोग करके इसमें सीरियलाइज़्ड स्ट्रक्चर (serialized struct) लिखते हैं:
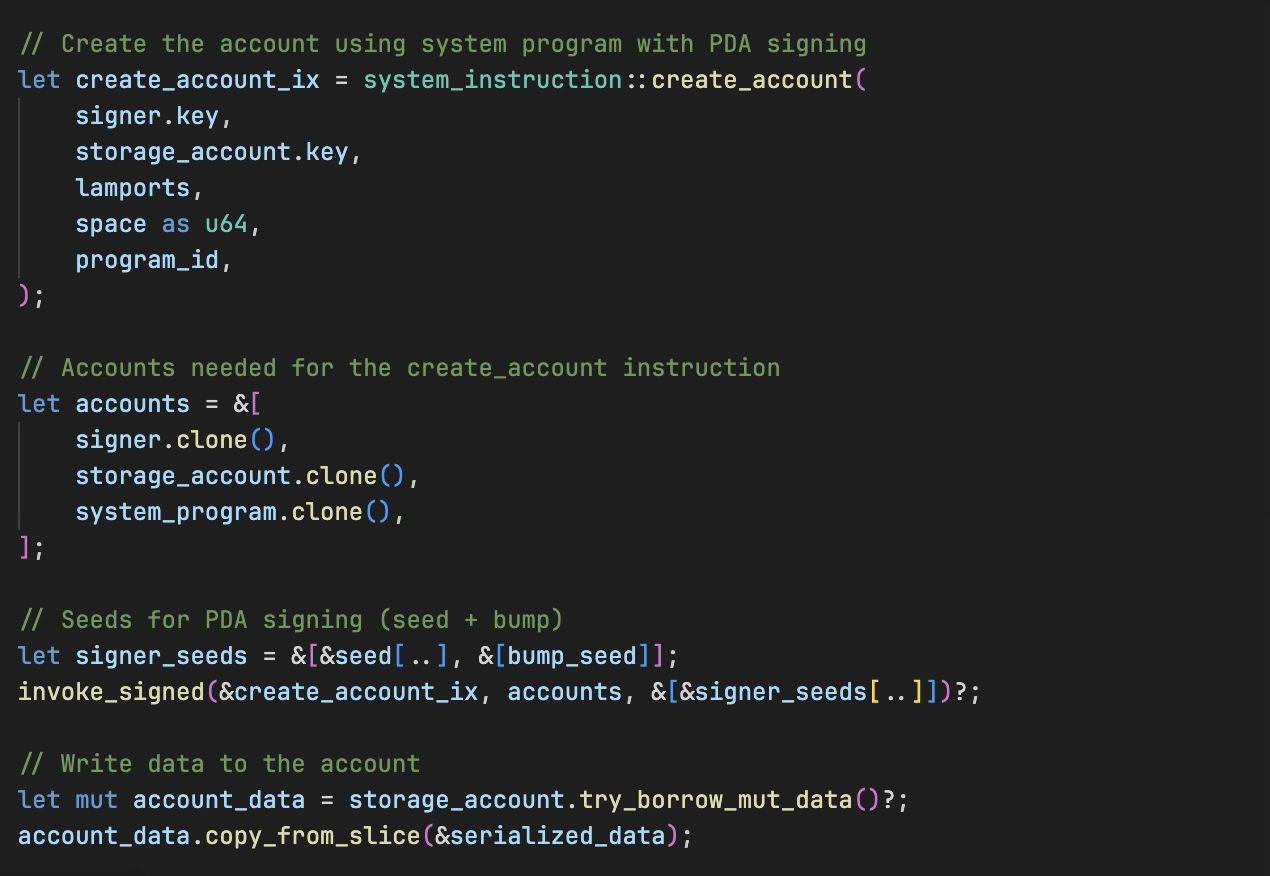
System Program डिटरमिनिस्टिक PDA एड्रेस पर अकाउंट बनाता है, और हमारा प्रोग्राम इसका ओनर (owner) बन जाता है।
PDA स्टोरेज क्रिएशन की टेस्टिंग
अब आइए PDA दृष्टिकोण (approach) का परीक्षण करें। PDA स्टोरेज का परीक्षण करने के लिए अपने client/client.ts को बदलें। इस क्लाइंट में, हम:
- एक signer keypair बनाते हैं और
PublicKey.findProgramAddressSyncका उपयोग करके “storage” seed और एक bump seed के साथ एक PDA स्टोरेज एड्रेस डिराइव करते हैं। - signer अकाउंट में SOL एयरड्रॉप (Airdrop) करते हैं।
- PDA स्टोरेज बनाने के लिए आवश्यक अकाउंट्स (PDA account, signer account, system program, rent) हमारे प्रोग्राम में पास करते हैं।
- PDA अकाउंट बनाने और डेटा लिखने के लिए ट्रांज़ैक्शन एक्ज़ीक्यूट (execute) करते हैं।
- अकाउंट डेटा को वापस पढ़ते हैं और वेरीफाई करते हैं कि यह सही ढंग से लिखा गया था (कि count की वैल्यू ठीक 100 है)।
import {
Connection,
Keypair,
LAMPORTS_PER_SOL,
PublicKey,
SystemProgram,
SYSVAR_RENT_PUBKEY,
Transaction,
TransactionInstruction,
sendAndConfirmTransaction,
} from '@solana/web3.js';
const PROGRAM_ID = new PublicKey('YOUR_PROGRAM_ID_HERE'); // Replace with your actual program ID
const connection = new Connection('<http://localhost:8899>', 'confirmed');
async function testPDAStorage() {
console.log('Testing PDA Storage Creation\\n');
// Create accounts
const signer = Keypair.generate();
// Create PDA for storage
const [pdaStorage, _bump] = PublicKey.findProgramAddressSync(
[Buffer.from("storage")],
PROGRAM_ID
);
// Fund the signer account
console.log('Funding signer account...');
await connection.requestAirdrop(signer.publicKey, LAMPORTS_PER_SOL);
await new Promise(resolve => setTimeout(resolve, 2000));
console.log(`Signer: ${signer.publicKey.toString()}`);
console.log(`PDA Storage: ${pdaStorage.toString()}\\n`);
// Test PDA storage account
console.log('=== Testing PDA Storage ===');
const pdaIx = new TransactionInstruction({
keys: [
{ pubkey: pdaStorage, isSigner: false, isWritable: true },
{ pubkey: signer.publicKey, isSigner: true, isWritable: true },
{ pubkey: SystemProgram.programId, isSigner: false, isWritable: false },
{ pubkey: SYSVAR_RENT_PUBKEY, isSigner: false, isWritable: false },
],
programId: PROGRAM_ID,
data: Buffer.alloc(0),
});
const pdaTx = new Transaction().add(pdaIx);
const pdaSig = await sendAndConfirmTransaction(connection, pdaTx, [signer]);
console.log(`PDA transaction: ${pdaSig}\\n`);
// Verify PDA data was written correctly
console.log('=== Verifying PDA Data ===');
const pdaAccountInfo = await connection.getAccountInfo(pdaStorage);
if (pdaAccountInfo && pdaAccountInfo.data.length > 0) {
console.log('PDA account data length:', pdaAccountInfo.data.length, 'bytes');
console.log('Raw PDA data:', Array.from(pdaAccountInfo.data));
// Deserialize the PDA data back to verify
const pdaData = new Uint8Array(pdaAccountInfo.data);
// DataView lets us read binary data as specific types (u64 in this case)
// getBigUint64(0, true) reads 8 bytes starting at offset 0, little-endian
const pdaCount = new DataView(pdaData.buffer).getBigUint64(0, true);
console.log('Deserialized PDA count value:', pdaCount.toString());
if (pdaCount === 100n) {
console.log('Success! PDA data was written correctly.');
} else {
console.log('Error: Expected PDA count 100, got', pdaCount.toString());
}
} else {
console.log('Error: Could not read PDA account data');
}
}
testPDAStorage().catch(console.error);
एक बार फिर, सुनिश्चित करें कि PROGRAM_ID वेरिएबल आपके program ID पर सेट है।
साथ ही, यह सुनिश्चित करें कि आपका लोकल Solana वैलिडेटर (validator) चल रहा है और प्रोग्राम उस पर डिप्लॉय (deploy) कर दिया गया है।
अब टेस्ट रन करें:
cd client
npm run test
आप देखेंगे कि counter वैल्यू 100 के साथ PDA स्टोरेज अकाउंट बन रहा है।
यह प्रदर्शित करता है कि PDAs का उपयोग करके प्योर (pure) Rust Solana प्रोग्राम्स में स्टोरेज अकाउंट कैसे बनाएं और डेटा कैसे लिखें।
यह लेख Solana development पर एक ट्यूटोरियल सीरीज़ का हिस्सा है।