在 Solana 中,编写依赖时间流逝的测试用例是很棘手的。我们可能想测试代码在一天过去后会发生什么,但我们不能让测试用例真的运行一天,因为这会使测试变得不切实际。LiteSVM 通过让你能够瞬间将区块链时钟向前拨动来解决这个问题,就像是你本地测试的“时间旅行”。
为了展示它在实践中是如何工作的,我们将使用 Anchor 为 NFT 构建一个基础的荷兰式拍卖程序。荷兰式拍卖以一个高价开始,随着时间的推移自动降价,直到有买家接受当前价格。这是对时间敏感行为的一个明确示例,而 LiteSVM 让这种测试变得简单得多。
LiteSVM 的工作原理类似于 Solana 的本地验证者节点(solana-test-validator),但它让我们在测试环境中对本地区块链状态拥有更多的控制权。它可以在我们的 TypeScript 测试中使用,使得测试拍卖或归属(vesting)等基于时间的逻辑变得轻而易举。
如果你熟悉以太坊开发,LiteSVM 的时间操纵功能类似于 Foundry 的 vm.warp(用于推进区块时间戳),但它是专门为 Solana 基于 slot 的架构量身定制的。
以下是我们在本文将要介绍的内容概述:
- 我们将创建一个用于 NFT 销售的荷兰式拍卖程序,包含创建拍卖和以递减价格购买 NFT 的功能
- 我们将解释这些功能并为它们编写测试
- 最后,我们将使用 LiteSVM 将时间向前推进 15 分钟,无需等待即可测试价格衰减,并验证拍卖价格是否正确下降
现在,让我们来创建这个荷兰式拍卖程序。
创建荷兰式拍卖程序
如前所述,荷兰式拍卖从高价开始,随时间降价,直到买家接受。为了保证交付,我们将 NFT 锁定在一个由程序控制的金库(托管)中。这可以防止卖家撤回或重复出售 NFT,并让买家不必在付款后依赖卖家来释放 NFT。一旦买家接受价格,该金库允许程序原子化地完成交换结算。
这个荷兰式拍卖程序将仅包含两个函数:
- 一个
initialize_auction函数,用于创建所需的账户,并将卖家的 NFT 存入由我们的程序拥有的金库账户中 - 一个
buy函数,允许买家以当前的拍卖价格使用 SOL 购买 NFT。
接下来,我们将创建以下账户:
Auction:一个由我们的程序拥有的 PDA,用于存储拍卖详情,如起拍价、拍卖时长等。Vault Authority:这将是一个由我们的程序拥有的 PDA,用于在发生销售时授权将 NFT 转移给买家。我们将在本文的“为什么我们需要金库权限 PDA?”一节中对此进行更详细的讨论。Vault:一个关联代币账户(ATA),用于持有存入的 NFT。它由Vault AuthorityPDA 拥有。
现在创建一个名为 dutch-auction 的新 Anchor 项目,并使用以下依赖项修改 programs/dutch-auction/Cargo.toml 文件:
anchor-spl用于 SPL 代币功能features下的anchor-spl/idl-build用于在生成的 IDL 文件中包含 SPL 类型
[package]
name = "dutch-auction"
version = "0.1.0"
description = "Created with Anchor"
edition = "2021"
[lib]
crate-type = ["cdylib", "lib"]
name = "dutch_auction"
[features]
default = []
cpi = ["no-entrypoint"]
no-entrypoint = []
no-idl = []
no-log-ix-name = []
idl-build = ["anchor-lang/idl-build", "anchor-spl/idl-build"]
[dependencies]
anchor-lang = "0.30.1"
anchor-spl = "0.30.1"
你可以运行 anchor build 来确认依赖项没有问题。
初始化拍卖程序
现在我们已经准备好了依赖项,将 programs/dutch-auction/src/lib.rs 中的程序代码替换为以下包含 initialize_auction 函数的代码,该函数执行以下操作:
- 初始化拍卖账户,并在账户中记录拍卖详情和持续时间(以秒为单位)。
- 将拍卖的 NFT 从卖家的关联代币账户(ATA)转移到我们程序拥有的金库(也是一个 ATA)中。
use anchor_lang::prelude::*;
use anchor_lang::solana_program::{program::invoke, system_instruction};
use anchor_spl::associated_token::AssociatedToken;
use anchor_spl::token::{self, Mint, Token, TokenAccount, Transfer};
declare_id!("GKP6La354ejTfqNDW4gdzC2mzNjnP6cMY1vtH6EN15zq");
#[program]
pub mod dutch_auction {
use super::*;
pub fn initialize_auction(
ctx: Context<InitializeAuction>,
starting_price: u64,
floor_price: u64,
duration: i64, // in seconds
) -> Result<()> {
// Initialize the auction account and set seller details
let auction = &mut ctx.accounts.auction;
auction.seller = ctx.accounts.seller.key();
auction.starting_price = starting_price;
auction.floor_price = floor_price;
auction.duration = duration;
auction.start_time = Clock::get()?.unix_timestamp;
auction.token_mint = ctx.accounts.mint.key();
// Move 1 token from seller ATA into vault escrow
let cpi_accounts = Transfer {
from: ctx.accounts.seller_ata.to_account_info(),
to: ctx.accounts.vault.to_account_info(),
authority: ctx.accounts.seller.to_account_info(),
};
let cpi_ctx = CpiContext::new(ctx.accounts.token_program.to_account_info(), cpi_accounts);
token::transfer(cpi_ctx, 1)?;
Ok(())
}
}
运行 anchor keys sync 将程序 ID 替换为你自己的 ID。
然后,将带有 Auction 状态的 InitializeAuction 账户结构体添加到程序代码中。
InitializeAuction 指定了拍卖初始化期间涉及的以下账户:
auction:用于存储拍卖状态(起拍价、持续时间、卖家信息等)的账户。seller:创建拍卖并签署交易的 NFT 所有者。seller_ata:持有待拍卖 NFT 的卖家关联代币账户。vault_auth:作为一个 PDA(程序派生地址),它是金库账户的权限控制者。这允许我们的程序控制 NFT 的转移。vault(托管):在拍卖期间持有卖家存入的 NFT 的关联代币账户。它由Vault AuthorityPDA 拥有。mint:代表被拍卖代币的 NFT 铸币账户。
#[derive(Accounts)]
pub struct InitializeAuction<'info> {
#[account(init, payer = seller, space = 8 + Auction::INIT_SPACE)]
pub auction: Account<'info, Auction>,
#[account(mut)]
pub seller: Signer<'info>,
#[account(
mut,
associated_token::mint = mint,
associated_token::authority = seller
)]
pub seller_ata: Account<'info, TokenAccount>,
/// CHECK: This is the PDA that will own the vault
#[account(
seeds = [b"vault", auction.key().as_ref()],
bump
)]
pub vault_auth: UncheckedAccount<'info>,
#[account(
init,
payer = seller,
associated_token::mint = mint,
associated_token::authority = vault_auth
)]
pub vault: Account<'info, TokenAccount>,
pub mint: Account<'info, Mint>,
pub token_program: Program<'info, Token>,
pub associated_token_program: Program<'info, AssociatedToken>,
pub system_program: Program<'info, System>,
}
#[account]
#[derive(InitSpace)]
pub struct Auction {
pub seller: Pubkey,
pub starting_price: u64,
pub floor_price: u64,
pub duration: i64,
pub start_time: i64,
pub token_mint: Pubkey,
pub sold: bool,
}
我们暂时不会测试这个函数,等整个程序编写完成后再进行测试。
现在,让我们添加购买被拍卖代币的函数。
购买被拍卖的代币
在我们的拍卖设置中,NFT 会停留在由程序控制的托管(金库)账户中,直到售出。购买被拍卖的代币意味着将 lamports 从买家转移给卖家,以此交换 NFT。
现在我们将添加一个函数,允许我们以当前的荷兰式拍卖价格购买 NFT。该函数的作用如下:
- 检查 NFT 是否已被售出。
- 获取当前时间并检查拍卖是否处于激活状态;如果拍卖尚未开始,则以
AuctionNotStarted错误被回退(revert);如果拍卖时长已过,则以AuctionEnded错误被回退。 - 计算迄今为止已流逝的时间,并使用线性荷兰式拍卖的公式推导出当前价格。
- 确保买家有足够的 lamports。
- 将 lamports 从买家转移给卖家。
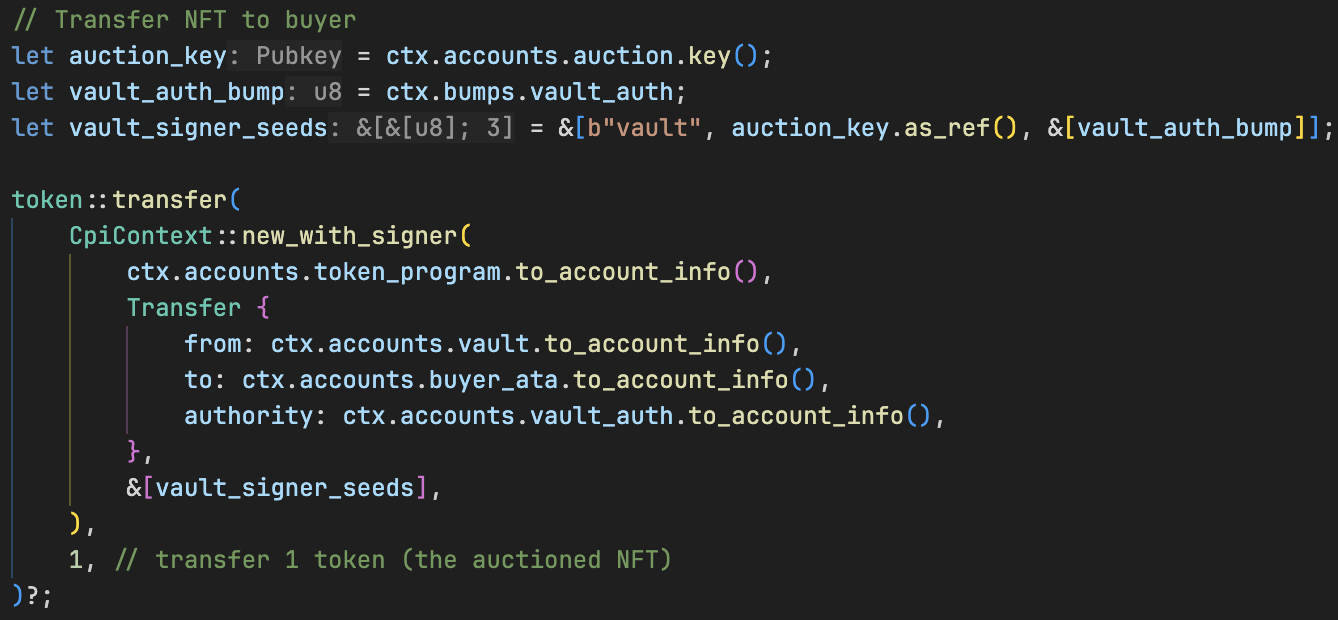
- 设置签名者种子,以便程序可以为金库签名。
- 将 NFT 从金库转移到买家的关联代币账户。
pub fn buy(ctx: Context<Buy>) -> Result<()> {
// Check if the NFT is already sold
require!(
ctx.accounts.auction.sold == false,
AuctionError::NFTAlreadySold
);
let auction = &mut ctx.accounts.auction;
let now = Clock::get()?.unix_timestamp; // Get the current time from the clock sysvar
// Validate auction timing
require!(now >= auction.start_time, AuctionError::AuctionNotStarted);
require!(
now < auction.start_time + auction.duration,
AuctionError::AuctionEnded
);
// Calculate current price based on elapsed time (linear decay)
let elapsed_time = (now - auction.start_time).min(auction.duration) as u64;
let total_price_drop = auction.starting_price - auction.floor_price;
let price_dropped_so_far = total_price_drop * elapsed_time / auction.duration as u64;
let price = auction.starting_price - price_dropped_so_far;
// Verify funds and transfer payment
require!(
ctx.accounts.buyer.lamports() >= price,
AuctionError::InsufficientFunds
);
invoke(
&system_instruction::transfer(
&ctx.accounts.buyer.key(),
&ctx.accounts.seller.key(),
price,
),
&[
ctx.accounts.buyer.to_account_info(),
ctx.accounts.seller.to_account_info(),
ctx.accounts.system_program.to_account_info(),
],
)?;
// Transfer NFT to buyer
let auction_key = ctx.accounts.auction.key();
let vault_auth_bump = ctx.bumps.vault_auth;
let vault_signer_seeds = &[b"vault", auction_key.as_ref(), &[vault_auth_bump]]; // Signer seeds for the vault PDA
token::transfer(
CpiContext::new_with_signer(
ctx.accounts.token_program.to_account_info(),
Transfer {
from: ctx.accounts.vault.to_account_info(),
to: ctx.accounts.buyer_ata.to_account_info(),
authority: ctx.accounts.vault_auth.to_account_info(),
},
&[vault_signer_seeds],
),
1, // transfer 1 token (the auctioned NFT)
)?;
Ok(())
}
为什么我们需要金库权限 PDA?
我们使用一个金库 ATA 来持有卖家存入的 NFT。我们需要一个金库权限 PDA,以便我们的程序可以为该 ATA 的转移签名,而不需要外部密钥对或签名者。
回顾我们在《带总供应量的代币销售》文章中,我们展示了如何让铸币 PDA 成为其自身的权限控制者,从而使程序能够自行铸造新代币。这里我们将相同的概念用于金库 ATA,但是为了赋予我们的程序转移现有代币的权限。我们通过 ["vault", auction.key().as_ref()] 派生出 vault_auth 并将其设置为该 ATA 的权限控制者。
在 buy() 函数中,我们使用这些种子调用 CpiContext::new_with_signer。Solana 运行时识别到我们的程序控制了 vault_auth,并允许它为金库 ATA 签名。这使得我们的程序能够自动将 NFT 转移给买家,无需任何外部签名者。
现在添加 Buy 账户结构体。Buy 结构体指定了拍卖程序中 NFT 购买期间涉及的账户:
auction:包含拍卖详情和状态的拍卖账户。seller:将收到 SOL 付款的原始 NFT 卖家。buyer:以当前拍卖价格购买 NFT 的账户,同时也是交易签名者。buyer_ata:将接收所购 NFT 的买家关联代币账户。vault_auth:控制金库并授权将 NFT 转移给买家的 PDA 权限控制者。vault:持有托管 NFT 的金库账户,由vault_authPDA 拥有。- 最后的两个账户:Token program(用于 NFT 转移)和 System program(用于 SOL 转移),是我们与之交互的原生程序。
#[derive(Accounts)]
pub struct Buy<'info> {
#[account(mut, has_one = seller)] // ensure we pass the right auction account
pub auction: Account<'info, Auction>, // auction account
/// CHECK: seller account
#[account(mut)]
pub seller: AccountInfo<'info>, // seller account
#[account(mut)]
pub buyer: Signer<'info>, // buyer account
#[account(
mut,
associated_token::mint = auction.token_mint,
associated_token::authority = buyer
)]
pub buyer_ata: Account<'info, TokenAccount>, // Buyer's ATA
#[account(
mut,
seeds = [b"vault", auction.key().as_ref()],
bump
)]
/// CHECK: PDA authority for the vault
pub vault_auth: AccountInfo<'info>, // Vault authority PDA
#[account(
mut,
associated_token::mint = auction.token_mint,
associated_token::authority = vault_auth
)]
pub vault: Account<'info, TokenAccount>,
pub token_program: Program<'info, Token>, // SPL Token program
pub system_program: Program<'info, System>, // System program
}
添加 AuctionError 错误定义,我们将在 buy 函数中使用它
#[error_code]
pub enum AuctionError {
#[msg("Auction hasn't started")]
AuctionNotStarted,
#[msg("Buyer has insufficient funds")]
InsufficientFunds,
#[msg("Auction has ended")]
AuctionEnded,
#[msg("NFT is already sold")]
NFTAlreadySold,
}
我们的程序现在完成了,所以让我们为它编写一些测试。
使用 LiteSVM 测试荷兰式拍卖程序
在荷兰式拍卖中,物品的价格会随时间衰减。此测试的目的是确认拍卖价格能否随时间正确衰减。为此,我们将使用 LiteSVM 将时间向前推进,并记录那时的价格下降情况。
在链上的真实荷兰式拍卖中,我们必须在现实中等待才能看到价格下降。有了 LiteSVM,我们可以通过推进时间来跳过等待。
我们将逐步添加测试代码,首先,将 tests/dutch-auction.ts 中的程序测试代码替换为以下内容。
我们定义了一些测试常量。另请注意此测试的两个关键库:
litesvm让我们能够直接从 TypeScript 客户端启动一个本地的 Solana 测试验证者,并赋予我们对验证者时钟的控制权以进行时间穿越。anchor-litesvm库将我们的 Anchor 项目与 LiteSVM 连接起来,使得在此 LiteSVM 设置中测试 Anchor 程序成为可能。
import * as anchor from "@coral-xyz/anchor";
import { BN, Program } from "@coral-xyz/anchor";
import {
ASSOCIATED_TOKEN_PROGRAM_ID,
createAssociatedTokenAccountInstruction,
createInitializeMintInstruction,
createMintToInstruction,
getAssociatedTokenAddress,
MINT_SIZE,
TOKEN_PROGRAM_ID,
} from "@solana/spl-token";
import {
Keypair,
LAMPORTS_PER_SOL,
PublicKey,
SystemProgram,
Transaction,
} from "@solana/web3.js";
import { fromWorkspace, LiteSVMProvider } from "anchor-litesvm";
import { assert } from "chai";
import { Clock, LiteSVM } from "litesvm";
import { DutchAuction } from "../target/types/dutch_auction";
// Constants
const STARTING_PRICE = new BN(2_000_000_000); // 2 SOL
const FLOOR_PRICE = new BN(500_000_000); // 0.5 SOL
const DURATION = new BN(3600); // 1 hour
使用以下命令安装测试依赖项:npm install anchor-litesvm litesvm @solana/spl-token
添加 describe 块。我们只需在这里声明测试账户和变量(稍后我们将对它们进行讨论)。
describe("dutch-auction", () => {
// Define our test variables
let svm: LiteSVM;
let provider: LiteSVMProvider;
let program: Program<DutchAuction>;
// Define our test accounts
const seller = Keypair.generate();
const buyer = Keypair.generate();
let auctionAccount: Keypair;
let mintKp: Keypair;
let sellerAta: PublicKey;
let buyerAta: PublicKey;
let vaultAuth: PublicKey;
let vault: PublicKey;
});
现在,将此 before 测试块添加到 describe 块内。
我们在这里通过执行以下操作来设置 LiteSVM 和账户:
- 初始化 LiteSVM 测试环境
- 向测试账户(买家和卖家)空投 SOL
- 使用
@solana/spl-token库为买家和卖家创建代币铸币账户及关联代币账户。 - 将 NFT 铸造给卖家
- 创建拍卖账户和金库权限 PDA
- 使用初始参数初始化拍卖
在此测试中构建交易的方式与我们过去的做法略有不同。其原因将在代码块之后讨论。
before(async () => {
// Initialize LiteSVM from the workspace and add SPL/Builtins/Sysvars
svm = fromWorkspace("./").withSplPrograms().withBuiltins().withSysvars();
provider = new LiteSVMProvider(svm);
anchor.setProvider(provider);
program = anchor.workspace.DutchAuction;
// Airdrop funds to seller and buyer
svm.airdrop(seller.publicKey, BigInt(10 * LAMPORTS_PER_SOL)); // Airdrop 10 SOL to seller
svm.airdrop(buyer.publicKey, BigInt(10 * LAMPORTS_PER_SOL)); // Airdrop 10 SOL to buyer
// Create NFT mint (0 decimals) with seller as mint authority
mintKp = Keypair.generate();
const LAMPORTS_FOR_MINT = 1_000_000_000; // sufficient for rent in tests
const createMintIx = SystemProgram.createAccount({
fromPubkey: seller.publicKey,
newAccountPubkey: mintKp.publicKey,
lamports: LAMPORTS_FOR_MINT,
space: MINT_SIZE,
programId: TOKEN_PROGRAM_ID,
});
const initMintIx = createInitializeMintInstruction(
mintKp.publicKey,
0, // decimals
seller.publicKey, // mint authority
null // freeze authority
);
const mintTx = new Transaction().add(createMintIx, initMintIx);
mintTx.recentBlockhash = svm.latestBlockhash();
mintTx.feePayer = seller.publicKey;
mintTx.sign(seller, mintKp);
svm.sendTransaction(mintTx);
// Create ATA for the seller
sellerAta = await getAssociatedTokenAddress(mintKp.publicKey, seller.publicKey);
const createSellerAtaIx = createAssociatedTokenAccountInstruction(
seller.publicKey,
sellerAta,
seller.publicKey,
mintKp.publicKey
);
const sellerAtaTx = new Transaction().add(createSellerAtaIx);
sellerAtaTx.recentBlockhash = svm.latestBlockhash();
sellerAtaTx.feePayer = seller.publicKey;
sellerAtaTx.sign(seller);
svm.sendTransaction(sellerAtaTx);
// Create ATA for the buyer
buyerAta = await getAssociatedTokenAddress(mintKp.publicKey, buyer.publicKey);
const createBuyerAtaIx = createAssociatedTokenAccountInstruction(
buyer.publicKey,
buyerAta,
buyer.publicKey,
mintKp.publicKey
);
const buyerAtaTx = new Transaction().add(createBuyerAtaIx);
buyerAtaTx.recentBlockhash = svm.latestBlockhash();
buyerAtaTx.feePayer = buyer.publicKey;
buyerAtaTx.sign(buyer);
svm.sendTransaction(buyerAtaTx);
// Mint 1 token to seller's ATA
const mintToIx = createMintToInstruction(
mintKp.publicKey,
sellerAta,
seller.publicKey,
BigInt(1)
);
const mintToTx = new Transaction().add(mintToIx);
mintToTx.recentBlockhash = svm.latestBlockhash();
mintToTx.feePayer = seller.publicKey;
mintToTx.sign(seller);
svm.sendTransaction(mintToTx);
// Find PDA for vault authority and associated token account
[vaultAuth] = PublicKey.findProgramAddressSync(
[Buffer.from("vault"), auctionAccount.publicKey.toBuffer()],
program.programId
);
vault = await getAssociatedTokenAddress(
mintKp.publicKey,
vaultAuth,
true
);
// Initialize the auction (moves 1 token from seller ATA to vault)
await program.methods
.initializeAuction(STARTING_PRICE, FLOOR_PRICE, DURATION)
.accounts({
auction: auctionAccount.publicKey,
seller: seller.publicKey,
sellerAta,
vaultAuth,
vault,
mint: mintKp.publicKey,
tokenProgram: TOKEN_PROGRAM_ID,
associatedTokenProgram: ASSOCIATED_TOKEN_PROGRAM_ID,
systemProgram: SystemProgram.programId,
})
.signers([seller, auctionAccount])
.rpc();
});
我们在上面的测试中使用了一些 LiteSVM 的功能和方法,稍后我们将进行讨论。
接下来,添加下面的测试块。此代码块仅仅是断言拍卖程序在 before 块中已正确初始化。
it("initializes auction state correctly", async () => {
const auction = await program.account.auction.fetch(auctionAccount.publicKey);
assert.ok(auction.seller.equals(seller.publicKey));
assert.equal(auction.startingPrice.toNumber(), STARTING_PRICE.toNumber());
assert.equal(auction.floorPrice.toNumber(), FLOOR_PRICE.toNumber());
assert.equal(auction.tokenMint.toBase58(), mintKp.publicKey.toBase58());
// Seller's NFT should have moved to vault during initialization
const vaultAcc = svm.getAccount(vault);
assert.isNotNull(vaultAcc, "Vault ATA must exist");
});
在运行测试之前,让我们先了解一下 LiteSVM 库以及到目前为止我们是如何使用它们的。
测试代码详解
LiteSVM 与 LiteSVMProvider
如下图所示,我们为测试声明了两个主要变量:

svm:这是来自litesvm库的LiteSVM实例。它的作用就像一个我们可以控制的本地 Solana 测试验证者,包括用于时间穿越的时钟控制。provider:这是来自anchor-litesvm库的LiteSVMProvider。它的作用类似于普通的 Anchor provider,但与 LiteSVM 配合使用,因此我们可以运行带有时间穿越的测试。
初始化 LiteSVM

如上图所示,我们通过初始化 LiteSVM、创建 LiteSVM provider 并配置 Anchor 使用此 provider 来设置测试环境。
让我们分解每个部分的作用:
-
litesvm库中的fromWorkspace("./")从当前目录创建一个 LiteSVM 实例,这告诉了 LiteSVM 去哪里找到我们的项目文件。然后我们将几个方法链式调用到该实例上:.withSplPrograms()添加了 SPL 代币程序,在测试中启用代币功能.withBuiltins()添加了内置程序,使我们能够访问 Solana 原生程序.withSysvars()添加了系统变量,这让我们能够访问诸如时钟之类的 Solana 系统信息
这个函数调用链返回一个配置完整的
LiteSVM对象,我们将其赋值给svm。 -
anchor-litesvm库中的new LiteSVMProvider(svm)创建了一个与 LiteSVM 一起工作但仍遵循 Anchor 预期接口的 provider -
anchor.setProvider(provider)告诉 Anchor 使用我们兼容 LiteSVM 的 provider
通过此设置,我们现在可以准备使用 LiteSVM provider 进行时间穿越了。
既然我们已经设置了测试环境,让我们来看看如何在 LiteSVM 中创建 SPL 代币和关联代币账户(ATA)。与使用 SPL Token 库中的 createMint() 和 createAssociatedTokenAccount() 等辅助函数的典型方法不同,在 LiteSVM 中,我们需要手动构建这些指令,并使用 svm.sendTransaction() 执行它们。
在 LiteSVM 中创建代币和 ATA
在 LiteSVM 中,我们手动创建代币和 ATA,因为 @solana/spl-token 辅助函数与 LiteSVM 的测试环境并不完全兼容。
让我们来看看如何为拍卖创建我们的 NFT。
步骤 1:创建铸币账户(Mint Account)
首先,我们创建铸币账户。
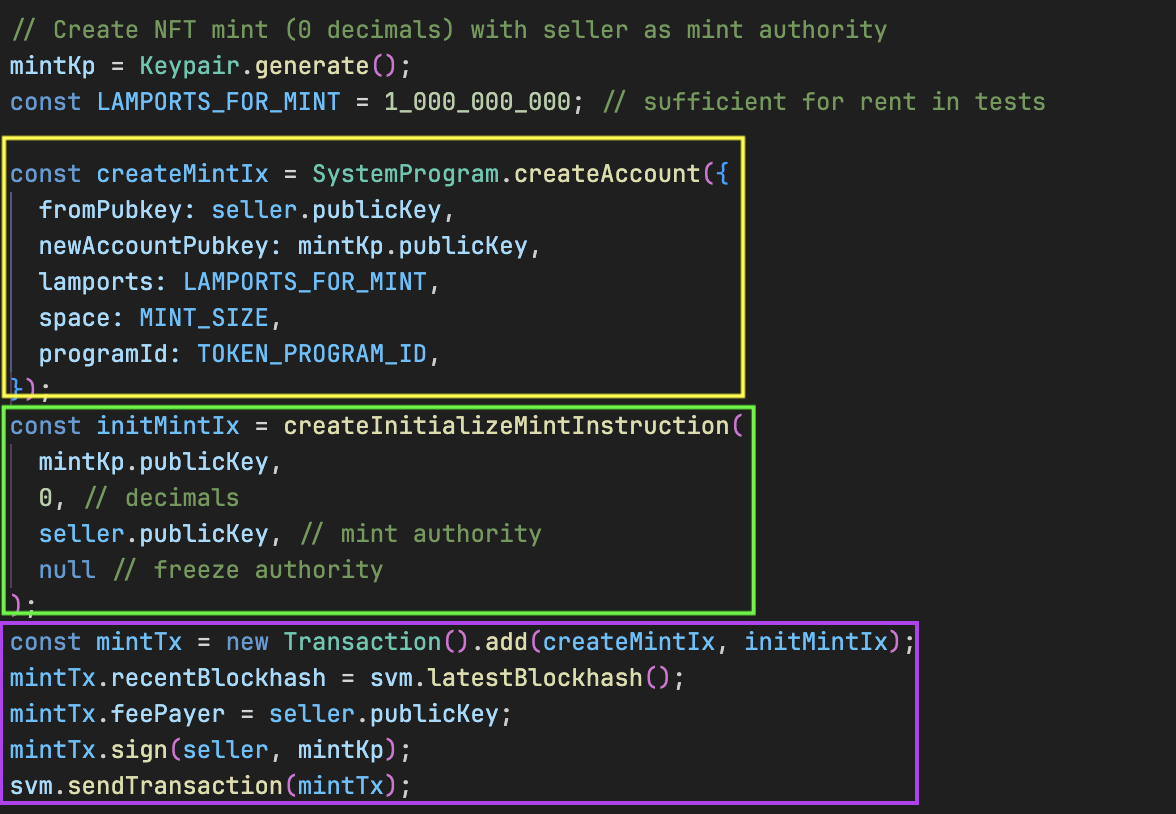
上图展示的过程如下:
- 创建账户:我们使用
SystemProgram.createAccount()(从@solana/web3.js导入)在链上分配空间并将所有权分配给 Token 程序。这是为了符合 SPL Token 标准,该标准要求所有代币铸币账户必须归 Token 程序所有才有效。 - 初始化为铸币账户:我们使用
createInitializeMintInstruction()(从@solana/spl-token导入)将该原始账户转变为具有 0 精度的正确代币铸币账户。我们这样做是因为 Solana 的 NFT 标准要求 0 精度以确保不可分割性。 - 执行:我们构建交易,设置 blockhash 和 fee payer,对其签名,然后使用
svm.sendTransaction()将其发送到我们的 LiteSVM 实例。这类似于向 Solana 区块链发送交易,但发生在本地 LiteSVM 环境中。
步骤 2:创建代币账户
接下来,我们为卖家和买家创建关联代币账户(ATA)。我们使用 getAssociatedTokenAddress()(从 @solana/spl-token 导入)派生账户地址,并使用 createAssociatedTokenAccountInstruction()(从 @solana/spl-token 导入)来创建将初始化这些账户的指令。
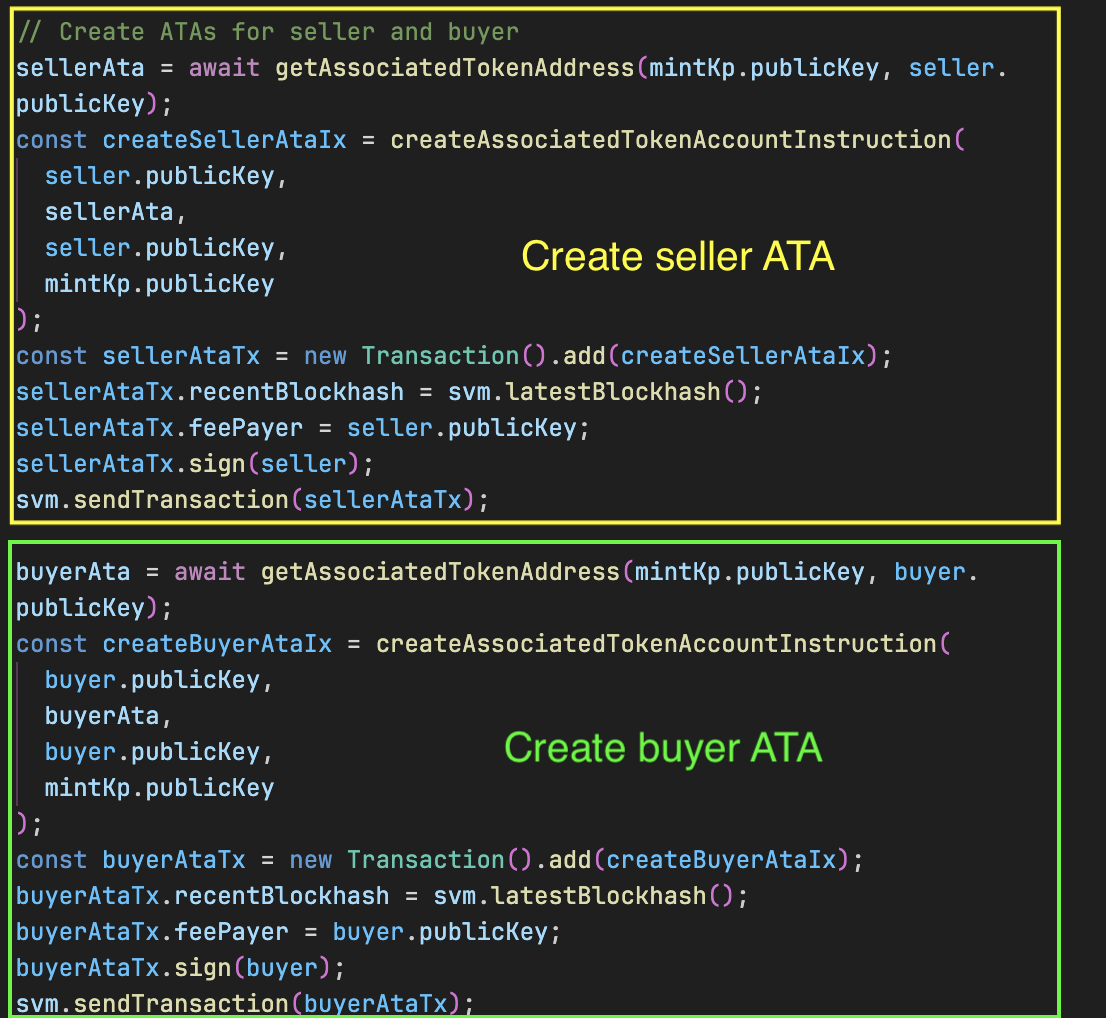
这些 ATA 将在拍卖前后为卖家和买家持有 NFT。
因为 LiteSVM 没有用于代币操作的辅助函数,所以我们遵循手动构建交易、签名并使用 svm.sendTransaction() 发送它的模式。
模拟时间以测试拍卖线性价格衰减
现在我们已经设置好测试环境并创建了必要的代币账户,我们可以继续我们的目标——模拟时间流逝并检查拍卖价格是否随时间正确下降。
我们将把时钟向前推进,并在特定时间点调用程序中的 buy 函数,以确认价格反映了预期的下降。
现在添加以下测试块。在这个测试中,我们要确认拍卖价格随时间正确降低。我们进行如下操作:
- 获取链上拍卖数据并提取关键参数(开始时间、持续时间等)。
- 计算拍卖开始后 15 分钟(即总时长 60 分钟的 25%)时的价格应该是多少。
- 使用 LiteSVM 将 Solana 时钟向前拨动 15 分钟。
- 在进行购买前检查买家的 SOL 余额。
- 调用
buy函数来模拟以当前价格进行购买。 - 检查买家的新余额,并用前一个余额减去它,看看支付了多少。
- 确认支付的价格与预期价格(1.625 SOL)相符。
it("executes buy at 25% time with expected price and transfers NFT", async () => {
const auction = await program.account.auction.fetch(auctionAccount.publicKey);
const startTime = auction.startTime.toNumber();
const duration = auction.duration.toNumber();
const quarterTime = startTime + Math.floor(duration / 4);
// Warp clock to 25% into the auction
const c = svm.getClock();
svm.setClock(
new Clock(c.slot, c.epochStartTimestamp, c.epoch, c.leaderScheduleEpoch, BigInt(quarterTime))
);
// Check buyer's lamports before purchase
const balanceBefore = svm.getBalance(buyer.publicKey)!;
// Execute the buy transaction
console.log('Executing buy transaction...');
await program.methods
.buy()
.accounts({
auction: auctionAccount.publicKey,
seller: seller.publicKey,
buyer: buyer.publicKey,
buyerAta,
vaultAuth,
vault,
tokenProgram: TOKEN_PROGRAM_ID,
systemProgram: SystemProgram.programId,
})
.signers([buyer])
.rpc();
// Check buyer's lamports after purchase
const balanceAfter = svm.getBalance(buyer.publicKey)!;
// Calculate the price paid and log it
const pricePaid = Number(balanceBefore - balanceAfter);
console.log(`Actual price paid: ${lamportsToSol(pricePaid)}`);
// Expected price at 25% through the auction duration:
// Starting price - ((Starting price - Floor price) * 0.25) =
// 2 SOL - ((2 SOL - 0.5 SOL) * 0.25) = 1.625 SOL = 1,625,000,000 lamports
const expectedPriceAt25Percent = 1_625_000_000;
// Assert that the price paid is equal to the expected price
assert.equal(
pricePaid,
expectedPriceAt25Percent,
"Buyer should pay the 25% elapsed linear price"
);
// Verify buyer received the NFT (amount stored at bytes 64..72)
const buyerAtaAcc = svm.getAccount(buyerAta)!;
// Read the token amount as u64 (little-endian) from offset 64
const amount = Number(Buffer.from(buyerAtaAcc.data).readBigUInt64LE(64));
assert.equal(amount, 1, "Buyer ATA should now contain 1 token");
});
早前,在我们的测试中,我们以 2 SOL 的起拍价和 60 分钟的持续时间初始化了拍卖。

15 分钟后(占拍卖时间的 25%),根据我们程序 buy 函数中使用的公式,我们预计价格将下降 25%。得出结果为 1.625 SOL,这是测试中的预期价格。

将时间向前推进 15 分钟
在上面的测试块中,我们使用 svm.setClock 来覆盖 Clock 系统变量,以模拟拍卖中较晚的时间点。

该方法接收一个 Clock 对象(从 litesvm 导入),我们将其 unixTimestamp 设置为拍卖开始时间后 15 分钟(由 quarterTime 定义)。这让我们能够测试价格衰减,而无需在现实中等待。
所有这一切都是通过我们在 before 块中执行的 LiteSVM 初始化和账户创建成为可能的。
现在我们所有的测试都已就绪,我们可以像普通 Anchor 程序一样使用 anchor test 运行它们,测试将会通过。

我们已成功进行了时间旅行,以此来模拟拍卖的价格下降
总结
在本教程中,我们实现了一个代币价格随时间线性递减的荷兰式拍卖,并编写了测试来验证该逻辑。
我们使用了 litesvm(和 anchor-litesvm)创建了一个可以扭曲时间的本地测试环境。这使得我们能够模拟流逝的 15 分钟而无需等待,并确认拍卖价格正确地从 2 SOL 降至 1.625 SOL(拍卖进行了 25%)。
通过覆盖 Clock 系统变量并使用 LiteSVM 的 API,我们能够确定性地测试基于时间的逻辑。
本文是 Solana 教程系列 的一部分。