正如我们在上一篇教程中所讨论的,entrypoint(入口点)是你的 Solana 程序的“正门”,它负责处理所有传入程序的指令。
在本教程中,我们将学习如何读取通过 entrypoint 传递给我们原生 Rust Solana 程序的账户。
在 Anchor 中,你可以使用 #[derive(Accounts)] 宏来定义程序预期接收的账户:
#[derive(Accounts)]
pub struct Initialize<'info> {
#[account(init, payer = user, space = 8 + 32)]
pub data_account: Account<'info, MyData>,
#[account(mut)]
pub user: Signer<'info>,
pub system_program: Program<'info, System>,
}
#[account]
pub struct MyData {
pub value: u64,
}
然后,你可以在指令处理程序中通过 Context 访问这些账户:
#[program]
pub mod my_program {
pub fn initialize(ctx: Context<Initialize>) -> Result<()> {
// other function logic
ctx.accounts.data_account.value = 100;
Ok(())
}
}
Anchor 会处理账户验证,并通过 Context 提供带类型的访问。而在原生 Rust 中,你将直接处理传递给指令处理函数的原生 accounts 切片(我们在上一篇教程中已经看到了这一点)。
如果你需要复习关于 Solana 账户的知识,请参阅 Initializing Accounts in Solana and Anchor 和 Solana Counter Program。
构建 Rust 程序
让我们构建一个程序,读取并记录传递给指令处理函数的账户信息。
首先,设置项目:
mkdir solana-storage
cd solana-storage
cargo init --lib solana-storage
将你的 Cargo.toml 更新为以下内容:
[package]
name = "solana-storage"
version = "0.1.0"
edition = "2021"
[lib]
crate-type = ["cdylib", "lib"]
[dependencies]
solana-program = "3.0.0"
borsh = "0.10"
我们添加了 borsh = "0.10",以便在未来的教程中对账户数据进行序列化。
在入口点函数中读取账户
将 src/lib.rs 中的代码替换为以下内容。该程序遍历提供的每个账户,并记录其公钥、lamport 余额、所有者、数据长度,以及该账户是否为可执行、可写或签名者。它通过传递给 process_instruction 的 accounts 参数来访问这些账户,这是一个 AccountInfo 结构体数组。AccountInfo 是用于表示链上账户的原生 Solana 类型。为了避免记录大量数据,程序仅打印每个账户数据的前 8 个字节,作为存储内容的预览。
use solana_program::{
account_info::AccountInfo,
entrypoint,
entrypoint::ProgramResult,
msg,
pubkey::Pubkey,
};
entrypoint!(process_instruction);
pub fn process_instruction(
_program_id: &Pubkey,
accounts: &[AccountInfo],
_instruction_data: &[u8],
) -> ProgramResult {
msg!("Storage Program: Examining {} accounts", accounts.len());
*// Create an iterator over accounts to safely access each account*
let accounts_iter = &mut accounts.iter();
*// Loop through each account and log its metadata*
for (index, account) in accounts_iter.enumerate() {
msg!("Account {}: {}", index, account.key);
msg!("Lamports: {}", account.lamports());
msg!("Owner: {}", account.owner);
msg!("Data length: {} bytes", account.data_len());
msg!("Executable: {}", account.executable);
msg!("Writable: {}", account.is_writable);
msg!("Is signer: {}", account.is_signer);
*// Log only the first 8 bytes to avoid overwhelming the logs*
if account.data_len() > 0 {
let data = account.try_borrow_data()?;
// Take the smaller value between 8 and data.len() so we never slice past the buffer.
// This caps the preview to at most 8 bytes while staying within bounds.
let preview_len = std::cmp::min(8, data.len());
msg!("First {} bytes: {:?}", preview_len, &data[..preview_len]);
} else {
msg!("No data stored");
}
msg!(""); // Empty line for readability
}
Ok(())
}
在之前基于 Anchor 的教程中,我们在账户验证的上下文中使用过这种类型。在原生程序中,AccountInfo 允许我们访问 Solana 维护的所有账户元数据——包括账户的公钥、lamports(余额)、所有者程序、数据字段,以及表示其是否可执行、可写或是否为签名者的标志。
下图重点展示了这段代码中的一些核心概念:
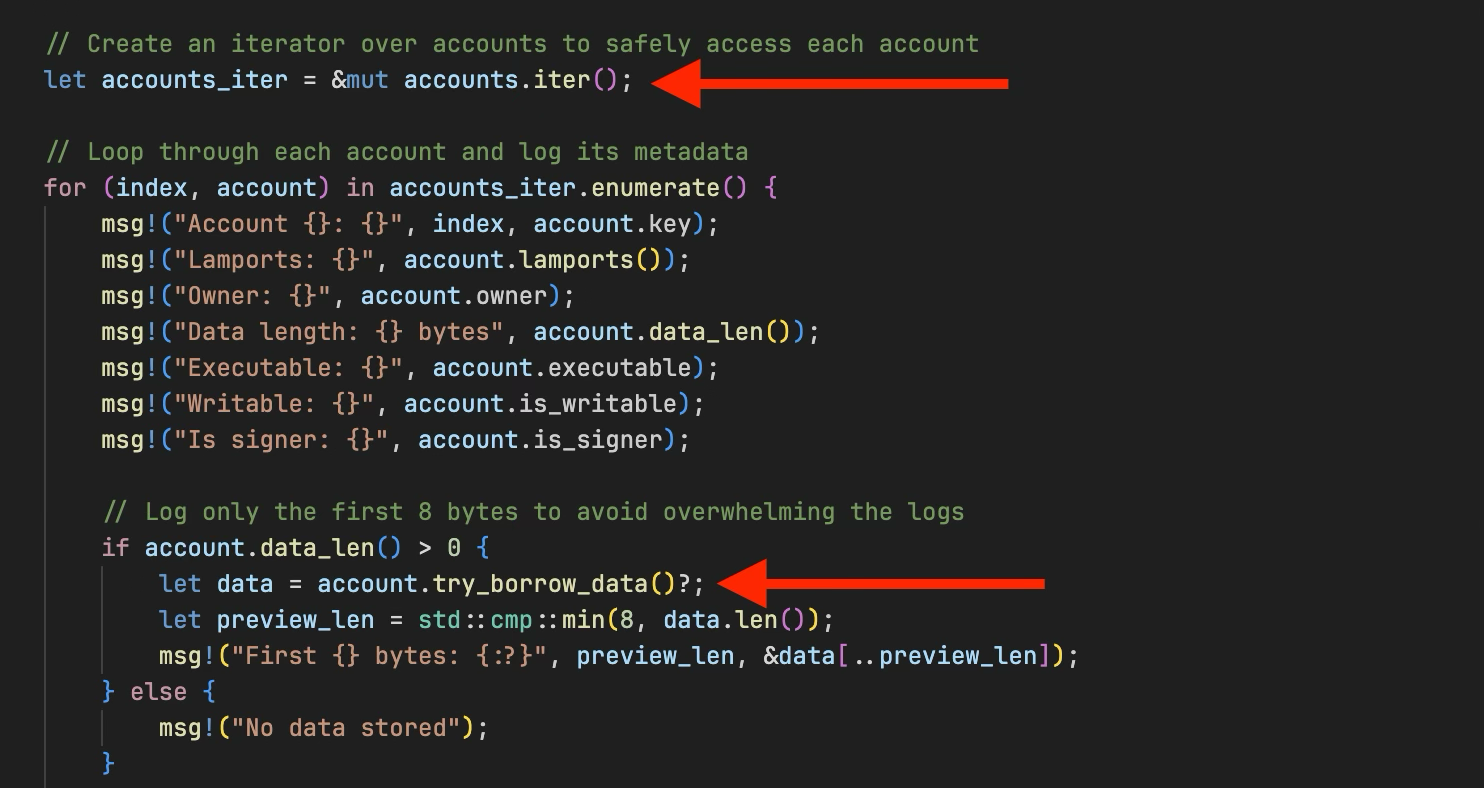
accounts.iter():在 accounts 切片上创建一个迭代器。account.try_borrow_data()?:返回账户数据字段的只读引用。我们使用try_borrow_data()来安全地借用账户数据。如果数据已经被可变借用,它会返回一个错误。
当你从客户端构建交易并在 keys 数组中指定账户时:
const ix = new TransactionInstruction({
keys: [
{ pubkey: payer.publicKey, isSigner: true, isWritable: false },
],
programId: PROGRAM_ID,
data: Buffer.alloc(0),
});
所有指定的账户都会作为 accounts 参数传递给你的程序的 process_instruction。这就是你的程序如何接收并能够检查客户端希望它处理的任何账户的方式——无论它们是签名者、可写账户,还是只需要读取的账户。
现在构建并部署该程序:
cargo build-sbf
solana-test-validator # in another terminal
solana program deploy target/deploy/solana_storage_tutorial.so

复制该 program ID,我们在测试程序时会用到它。
将程序部署到本地 Solana 验证节点后,我们现在可以开始测试我们的程序了。
测试账户检查
让我们创建一个客户端,将多个账户传递给我们的程序,并记录它们的元数据。
从我们的项目根目录设置客户端环境:
mkdir client && cd client
npm init -y
npm install @solana/web3.js typescript ts-node @types/node
更新 client/package.json:
{
"scripts": {
"test": "ts-node client.ts"
}
}
创建 client/tsconfig.json:
{
"compilerOptions": {
"target": "ES2020",
"module": "commonjs",
"moduleResolution": "node",
"strict": true,
"esModuleInterop": true,
"skipLibCheck": true,
"types": ["node"]
},
"include": ["*.ts"]
}
现在创建 client/client.ts 并添加以下代码。在这个客户端中,我们:
- 从
@solana/web3.js导入必要的依赖项 - 创建一个
testAccountInspection函数,该函数会:- 创建两个密钥对账户(
payer和emptyAccount) - 向 payer 账户充值 SOL
- 将这些账户(包括系统程序)传递给我们的程序,以读取并记录它们的元数据
- 创建两个密钥对账户(
import {
Connection,
Keypair,
LAMPORTS_PER_SOL,
PublicKey,
SystemProgram,
Transaction,
TransactionInstruction,
sendAndConfirmTransaction,
} from '@solana/web3.js';
const PROGRAM_ID = new PublicKey('YOUR_PROGRAM_ID_HERE');// Replace with your actual program IDconst connection = new Connection('http://localhost:8899', 'confirmed');
async function testAccountInspection() {
console.log('Testing Account Inspection\n');
// Create accounts to inspect
const payer = Keypair.generate();
const emptyAccount = Keypair.generate();
// Fund the payer account
console.log('Funding accounts...');
await connection.requestAirdrop(payer.publicKey, LAMPORTS_PER_SOL);
// Wait for airdrops
await new Promise(resolve => setTimeout(resolve, 2000));
console.log(`Payer: ${payer.publicKey.toString()}`);
console.log(`Empty Account: ${emptyAccount.publicKey.toString()}\n`);
// Create instruction with multiple accounts
const instruction = new TransactionInstruction({
keys: [
{ pubkey: payer.publicKey, isSigner: true, isWritable: false },
{ pubkey: emptyAccount.publicKey, isSigner: false, isWritable: false },
{ pubkey: SystemProgram.programId, isSigner: false, isWritable: false },
],
programId: PROGRAM_ID,
data: Buffer.alloc(0),
});
const transaction = new Transaction().add(instruction);
console.log('Sending transaction with 3 accounts for inspection...');
const signature = await sendAndConfirmTransaction(connection, transaction, [payer]);
console.log(`Transaction confirmed: ${signature}`);
console.log('Check the logs to see detailed account information!');
console.log('Run: solana logs');
}
testAccountInspection().catch(console.error);
将 PROGRAM_ID 变量更新为你自己的 program ID。
在运行测试之前,请确保你的本地 Solana 验证节点正在运行,且程序已部署到该节点上。
现在运行测试:
cd client
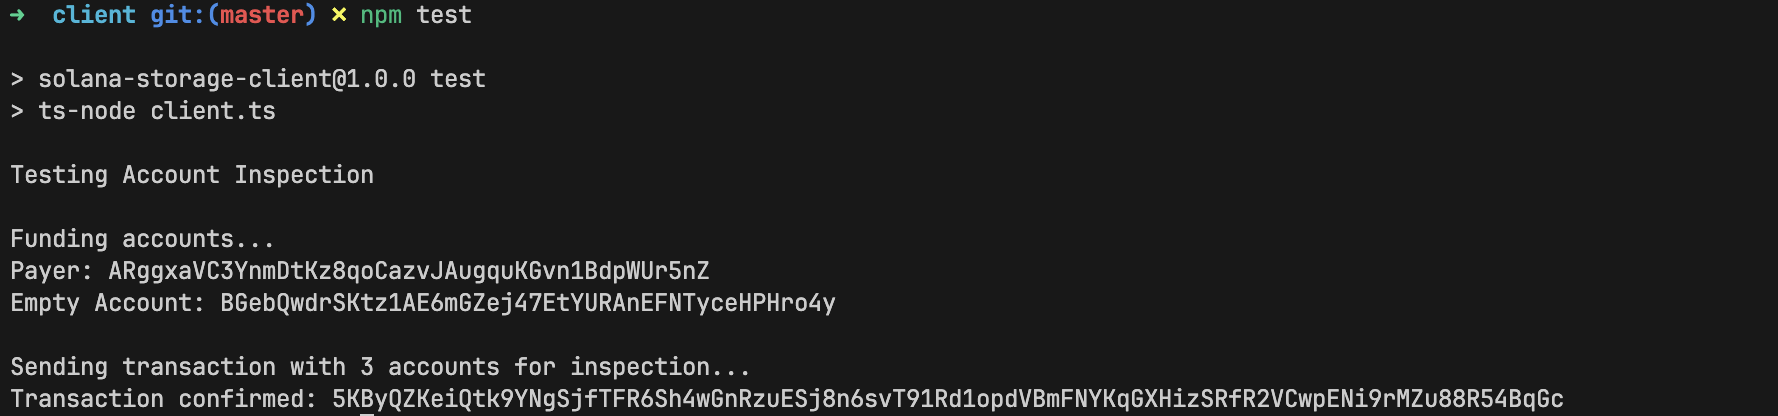
npm run test
运行成功。
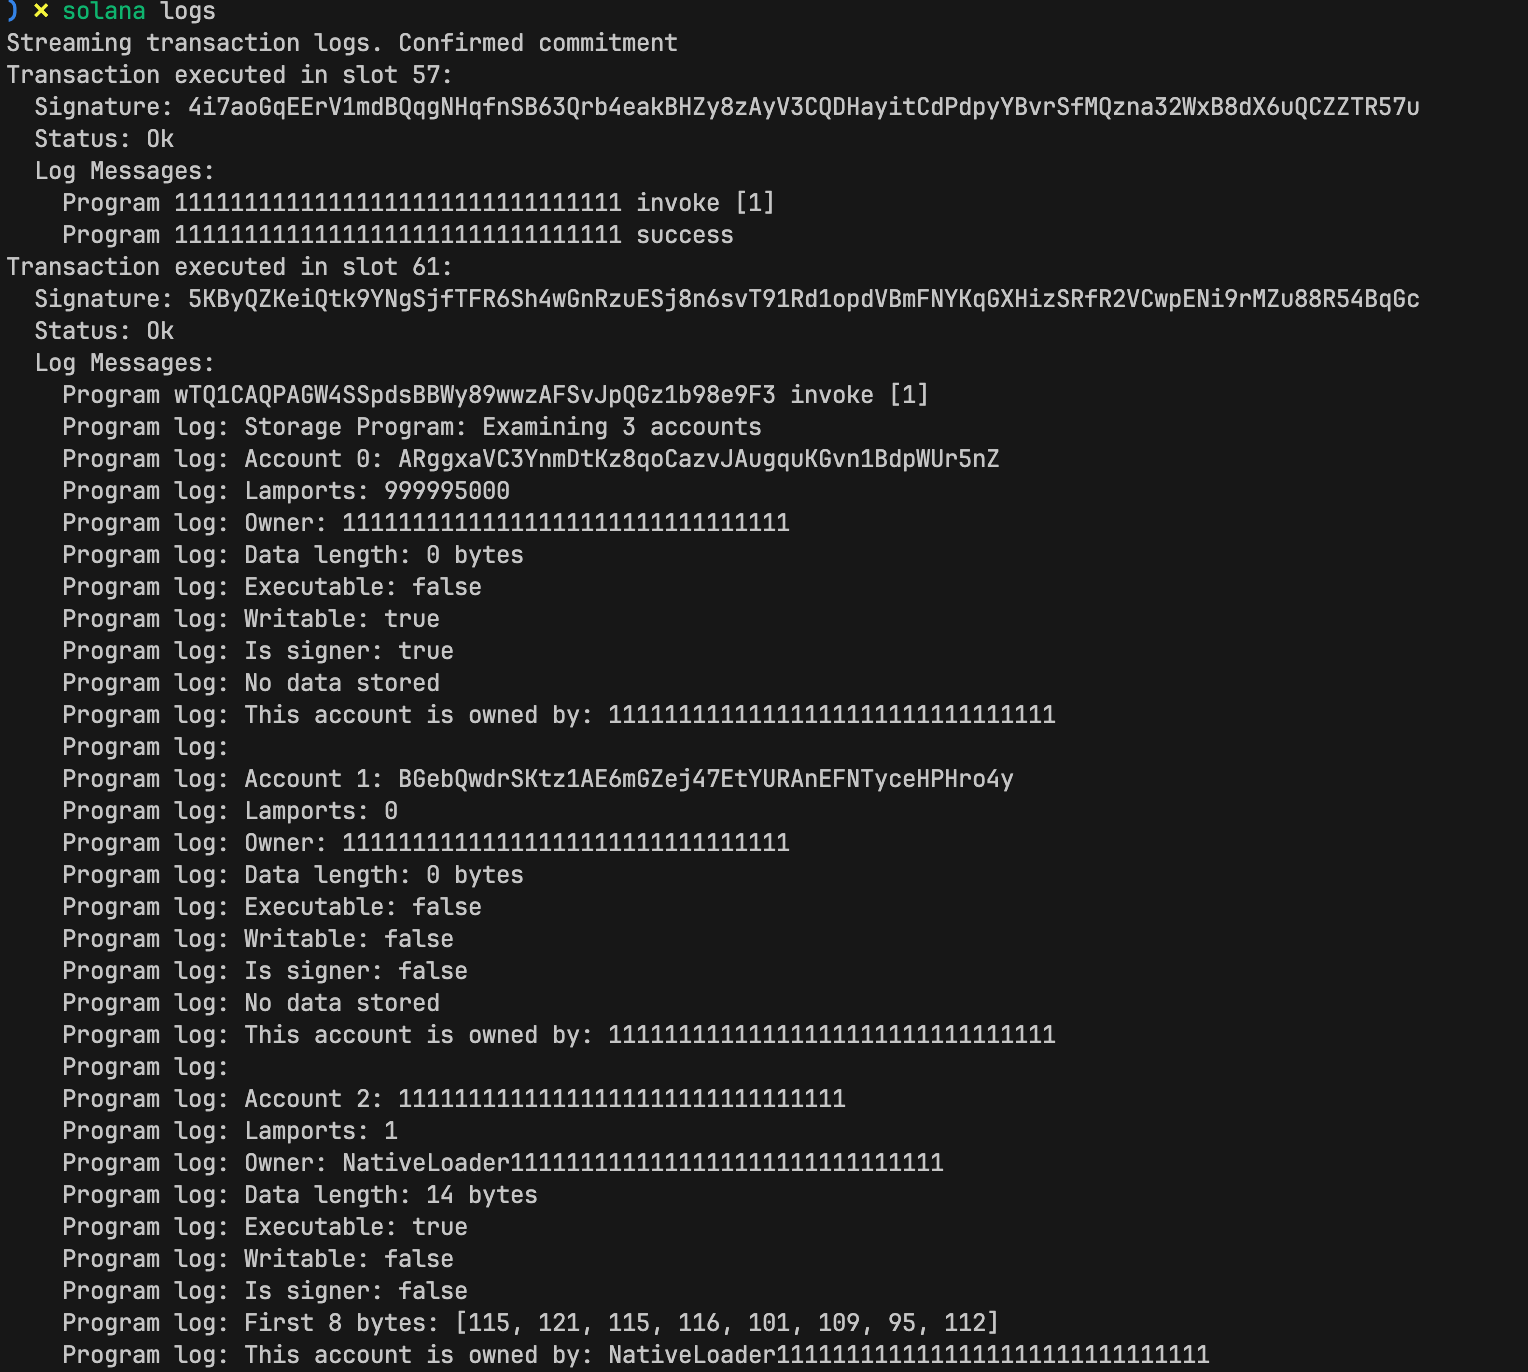
在你的 solana logs 终端中,你应该能看到每个账户的详细信息,包括余额、所有者和元数据:
本文是 Solana 开发 系列教程的一部分。